Showing posts with label Puppet building. Show all posts

Sunday, September 24, 2006

Smooth move dude!

Photobucket - Video and Image Hosting
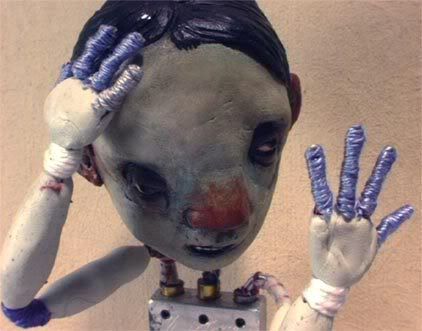
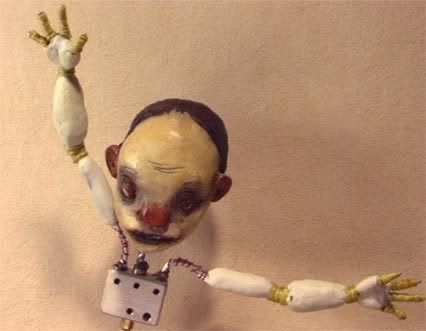
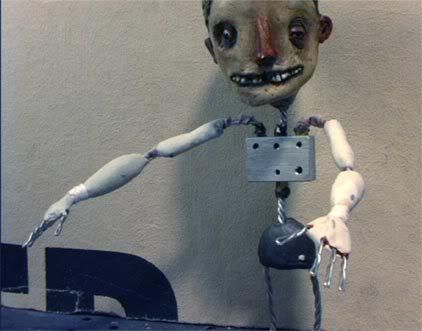
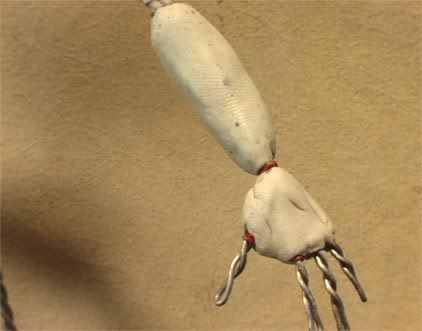
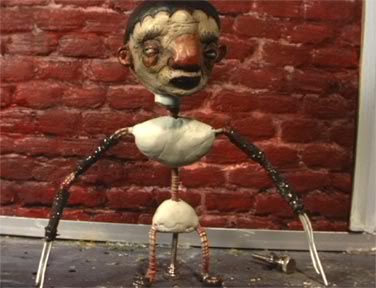
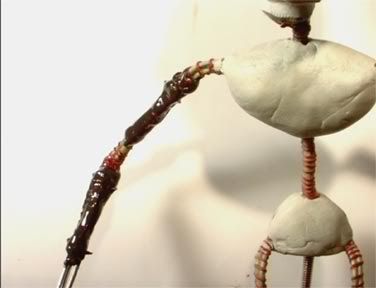
Well, the latex isn't in yet, so I decided to spend a night smoothing out all the arms a little better. I mixed up some epoxy putty (yes, more epoxy putty!) and put a little bit next to each joint, on both sides of the wrapped string. With wet fingers I smoothed it down to create a nicer profile for each arm. In some cases the string stood out quite a bit, now it's actually slightly recessed.... I think it looks better.

Oh yeah, and I also played around with "replace color" in Photoshop......

Saturday, September 23, 2006

It's a wrap

Photobucket - Video and Image Hosting
I know one day I'll be glad I took all these pictures! After these guys are dipped in latex I won't be able to remember what they looked like at this stage anymore. Anywho, all the arms and fingers are now wrapped and ready for dippin'. Still gotta figure out what I'm gonna do with the necks, and gotta foam up the legs and torsos. Then I get to play tailor.

Friday, September 22, 2006

Cosmo is ready for his closeup

Photobucket - Video and Image Hosting
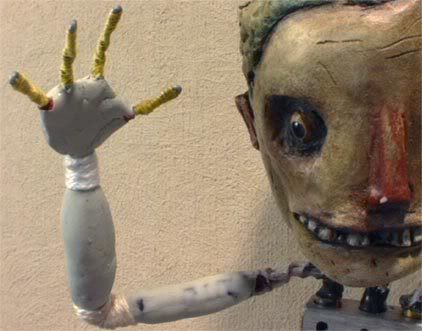
D-oh! Ok, you know what.... why didn't I think before to use the thicker thread for fingers? Now they actually look like fingers!

Thursday, September 21, 2006

Fun with forearms and fingers

Photobucket - Video and Image Hosting
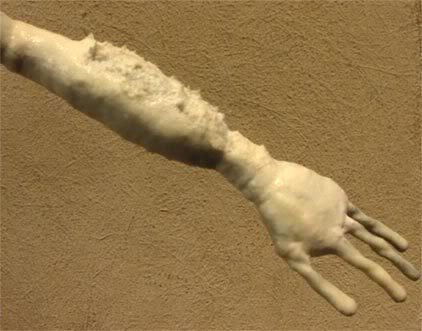
Ok, this didn't work out so well! First I just dipped the arm right into the dipping latex... seemed like the thing to do, right? Wrong! The stuff is so thin it just runs off like water... it left the thinnest skin imaginable. I'd have to re-dip about a hundred times to get the right thikness, and you have to let each layer dry for like 8 to 12 hours or so. I don't have that kind of patience! So I mixed in some of my Pastemaker latex thickening powder. Ok, yeah... it thickened up the latex, but it's all lumpy and gloppy. Maybe if I had a mortar and pestle and ground it together for an hour or so it would work, I don't know. But I don't. Heh.... the forearm area was so messed up with big ugly lumps all over I tried to smooth it down with a fingertip.... big mistake! It left the result you see here, only not so bad. I decided to try to turn it into forearm hair... lucky it happened right where it did I guess, though I still might strip this layer off and start over after my just-ordered slip-casting latex comes in (should be more like the mold-builder stuff I'm used to).
Photobucket - Video and Image Hosting
I decided from here on out I'd wrap the fingers with thread before dipping, as per the techniques Mena mentioned recently. Not only will it give the latex better grip than bare wire does, but it helps to build up a little thickness so it needs less latex dipping later. I like the idea, but I got a little discouraged when I realized I have 40 more fingers to wrap! Better get busy, huh?

Wednesday, September 20, 2006

Upper arms

Photobucket - Video and Image Hosting
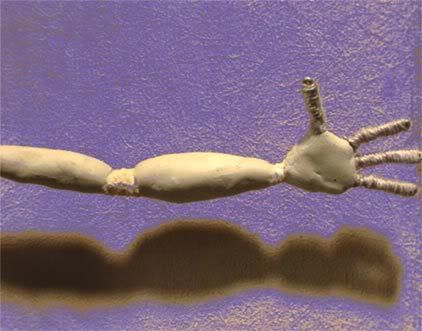
Decided to go ahead and sculpt upper arms from epoxy putty too, and then I can wrap the elbows same as the wrists. That way I can put some of them in short sleeves if I want to.

Also, my Dipping Latex and Latex Softener came in from Monstermakers today. Haven't messed with any of it yet, hopefully tomorrow... but man, that Dipping Latex is some thin stuff! I figured it would be about the same as the Mold Builder Latex I'm used to, which is thick and creamy... but this is as thin as water! I might need to add some thickener to it to get the consistency I want.

Monday, September 18, 2006

Day 16 - THE ULTIMATE DAY AT LAST!!! and wrapping wrists

Photobucket - Video and Image Hosting
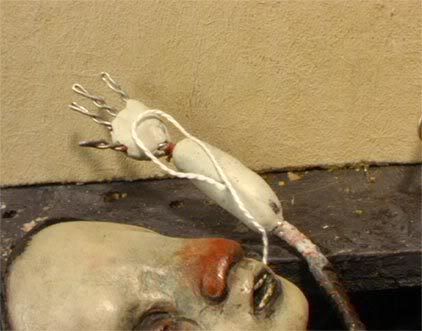
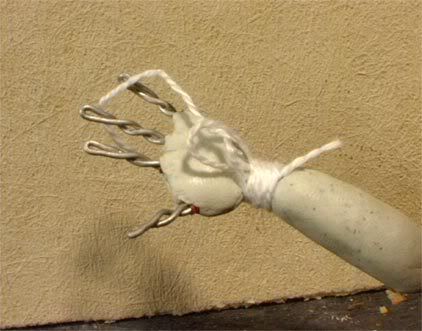
Tom is our model tonight. He's demonstrating the handy-dandy wrist-wrap method, so good for those liquid latex buildup puppets. This is a little technique I first saw used in Dan Anderson's Mirror Monster puppet, and then Grant used the same technique for his Vitruvius puppets. The idea is to fill in the empty space between forearm and hand with wrapped string and then cover that with liquid latex. I'm using a special method that allows the ends of the string to be tucked away down inside for neatness' sake. You start by making a loop as shown in the first pic, which you hold in place with one hand while you wrap string - loosely around and around the wrist with the other.
Photobucket - Video and Image Hosting
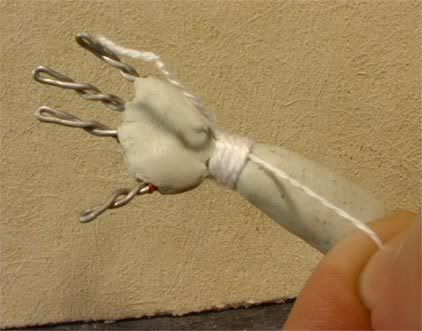
I'm using a nice soft string Shelley sent me as part of a fantastic and incredibly useful fabrication kit for my birthday a few months ago (thanks Shellsies!). It's cotton, which makes it a bit absorbent... that might soak up some latex and end up being a bit stiff, but it's a soft string that will move much more freely than a hard thread. I tried an even thicker nylon wrapping string, which wouldn't absorb latex, but it was too thick and lumpy and I couldn't get a nice wrist shape with it. So I tore it off and went back to cotton - the fabric of our lives. Wrap until you have the shape you want... pay close attention to what's happening, and sometimes you might have to back off a few wrappings and re-do them to fill in an area or to bring down an area that's wrapped too high. When you're done, tuck the end through the loop as demonstrated in the second pic.
Photobucket - Video and Image Hosting
Then pull the first end of the string, the one emerging from under all the wrappings. This will pull the end down inside, where it's out of sight and out of mind, and you don't have to worry about how to tie it off or glue it down. Then simply snip off both ends as close as possible.

You know... if I had all these puppets to do over again, there are so many things I'd do differently in hindsight. I completely overengineered these armatures. Since I ended up building the forearms out of epoxy putty anyway, there was no need to do all that intricate thread wrapping and nail cutting way back at the beginning... the stuff that was the hardest to do and that my hands have only recently recovered from! But ya live and ya learn, right? Next time I'll know... next time.....

Sunday, September 17, 2006

Day 15 - the penultimate day (and the secret to working with epoxy putty)

Did you know penultimate means "second to last"? It's true... technically the word ultimate doesn't mean "best" as everyone assumes, it means last. So tomorrow is the ultimate day of the UbaDarkLand production marathon. Making today the penultimate day. Heh... I doubt Jeffrey is ready to quit though, and I know I'm not... I'll bet I can talk him into extending this thing till the end of the month or so. And maybe Shelley will stick it out along with us. Shells? Well ok, I guess if you got some other stuff to attend to when Himself gets home... that's allowed.

Anywho, here's what I did tonight:
Photobucket - Video and Image Hosting
All 6 of the chestblockers now have sleek, sexy forearms. Since I decided to build up the arms with latex instead of molding them in silicone, I needed to shape them pretty much how I want them to look later, only a little slimmer. I can only imagine how nasty it would have looked if I just dipped those gnarly twisted arms right into some latex.... ugh!
So... the secret to getting epoxy putty nice and smooth you ask? It's simple... H2O. Just keep a cup of water close at hand, and after you've kneaded your putty and stuck it to the work surface, dip your fingers in it. Then when you work, the putty won't stick to your skin. And you can even slide a wet finger around and get a glass-smooth finish if you want. On this arm I got a little carried away... i should definitely leave a bigger gap than that between solid areas... you don't want the wire to have to bend back and forth too many times at exactly the same spot or you create a weak point that will surely break.
***

Ok, I've cut a little off the end of that forearm... Tom is a lot happier. For jobs like this I like to use Kneadatite A+B putty, which has a working time of somewhere around an hour, allowing me to make decisions like this and make changes if necessary.

Saturday, September 16, 2006

Day 14 - hands

Took a day off yesterday. Hey, I just noticed it was day 13.... maybe it's best I did! Tonight I'm making hands:
Photobucket - Video and Image Hosting
The idea of the thread wrapping is to help keep the hand bones from splaying out unnaturally. All too often I've seen puppets made by beginners that don't really have hands, just fingers sprouting directly from the wrist. Grotesque abominations! And while these puppets are a bit strange looking, I don't want them to be total mutants (even though they do only have three fingers and a thumb).
I could have just packed epoxy putty in for the body of the hand, but for that wo hold the fingers all together in a tight unit and not allow the pinky or forefinger to float out to the side, it needs to be extra fat around those areas. Hope that makes sense. This way I figure the thread will hold it from drifting, and allow me to make smaller epoxy blocks. As with the last post, I'll add to this one as I get more done throughout the night.
***

Photobucket - Video and Image Hosting
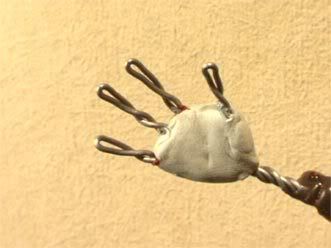
The hands on six puppets are epoxied now. I still need to figure out how I'm going to make hands for Tonic and Cindy Lou, but I won't be making them until after they're foamed and clothed. Man, this got scary! Extremely difficult work, and on one hqand the thread came untied and started unravelling as I worked. I just went ahead and puttied it all up anyway. Despite my efforts, most of the hands came out pretty thick and lumpy anyway. I might be able to file some of them down later though.

Thursday, September 14, 2006

Day 12 - "And when you've made your secret puppet/ you will be a happy man"

Photobucket - Video and Image Hosting
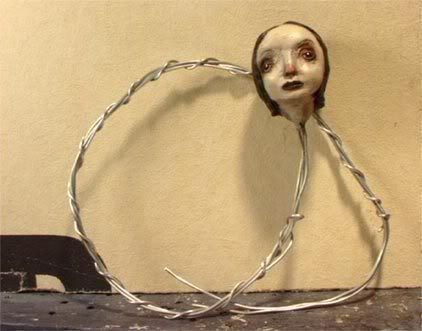
Ok, so I butchered Sting... so sue me! Here it is folks... at long last. The secret puppet. Her name is Cindy Lou, and she'll be the tiniest puppet I've ever attempted to make (that's what I was talking about before, when I said the secret puppet would be something special). This is exactly how she arrived in the box Scott sent me, along with all the other heads. Each had a foot and a half long coil of wire (three strands of 1/16" aluminum armature wire) sticking out of it, loosely coiled like this to avoid kinking. I asked him to do it like this because originally I wasn't planning to use the StopMoTech aluminum chest blocks... I was just going to make them all the simple straightforward way. Well, since for 6 of them I did use the chest blocks I ended up cutting the wire for them, but now that I'm going to work on Cindy I can show how I do it. Though simply because I'm making her so small things might be a little funky. At this point I'm not entirely sure how I'll do everything, I'm just winging it.
Photobucket - Video and Image Hosting
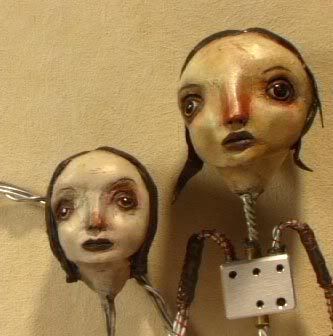
Here's a size/height comparison with Mommie Dearest. This is just about how high I want Cindy to stand. She's the smallest head Scott has sculpted to date.


Ok, time for more Wiretech.

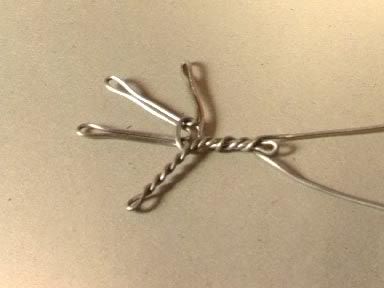
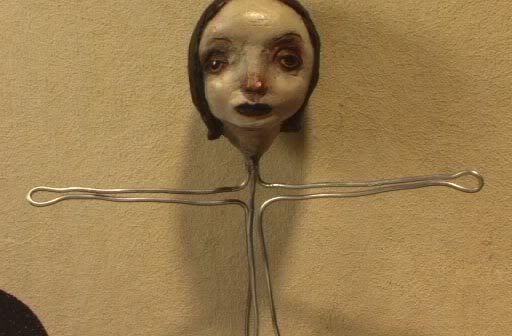
I like to use continuous strands of wire as much as possible, and make sure they're joined strongly and permanently at the intersection points. Many beginners try to join together separate pieces of wire and end up with unstable joins at shoulders and hips. Instead iIlike to run continuous strands all the way through, and then there's no way anything is going to loosen or come apart later. And when you twist them together it serves to tighten everything down(since I'm back to twisting again).
Photobucket - Video and Image Hosting
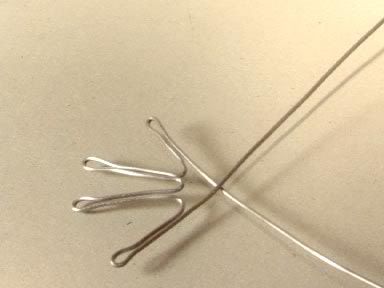
I've decided since Cindy Lou is so small she only needs two wire strands for her arms... she doesn't need to do any heavy lifting or anything. But I want the spine and legs to have 3 wires. So here's the design I came up with.
Photobucket - Video and Image Hosting
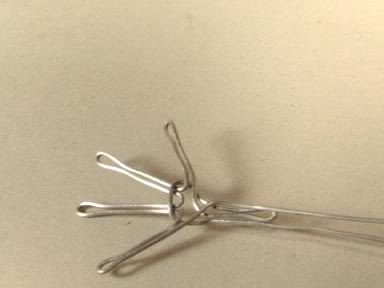
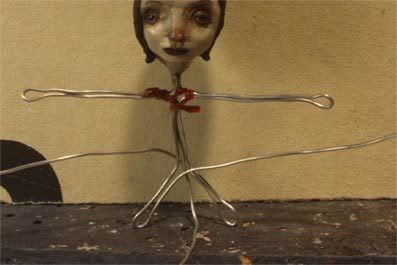
Can you still see what's going on? Just like the arms, each leg is one piece of wire that goes out to the foot, loops back, and at this point they're crossed at the center, just a lot of excess wire sticking out everywhere. And there's still one extra wire coming down from the spine that needs to be fastened off somehow. I always try to fasten these things at intersection areas (chest or pelvis) where they'll be locked inside a solid block of epoxy putty. But in little Cindy's case, I don't think I'll even be using epoxy putty since she's so tiny. Unless it seems like she needs it.
Photobucket - Video and Image Hosting
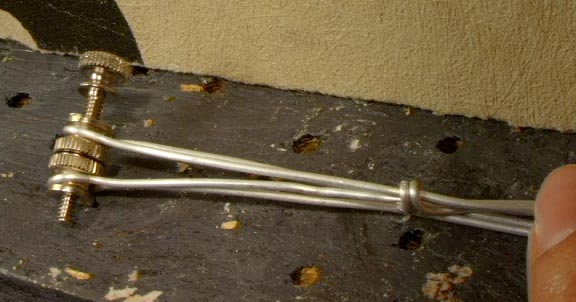
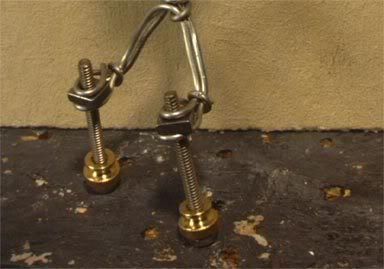
Tiny puppets call for tiny tiedowns! I'm using my smallest ones here... 6/32 square nuts. Notice I have a loop of wire running under each nut and another loop over the top, trapping the nut in between like a sandwich. I've got the screws in place to hold everything together while I epoxy them in place.
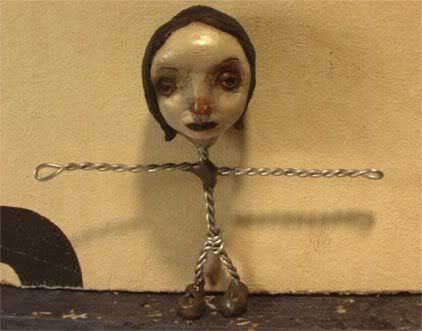
Photobucket - Video and Image HostingOk, she's all twisted up now. I'm not entirely happy... I wish the legs were at least twice as long, and she suffers from the same problem they all do... huge feet! Well, at least they're all consistent. I think she'll be wearing some big clodhoppers. Oh, and like Buster, she can't bend her knees dammit! When will I learn??!! My excuse is that it's so small... everything should have been scaled down more. Two wires would definitely have been enough for such short legs. Oh well... next time I'll know. If nothing else, I'm getting a lot of experience here!

***

Photobucket - Video and Image Hosting
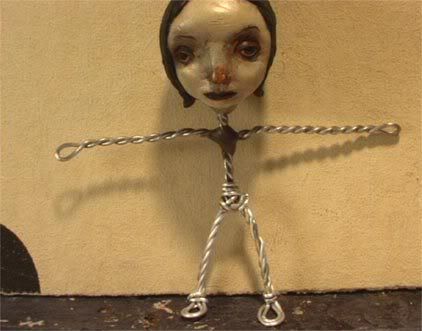
I got bold and cut off her feet, hoping I can salvage enough wire to tie in some new stuff and extend the legs a bit. I don't know... it's pretty crazy, all mixed up and stuff... I'm not even sure exactly what I did! But it feels sturdy enough to work. I'm trying a different approach for attaching the tie-downs this time... note the twin loops one inside the other... should keep the feet a little more petite.

Wednesday, September 13, 2006

Day 11 - A New Hoppy

Photobucket - Video and Image Hosting

Now that's more like it! Gonna wait till my Monstermakers order (with rubber gloves) comes in to do the epoxy pelvis block.
****
Ok, screw waiting. I grabbed a discarded glove... they tend to get turned inside-out when you peel them off. I just put it on inside-out. There was a thin crust of epoxy putty on the forefinger and thumb, but it just made it feel kinda weird, didn't really cause any problems. Now he's done.

Tuesday, September 12, 2006

Day 10 - wiretech talk

Photobucket - Video and Image Hosting
Veronica is a barmaid at Cosmo's tavern. That's Cosmo beside her. Oh, he now has the lower body I originally made for Huck... the weird long torso thing works better on him (partly because he'll be wearning an apron and standing behind the bar most of the time!).

I'd like to walk you through the process I use to make the lower bodies. There are a few techniques I want to share that I've picked up over the years... and trust me, I made a lot of mistakes along the way and learned a lot of what not to do!


For starters, here's the way I lock the wires into the little pieces of tubing:


I always like to make some kind of hook or loop in a wire where it will be embedded in epoxy - this creates an actual physical bond, a mechanical join that is much stronger than the adhesive itself. A straight wire embedded in a block of epoxy can easily turn or even pull straight out. I defy anyone to spin these wires inside the tubing, or to pull them out!

Every bend you put in a wire should serve some purpose... often it can serve two or more at the same time. By making these two little hooks I effectively double the thickness of the wire inside the tubing, almost filling the available space, as well as creating that physical lock.


Here I've added a third wire (no hook in this one... I find three hooks just won't fit inside the tubing). The original pair of wires are each about two feet long, the third one is only about 5 inches. You'll see why in a minute. Everything is kwickwelded solidly in place.


I wrap the short wire around at the point where the pelvis is to be located. I only touch the wire with my fingers when I'm bending and twisting it.... you don't want to put any nicks in it by working it with pliers or anything. Every nick is a weak point where the wire can easily break during animation. But it is ok to use pliers in areas where the wires will be embedded in epoxy, like here or when I made the loops. No way I could do THAT with my bare handses!


I mark the length I want a leg to be and place a thumb nut there that has been filed around the groove to rough it up so the epoxy can find purchase.


This is my clever little trick to make sure the legs are exactly the same length (just thought of it now... this is the first time I've used it). I used a thumb screw to secure another thumb nut to the first one, then wrap the wire around it the same way. Once this is done I remove the screw.


Hope you can make out what's going on here. What I did was bend each wire down the other leg, so each leg now has three wires. I wrapped the wires around the thumb nuts... there's just enough room for two loops of wire there. Then I tie the wires off as you can see and cut off the excess making sure to use the pliers to tuck the cut end nicely down where it won't poke out and cause any trouble. It will be embedded in kwikweld in a moment. All that's left then is to kwikweld the thumb nuts securely in place and mix up a blob of epoxy putty for the pelvis block. I use a steel filled epoxy putty that happens to look just like the (also steel-filled) kwikweld. Once everything is all set up then I twist the legs and the spine, which has the effect of tightening everything down nicely. Obviously this was for a puppet that doesn't have the rectal tiedown for barstool attachment. If it did I would have attached the thumb nut to the short wire at the beginning of the process. I could have made this in about 15 minutes, but making the tutorial added about an hour! I've got two more bodies to make... I'll see if I can get them done yet tonight before hitting the sack. Really getting tired of messing with all this wire and goop!

****


Update:

Finished the last two... now all the armatures are complete except for the secret puppet.

Sunday, September 10, 2006

3 wise guys

Photobucket - Video and Image Hosting
I tested Tom a bit and decided the legs and spine are strong enough after all. He wobbles a bit because the head is so freakin' heavy, but he can hold himself up on one leg in a pretty extreme pose... leaning all the way over till his head is like an inch from the table. Essentially all that twisted wire is like a long spring under the heavy bobblehead, so it means after re-positioning the puppets for each frame I'll just have to wait till they stop bobbling!

So I went ahead and made Huck the same way... no leg bones. I still need to make some epoxy putty pelvic blocks for them, to secure all that wire together at the groinal area and to provide a solid 'grab point' that can be easily felt and held under the padding and the clothes. It's always a good idea to have the chest and pelvis be big solid blocks inside the puppet so you can easily move them.

Day 8 - halfway point and my first completed armature

Photobucket - Video and Image Hosting
Tom says hi. He has three wires in his spine and each leg, but he thinks he might need another one. Since there are no bones there the wire is weaker. I was originally planning to put bones in his legs, but geez... they're just so short!! I had planned to test out my new hybrid method, which involves leaving the wires untwisted only where the bones will lay... then adding the bones using the thread-wrapping/Kwikweld method as before (only the thread doesn't extend past the ends of the bone), and then I was going to twist in between bones. That way the straight wire makes a nice trough for the bone to lay in, keeping things neat and compact, and twisting tightens everything down and does away with... um... that complicated problem that I can't seem to explain very well. ;)

I think I'll go ahead and put tiny little bones in Huck's legs when I make him later tonight. Huck is Tom's friend and the tallest of the puppets.

Friday, September 08, 2006

Day 6... didn't do nuttin' honey.

Well, not quite true... I made one hand, and a tutorial:
Photobucket - Video and Image Hosting

And here's the promised writeup about the problem I discovered with the thread-wrapped wire method of armature construction.
Photobucket - Video and Image Hosting
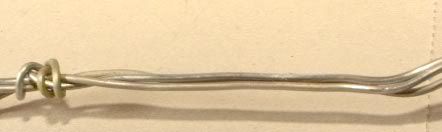
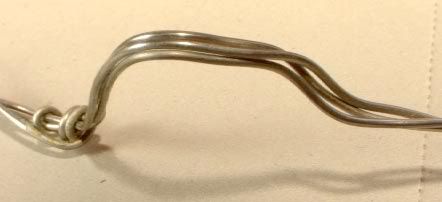
See... this pic shows the most comfortablest way for three wires to nestle together.... the cross-section would look triangular. And I've found three 1/16" Almaloy wires is a perfect combo for most parts of the puppets I'm making. The triangular configuration is a thing of beauty and much economy.... it's the way they naturally want to lay anyway when you start wrapping... it's a lot harder to get them to lay out side by side (flat cross-section like a ribbon).
Photobucket - Video and Image Hosting
BUT... Here's the problem with it. All I did was bend the wire-thing here, and see what happened? The wire that was behind the other two popped out between them, and now it's gone from triangular profile to flat profile. This is what happens inside the puppet when you bend a joint if the wires were in triangular configuration to start with... and to complicate matters, even if you originally made it in flat configuration, it will shift from handling. In other words, it's constantly shifting between the two configurations...... and this causes stress. I can tell by the popping sound I hear when it happens! At first I didn't know what was going on... I though something was breaking, but obviously nothing was.... so I examined it closely and bent it back and forth a few times, and then I saw it happen. See, the problem is that when the wires are in triangular configuration and you bend them, the wire in the back would need to stretch... or else pop through between the other two. When you go with the good old fashioned twisted wire method, they're sort of springlike, so the back one actually can stretch a bit, and the front ones can compress a little too. Crazy stuff!

This doesn't mean the thread-wrapping method is crap or anything... it's just a different alternative. I believe both methods have their strengths and weaknesses (a bit too tired to pontificate any deeper on it right now). And the popping-through thing doesn't jhappen all the time, possibly it's only on certain joints depending on how they were made, I'm not sure. It's just something I noticed and wanted to share.

Thursday, September 07, 2006

Day 5... Kwikweld saves the day! And a sort of tutorial

Photobucket - Video and Image Hosting
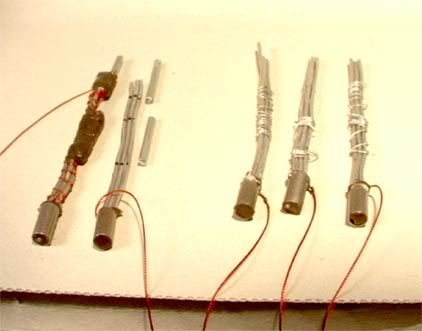
There's something I just love about the way my work area looks with these partial puppets laying around amid tools and scraps of wire and thread etc. Had to share. And I think my favorite part is all the red thread hanging off eveything. They almost look like marionettes! Above are 2 arms in the first stage of their evolution.
Photobucket - Video and Image Hosting
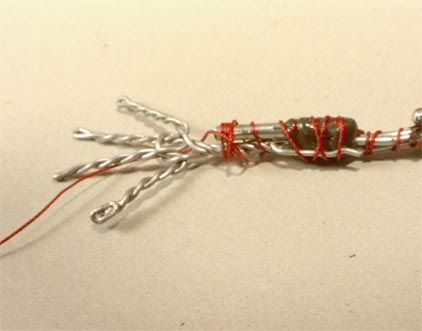
I've kwikwelded them into their tubes, making sure the knotted silk thread is pushed down inside and firmly embedded ino tthe ugly grey stuff. This anchors the thread, making the next steps possible... I don't think I could even attempt the next part if the thread was loose and slipping around. The thin wrapping wire is what holds the 3 strands of wire together as one entity as i work, it's discarded after the endcaps are secured in place. On the left you can see I've marked the positions for the two 'bones' (actually sections cut from nails). And at the far end is a completed arm.
Photobucket - Video and Image Hosting
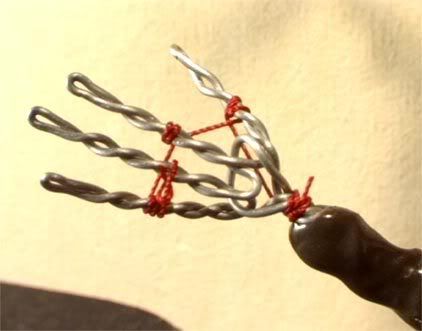
Hey... can somebody give me a hand? (Sorry Shelley... I'm a jokethief!) You can see how everything fits together. I've tried to maximize the area of joinage. Look back and forth from this pic to the one below, you'll see what's going on. Below I just loosely wrapped the thread to semi-secure the hand, trying to leave enough clear area so you can see what's happening. I'll wrap it more when I actually secure it for real.
Photobucket - Video and Image Hosting

I've got all the arms done now, still need to make more hands. And I've accepted that I'm just not a Dave Sim or a Nick Hilligoss. After getting home from work I can't realistically expect to spend a solid 8 hours working. Hell, I'm lucky to get two full hours done most nights. If I can do that 5 nights a week, then I'm making some good steady progress. At this point I'll be happy if I get all the puppets done and dressed by the end of the 16 day marathon (though I might not get all the clothes done... I think that's going to be the hardest part). Anything else is a bonus.

Monday, September 04, 2006

Darkland production race... day 2

Photobucket - Video and Image Hosting

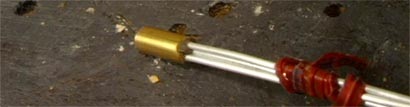
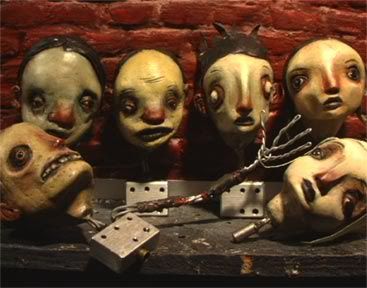
These six heads are now safely ensconced in their chest blocks... or easily can be with the simple twist of an allen key. Each head has 3 wires coming out of it... my idea was to fold all 3 wires in half to double the thckness inside the section of tubing, so the neck wires are solidly wedged in there and the Quickweld only has to aid and abet the physical connection. I always like to make my connections as solid as possible in this manner... I don't like to trust adhesive to hold up under the rigors of animation. It turned out not to be quite that simple though... all 3 wires folded in half was just a little too thick and couldn't be jammed into the tubing, so i had to cut one shorter and only fold 2 in half. Heh... it always has to get complicated, doesn't it?

And I also made my prototype arm... very similar to the arms I made for the Catatonic Drunk puppet a while ago, only this time I didn't wrap with silk thread until After quickwelding the lengths of nail on for bones. This way the thread is wrapped inside the JB Quickweld, embedded permanently in it. And it saves me a step on each arm (and there's one less toxic substance to inhale!).

Plans for the next session... make as many arms as possible. Hopefully the remaining 11. We'll see.

The DARKLAND production race countdown.... day 1

Photobucket - Video and Image Hosting

To explain what's going on, my Sister in Stopmo Shelley Noble just announced the other day that she at long last has 16 free days to work on her stopmotion film Halfland. Well, I was just about ready to end my month (or so) long vacation from animation anyway, and what better way to do it than to challenge her to a production race.... 16 days of concentrated production for each of us. The competition can only do us good. She has a bit of an advantage in that I have to hold down the day job and can only work for a few hours each night, but then I have a good deal of experience in stopmo stuff over her, so this should be pretty close. We've both chosen tentative deadlines for our films at the end of the year, and time's a'tickin' away.... in my case I did a bit of experimenting a while back but haven't really launched into any kind of production schedule yet, and I know if I don't very soon I'm not gonna make it.

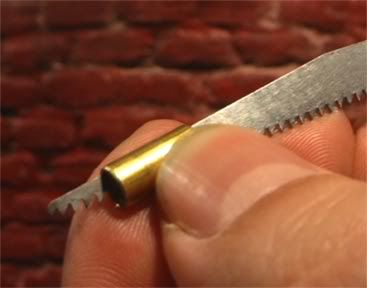
My first order of business is to make my 8 puppets. Two nights ago being the first day of the challenge, I intended to get started, so I accomplished step 1... scraping the inside of a bunch of brass and aluminum tubing with an X-Acto sawblade to rough them up so they'll grip the JB Quickweld better when I jam the armature wires inside.

...That's it. Yep, that was absotively posilutely all I got done on day 1! But of course it's not about who wins... there are no losers in this. We both benefit from the slingshot effect of each other's momentum. This is the COMERADERY/COMPETITION effect I sometimes rhapsodize about, that can spur both participants on to ever greater achievements.

Wednesday, July 19, 2006

No bones about it

Photobucket - Video and Image Hosting
CD is starting to look more like a puppet. In fact, a very Czech puppet, something I've always wanted to achieve but haven't been able to yet. And now he's got some bones.

Photobucket - Video and Image Hosting
Here's an (ugly) closeup... hopefully you can make out the threads under/immersed in the nasty-looking JB Quickweld. Here's what i did....

I cut some nails to the length I wanted each arm segment to be (leaving plenty of room in between segments so the wire won't have to bend too sharply). I made sure to cut off the head and the point on each nail. Then I filed down the cut ends so they're rounded (no need tempting fate... I'd hate for a bone end to suddenly pierce through the arm during shooting). I also filed down the entire length of the nail so the JB Weld can grip it firmly. Once I had all 4 nails set up like this, I cut 4 lengths of silk thread - a little longer than I thought I'd need, and I pre-tied a slipknot in one end of each. The reason for this will become clear in a moment. Now things get crazy... the Quickweld sets in 4 minutes, so I had to work fairly fast. Actually it wasn't like crazy-fast or anything, but there was no room for errors and re-dos. Heh... actually I didn't think to pre-tie the slipknot in the first piece of thread until after attempting this the first time, and that one did get crazy, but after that I pre-tied each one.

Ok, I mixed up just enough JB Weld to do one bone segment, and I applied it to the arm with a little spatula thing. I first examined the arms and decided exactly where I wanted to lay the bone segments.... I fit them into natural troughs between the arm wires. Now I apply the JB Weld and drop a bone in place, and then quickly take one of the pieces of thread and tighten the slipknot around the end of the bone to secure it against the arm. By this time the JB Weld is trying to sag and drip off onto the puppet's head or onto my jeans, but it's thick gummy stuff, so a little slow rotation keeps that under control. Once the slipknot is secured, clip off the end of the thread and start wrappin'. I made sure to completley cover the end of the bones, with both thread (lots of extra wrappings) and Quickweld so the ends don't try to lift up later. Once I reach the far end of the bone and get that securely wrapped, I tie it off and cut off the excess. Then, if the quickweld isn't too stiff yet (it's getting close in any event) I try to add a little more in places and smooth down what squeezed through the wrappings. The idea is to have the wrapped thread completley immersed inside the epoxy... so once that's set it's all one solid form. No way will any of this thread come unwrapped later!

Still not entirely sure how I'm gonna do hands. I think I'll use thinner guage wire... Buster's fingers are made from the extended arm wires, and they're a bit too stiff.

Tuesday, July 18, 2006

Puppet #1.... BEGUN

Photobucket - Video and Image Hosting
It's time for those incredible Radke heads to grow some bodies. I decided to start with this guy, affectionately known as Catatonic Drunk - because he's one of the simplest. He'll be wearing long sleeves, so I don't need to make silicone arms. In fact, he'll be made very much like Buster (and is proportioned almost identically, except the head is bigger and the legs are shorter).

Photobucket - Video and Image Hosting
The armature is untwisted aluminum armature wire, wrapped with silk thread for strength (adhered with trusty Barge flexible contact cement), and the tie-downs are nickle-plated brass thumb nuts from Smallparts.com. I roughed up the channel with a file down to the brass to get a good bond with the JB Quickweld that's attaching them to the wire. Can you see the third tie-down? That's to secure him to his barstool... it's probably the only one he'll really use, because he pretty much lives on his stool. But I thought I'd give him the regulation foot tie-downs, just in case of an emergency (like if he needs to go pee in a dark corner or something). The legs are almost too weak to hold him up though... could have used one more wire. But I think he'll remain seated for the entire performance.

Photobucket - Video and Image Hosting
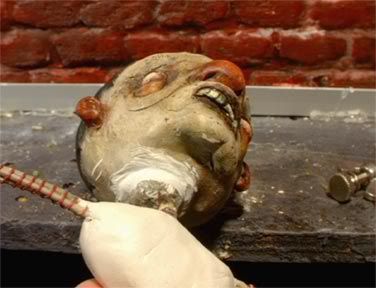
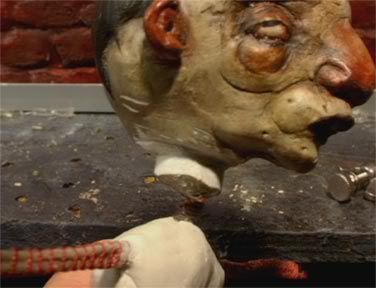
I hope Scott doesn't see this.... I can't believe I did it! I feel like I defaced the Mona Lisa or something! It was an experiment (which I WON'T be trying on any of the others!!)... see, Scott left these little neck-stubs on all the heads. I think that's generally the way a marionette head is articulated.... there's no joint at the base of the skull, just at the bottom of the neck. And of course I could just leave them, but I really wanted to make silicone necks for them and get full head movement! Stupid really - I should have left them exactly as he sculpted them. Bit I thought, just on this one head, I'd just TRY it.... how hard could it be right? Just carve away some of that paperclay and then make a silicone neck to cover the damage. But it turns out the heads are sculpted from something much harder than paperclay... it's rock hard! Must be epoxy putty. And of course, wouldn't you know it - I scratched him up in a couple places and nicked the neck wires! Damn!

Photobucket - Video and Image Hosting
Here's another damage shot. I can fix it. I'll rebuild the neck stub as closely as I can to the way it originally was, and try to match Scott's paint job. I can't believe I did this! Better to stick a rusty X-Acto knife in my calf.

Saturday, June 24, 2006

Tech bits

Photobucket - Video and Image Hosting

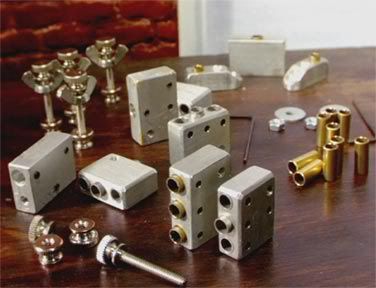
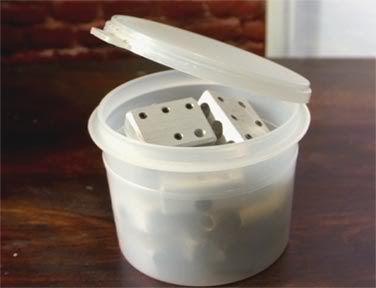
Here's what's going inside the puppets I'm getting ready to make. Most of the stuff above are components of Juergen Kling's StopMo Tech plug-in armature kits, that I bought from Animateclay.com. He recently re-tooled the blocks to be a little smaller, to fit in smaller puppets (like the ones I make). Right in front in the above pic you can see the older and newer chest blocks stood side by side for comparison. I had two of the original kits, and now I discovered Marc is selling the blocks individually for only 12.95 apiece, so I just bought 4 chest blocks. I figure those are the only parts I'll really need, since my design won't really allow for the pelvis block, and most of the puppets need to have tie-downs in their backsides for mounting to their barstools. I can't believe it, but I managed to pack all those parts into this one cannister!

Photobucket - Video and Image Hosting

In the top pic you can also see the thumb screws and thumb nuts I got from Smallparts.com to use for tie-downs. Nice!