Showing posts with label framing projector. Show all posts

Thursday, August 06, 2009

Quakehold! Museum Gel for animating water, and a fix for the Solux Framing Art Light

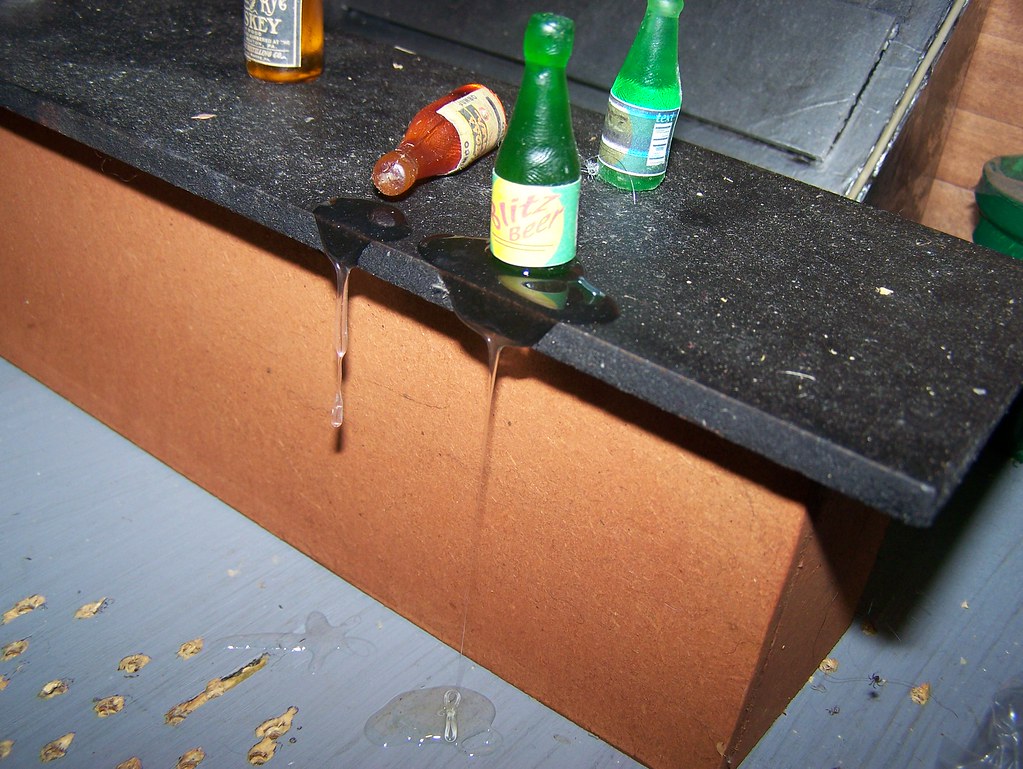
Gel spill
(Click image to see it at Flickr, then click on All Sizes above the pic to see a bigger version)

Hmm... wow that pic is UGLY!!! Amazing how using the flash makes every speck of dust glare impossibly bright! And I didn't even know I had a little arachnid friend living on the set till I saw him larger than life in closeup. Egad!! Try to ignore the nastiness and concentrate instead on the beerspill effect (even though it's clear rather than beer colored). Hey, this whole shot would look a lot better through beer goggles!!

Anyway, the (1st) point of this post is to tout my discovery for water (or any liquid) animation... Quakehold! Museum Gel. Crystal clear, non-toxic, and easy to form into spills or drips that hold their shape for a long time. It will sag over time, but it takes a few hours for a ball to revert to a puddle. Easily enough time for animation. It can also be tinted by adding probably any kind of transparent tint. I tried it with some of the resin tints I used for the bottles and it works great.

Quakehold! also makes a Museum Wax that's just microcrystalline wax... a very sticky yellowish translucent wax that's perfect for sticking props to sets or even to puppets hands. It's a good deal stickier than the so-called Stikky-Wax I bought some time ago. I consider it an essential for any stopmoe to have on hand.

One thing I discovered quite by accident that needs further testing.... I had a blob of the gel sitting on a paper envelope for a long time.... probably a week and a half or so, and noticed a big clear stain spreading around it... like an oil stain. I peeled the gel off the paper and it seemed like it was a good deal stiffer than it normally is... to the point that you could maybe sculpt forms from it and they'd hold their shape long enough for animation. Not sure on that one... I decided to put it to the test and placed a larger glob on a piece of paper last night, but so far it hasn't leached very much, just the beginning of a spreading stain. It must take longer than overnight. But Im not sure if it was really much stiffer than the regular stuff.... more experimentation is needed. I'm also not sure why you'd need it any stiffer.... this stuff is perfect for animating spills or drips or pours just as it is. Seemed kinda neat is all.

Also, at just about the same time as I made that accidental discovery last night, I made another one.


This is my Solux Framing Art Light, a great little device that casts a very controllable spotlight effect. The only problem I had with it is that it was rather... well - droopy. In fact I used to say it was built like a Dr Seuss telescope. Kind of tricky to get it aimed exactly where you want. I was looking at it last night thinking I ought to find some way to secure it better, and I had an idea about bending a couple of strips of metal to use as clips. I started looking around the basement to find some suitable metal, when I ran across the rotisserie attachment from my convection oven... basically a useless chunk of metal that I had kept around in case I ever found a use for it! Hah! In a few minutes I had bent the pointy tines (prongs... whatever they are) into suitable positions and found that it's just what the doctor ordered!!! The steel has just the right amount of spring to it too... by tightening it a little too much I get some good tension on it. Now the Dr Seuss telescope is more like an arrow-straight ramrod!! And just incidentally, I found the steel rod is also a great handle for adjusting the light... I used to burn my hands on it all the time!!

Friday, August 17, 2007

Ridin' the Lightwave!!!

Photo Sharing and Video Hosting at Photobucket
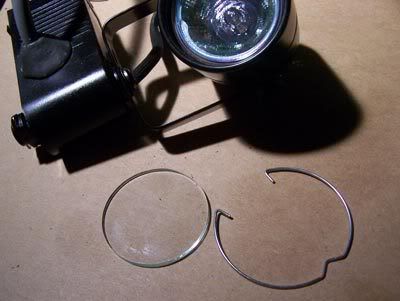
Ah, my magic package arrived today.... my Solux Framing Art Light Projector kit!!! First step in assembly is to remove the front glass and retaining ring from my Lamps Plus tracklight (oddly there were no instructions with the framing light kit - but it's not hard to figure out). At this point I need to determine if the snout will fit securely on this light unit. It looks identical to the Solux unit, but you never know.

Photo Sharing and Video Hosting at Photobucket
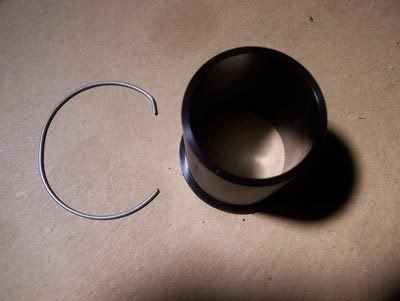
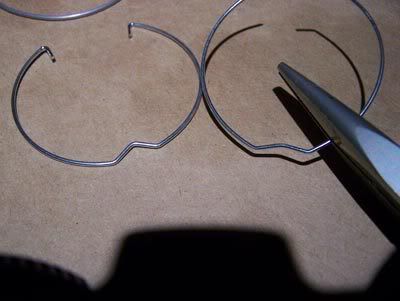
Here's the snout and its retaining ring. I tried it, but it didn't want to fit right - it kept trying to fall out of the Lamps Plus fixture. So I decided to try it with the Lamps Plus retaining ring instead.

Photo Sharing and Video Hosting at Photobucket
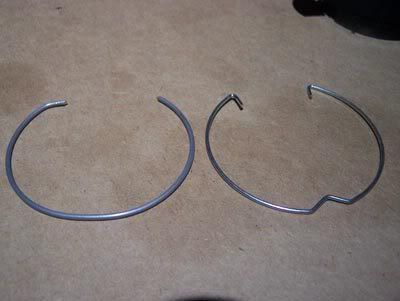
They're designed very differently - the LP design actually looks a lot better to me.

Photo Sharing and Video Hosting at Photobucket
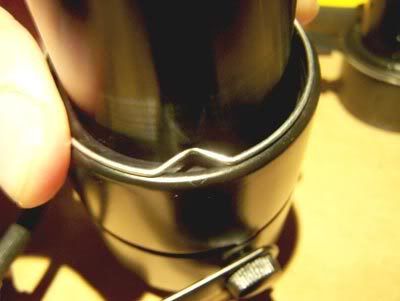
.... But it won't quite fit!!!

Photo Sharing and Video Hosting at Photobucket
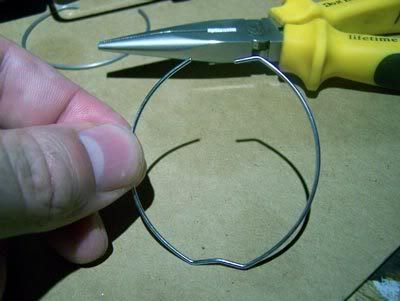
So I flattened out the.... um.......... little bendy part.

Photo Sharing and Video Hosting at Photobucket
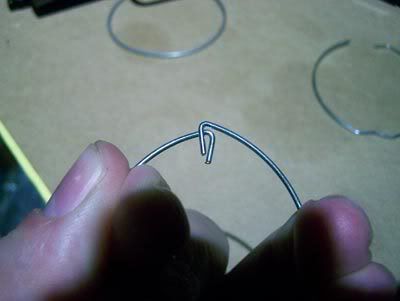
Which opened up the ring some more, causing the ends to overlap - and making it too thick there.

Photo Sharing and Video Hosting at Photobucket
So I snipped off one of the.... um..... handle pieces (???) and bent the other one a bit flatter same as I did the... um.... bendy thing at the bottom. That worked perfectly!!! Success!!! That means I'm in business. I can now create a Frankenstein Framing Art Light from my Lamps Plus (el-cheapo) track lighting unit!!!

Photo Sharing and Video Hosting at Photobucket
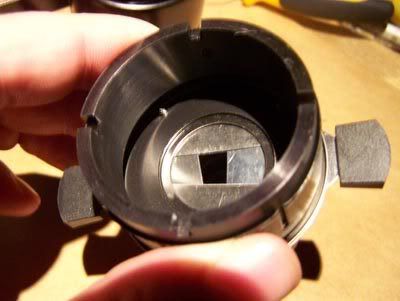
This is an inside view of the framing shutters inside the front assembly. Very simple economical design. You can shift them around to a wide variety of positions, creating all sorts of rectangles and parallelograms (and... um... un-parallelograms).

Photo Sharing and Video Hosting at Photobucket
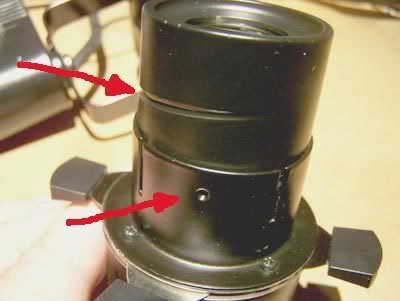
Here's the screw thread that allows you to adjust the focus. It's stamped from sheet metal, so like all parts of this nifty (but somewhat flimsy) little device, it's a little wonky. But it's service-able, and so small and lightweight!!! Perfect for hanging from the lighting grid (unlike my hefty and extrmeely bulky slide projector!!!)

Photo Sharing and Video Hosting at Photobucket
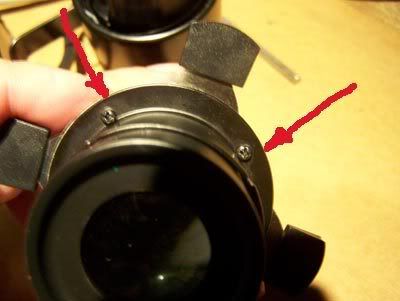
And see these tiny little (slightly out-of-focus) screws? These are important. It took me a while to figure it out, but you can tighten them to snug up the tension on the framing shutters. At first it was all really loose and they would just flop around - I thought I was going to have to jam something in there to wedge them in place, till I saw the screws. Good screws!!!

Photo Sharing and Video Hosting at Photobucket
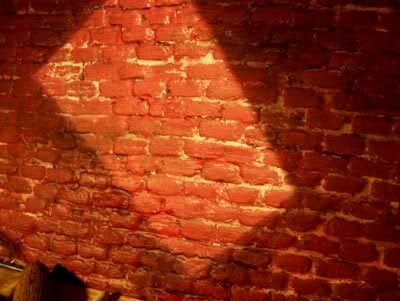
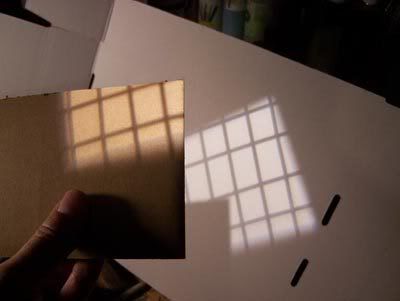
Now we start to get to the fun stuff! Just a quick example of what it can do. Or if I was to unfocus it the edges would get fuzzy. The weird part is everything is upside-down and backwards..... when you move the left framing shutter it changes the right edge. Hard to get used to.

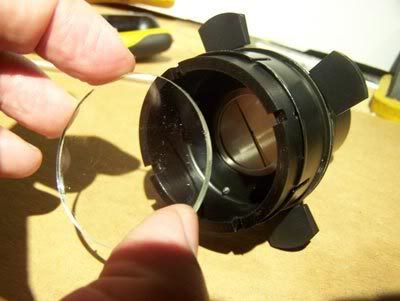
This device is not advertised as a gobo projector - but I was hoping I might be able to use it as one anyway. It seems like since the framing shutters will focus so sweetly and give a good crisp image, I should be able to put some kind of slide or gobo in there at the same place and it should work. At first I thought it meant removing a shutter or two, or something equally ill-advised. But then it occurred to me - there's no need for anything so drastic when the whole fixture just slides apart! It's all pressure-fit together! I opened it up and started thinking about what I might be able to use as a gobo/slide.... should prefferably be round, the right size, and made of glass.

Photo Sharing and Video Hosting at Photobucket
Hey!!! How about the glass I removed from the fixture right at the beginning? And sure enough - it fits perfectly! Kind of small, but I could see making designs on it with black tape or something. Or making Photoshop images and printing them on transparencies that I could sandwich between two pieces of the glass. Or something. Anyway, this is starting to get really exciting now!!!

Photo Sharing and Video Hosting at Photobucket
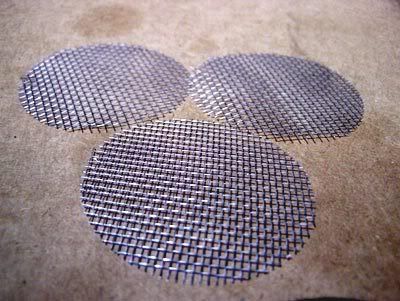
One of the accessories I ordered to try out was the "Neutral Density Screen Kit". It cost $15. What they sent me were three discs cut from a screen door!!! Ripoff!!!

Photo Sharing and Video Hosting at Photobucket
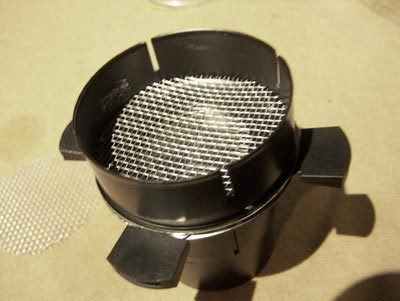
But I noticed they were also the right size to fit in the gobo slot, so rather than mess with making some tape design on the tiny piece of glass, I just popped a screen in there to try it out and see if it will focus properly and give a good image.....

Photo Sharing and Video Hosting at Photobucket
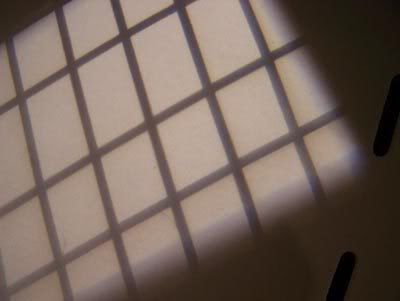
Voila!!! Folks, we have an actual Gobo projector!!! But notice, when it's focused on the screen the shutters that create the outer edge are fuzzy. (not that that's a deal-breaker or anything)

Photo Sharing and Video Hosting at Photobucket
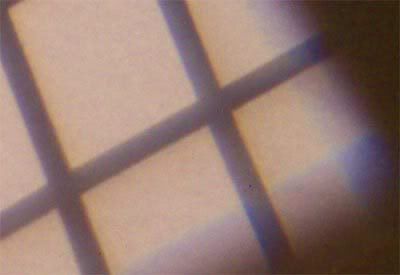
And in fact, I took this close-up detail shot to try to show the weird rainbow/prism effect you get. Can you see the reds and blues along all the edges? I assume it's because the bulb isn't glass - it's made of quartz. If I understand right it's because the halogen gas inside is under too much pressure and heat - glass would shatter. I wonder if anything can be done about that? (meaning the weird prismatic color effect, not shattering light bulbs)

Photo Sharing and Video Hosting at Photobucket
Of course there is another way to use gobos. They don't need to fit inside the projector unit itself - here's just a quick little demonstration of the more traditional way - you just cut out a shape and place it in front of the beam somewhere near the set. This way doesn't seem to cause the rainbow effect, so it might be the way to go.

Actually what I'm using here would more properly be called a flag (or a cutter - I'm not up on all the terminology). Just a straight edge to cut off light where you don't want it. It would be supported by some kind of flexible arm - something I'll be covering soon in my ever-growing Lighting Department upgrade. It's exciting times around the Darkstudio folks..... all my lighting purchases have been golden (and I don't mean color temperature-wise) - it's really a huge thrill to see everything working out better than I had planned or expected. August 2007 will be remembered for a massive heat wave - but I'll remember it for riding the light-wave!!!

Monday, August 06, 2007

Transformer-thon 2007!!!!

No, it's nothing to do with the current mega-smash hit movie Transformers, though it is kind of ironic that it happens to coincide with my own delving into the mysteries and lore of the humble 12-volt transformer.

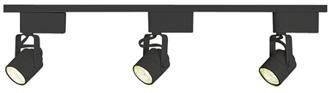
In case anyone hasn't noticed, all my posts lately have dealt with lighting - I've decided it's time to learn new tricks and to upgrade the lighting department in the Darkstudio. And most recently my questing has led me to low voltage lighting, which requires a transformer to step down household current to 12 volts. I bought this track lighting kit from Lamps Plus
Photo Sharing and Video Hosting at Photobucket

which now sits assembled (mostly) and waiting for the coup-de-grace - I intend to bodger it so I have three separate lighting units rather than all of them on one track. Here's a thread on the message board going into more detail if anyone's interested. It's Nick to the rescue once again!

But wait - It gets even better...
Photo Sharing and Video Hosting at Photobucket
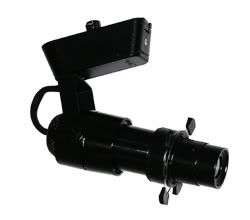
This my friends is the Solux Framing Projector - a thing of great beauty and magnificence!

Photo Sharing and Video Hosting at Photobucket

See, the separate components all fit together on a quite ordinary track lighting fixture, in fact exactly like the ones I have sitting next to me right now! How awesome is that??!! Theoretically (assuming the snout piece fits correctly) I should be able to just buy the accessories and fit them onto one of my existing units and I can *transform* it into a super-sexy micro-gobo projector! A sort of poor-man's ellipsoidal spotlight in a miniaturized size (perfect for my needs!) - AND at a miniaturized price!!

Also note that Solux makes probably the finest bulbs in the world (at the same price as ordinary bulbs) - you can buy them in various color temps including fully-balanced daylight with ultra-low IR and UV emissions. What this means is, no more weird orangey or blueish light - unless that's what you want! Also note - one advantage of low-voltage lighting is that the transformer effectively stabilizes the current (I believe) - so hopefully flicker and surges are a thing of the past.

Probably the biggest difference between this device and a real projector unit is that it isn't made to accept slides or gobos of any kind - and in fact I rather doubt it can be made to project them clearly, since it uses a typical MR-16 bulb, not the single-point projector style bulb with a polished reflector behind it like you find in a slide projector. But it will definitely project a shaped beam of very coherent light, and as Tennessee Reid Norton said in a recent comment, "where you DON'T put light is just as important as where you put it" (or something to that effect - sorry if I screwed it up).

And coming soon on the Transformer-thon 2007 front, I intend to get ahold of a dollhouse style lighting kit to use as onset practicals! Fun stuff!