Showing posts with label light bashing. Show all posts

Tuesday, January 18, 2011

Let there be (more) Light!!!

Photobucket
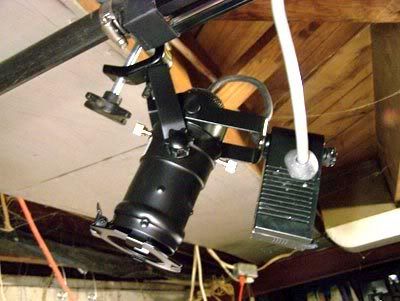
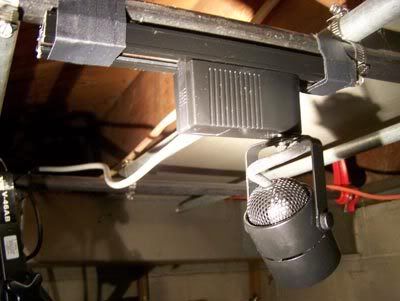
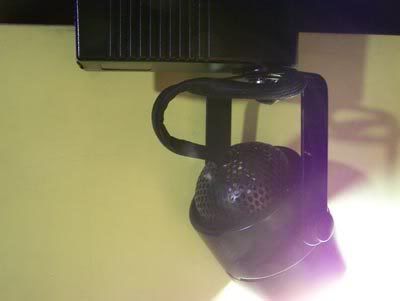
This, my friends, is what I call the Lightcannon.


It's a further refinement/ modification to the Solux Framing Art Light. I detailed my first round of mods to it in these posts. It worked, but with some issues - namely, due to its rather rickety construction and pressure-fit components, it had a tendency to sag and droop like a Dr. Seuss Spyglass, making it very hard to get precise accuracy, plus once you did get it aimed where you wanted, it could slowly droop... impercieptibe except when played back in your animation, when it becomes VERY noticeable. In fact, I have an example posted. Check out the background lighting in One Good Yank. This is unacceptable... in stopmotion everything must stay exactly where you put it until you move it yourself. 


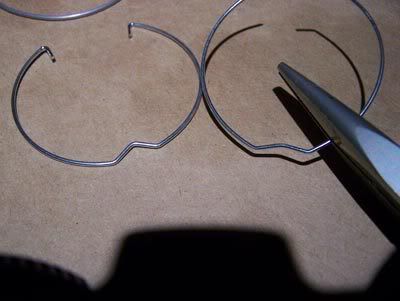
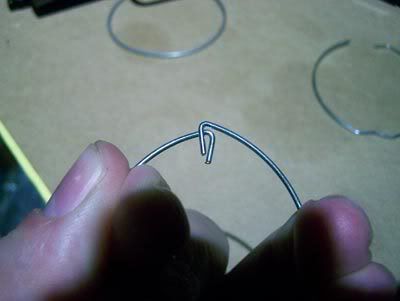
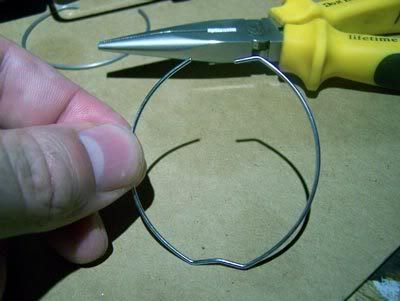
I partially solved the problems with this makeshift brace made from a turkey skewer:


It did snug up the assembly nicely, countering all that cartoonish sagging, but it's bulky and dangerous -- those chromed points sticking out right at eye level. Also, the yoke attaching it to my lighting grid was weak and couldn't be secured very well. I tried using a piece of folded-up paper jammed behind it, which helped somewhat but not enough. 

So today I set about to improve it. 

I started with one of my tinkered-together Blackbirds:


Photobucket

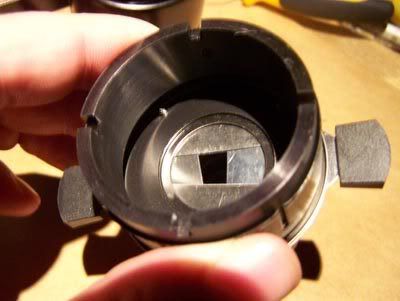
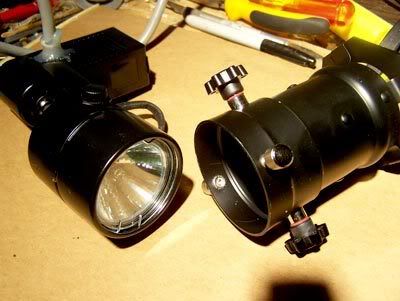
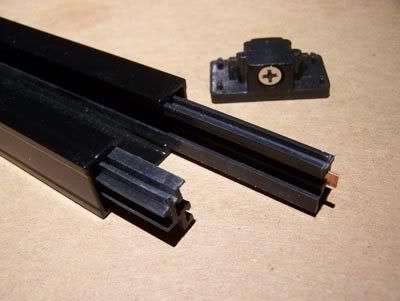
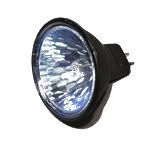
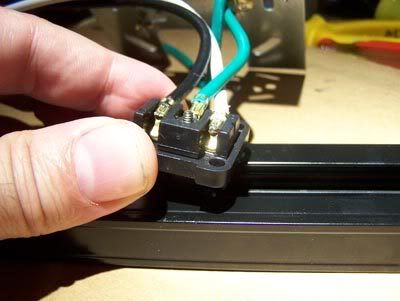
... based on the discovery that the snout/ yoke assembly from a cheap PAR16 (known as a Birdie) pressure-fits perfectly onto an ordinary track lighting unit. As so:

Photobucket


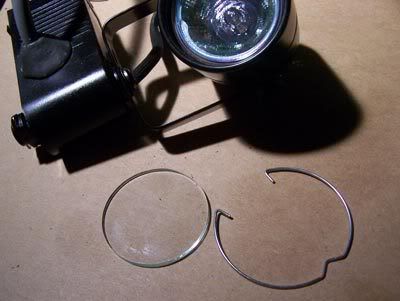
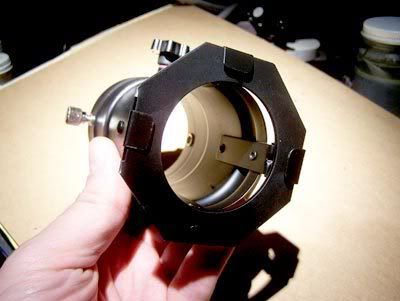
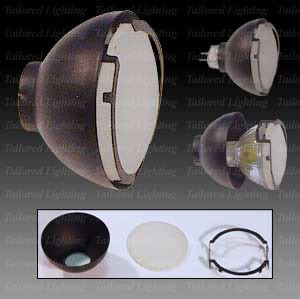
Here's one of my Blackbirds, with the Framing Optic Assembly of a Solux Framing Art Light laying next to it: 

Photobucket

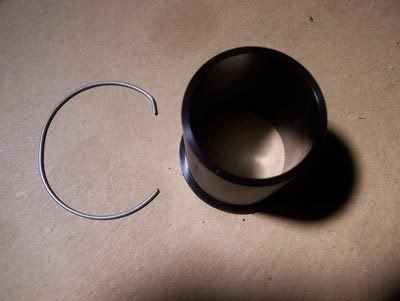
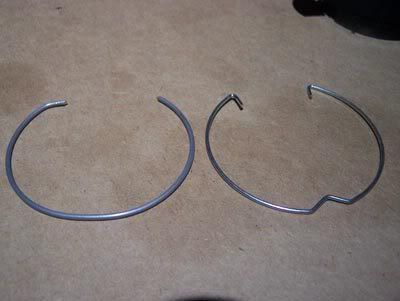
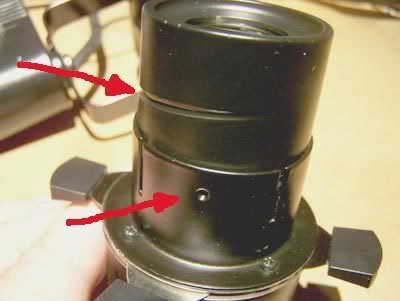
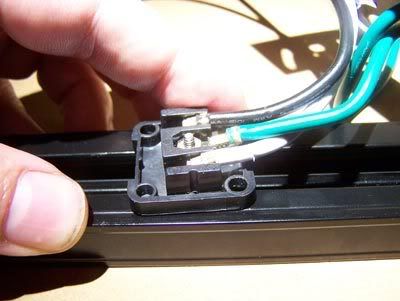
I tried fitting the Adapter Ring into the snout:

Photobucket

Success!! It fits, nice and tight!! 

Photobucket

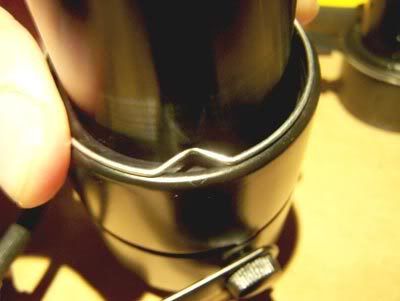
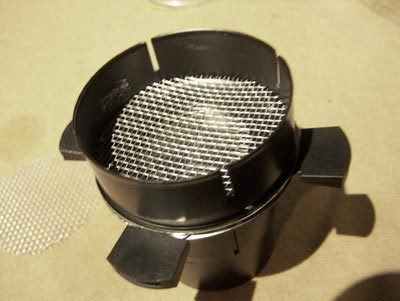
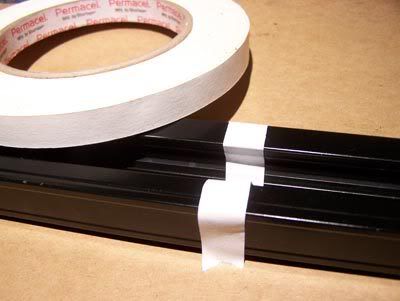
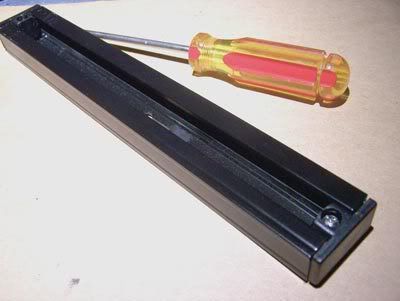
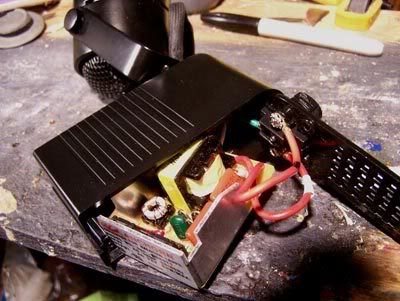
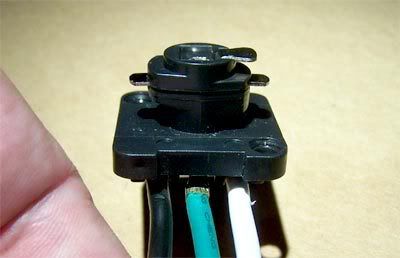
So I fitted the rest of the Solux assembly in place...

Photobucket

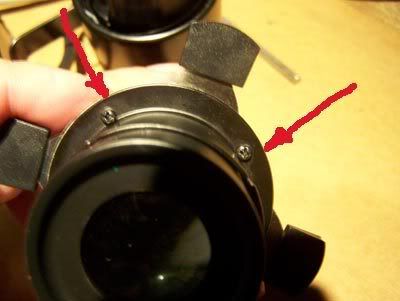
So far, so good... but when I plugged it in to test it, a problem:

Photobucket

A LOT of light leaks out as you can see. All this spill light sprays out onto the set where you don't want it. Wish I would have got a picture of that. But then, this tut is already ridiculously long and filled with too many pictures. Anyway, my first attempted solution was to jam some Blackwrap in there:

Photobucket

It's designed for use with lights to block out unwanted spill. But it was impossible to arrange it right in there, too many compound curves to deal with. I could have just wrapped it around the outside of the fixure, but I wanted a clean permanent solution, not an ugly blob of black foil hanging from my grid! 

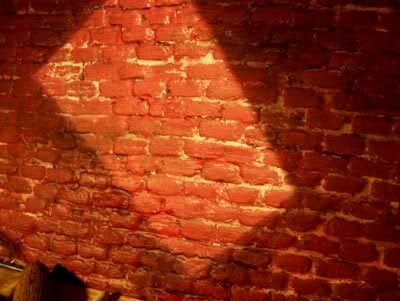
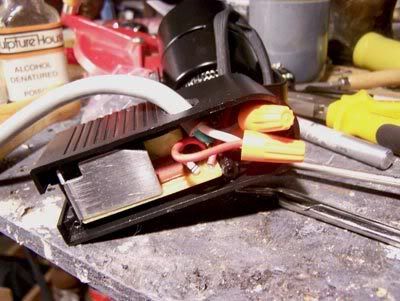
It didn't get rid of all the spill:

Photobucket

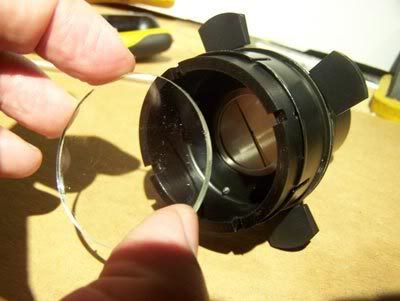
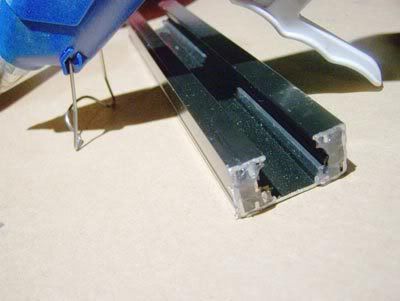
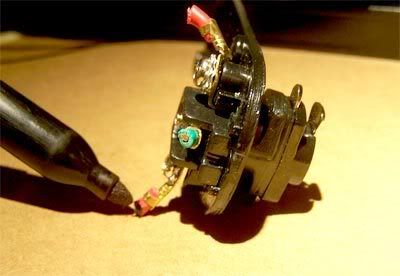
So I decided to try some Epoxy Putty:

Photobucket

Photobucket


Photobucket

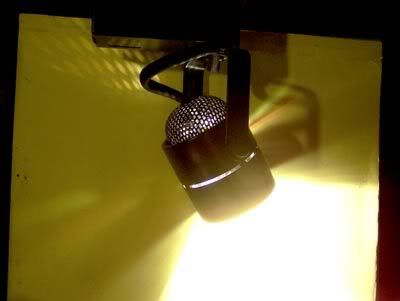
... And Voila!! No more spill!! And not only is it fully functional now, but it looks a heck of a lot like a high-tech Ellipsoidal fixture...


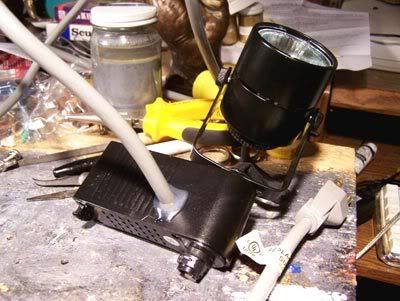
... Which is exactly what it is really. 

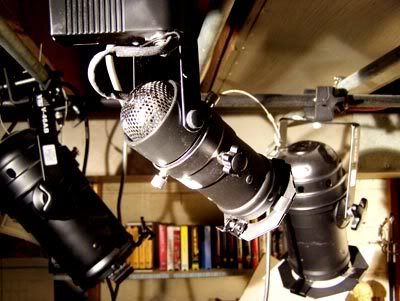
I've also ordered another 3-unit Tracklight kit from Lamps Plus, a couple pairs of the cheap PAR 16's from Musician's Friend,  and another Solux Framing Optic Assembly. I'm glad I detailed out exactly how I did all that modding, because I'll need to go back and check my notes for specifics. But when I'm done, I'll have two more Blackbirdies (for a total of 4) and another Lightcannon (to make a pair) to add to my lighting grid... that should be enough for just about any lighting situation. 


*** EDIT***


I came up with a better name than Lightcannon. I'm calling it the Ellipsis. An ellipsis is those three little dots that represent missing text... 


Yeah. THOSE three little dots. Essentially it's an edit used to shorten something. It's also used in filmmaking, with the same meaning. It's an edit used to cut out unnecessary action or time... example you see someone go to bed, then cut to them waking up in the morning. It edits out the 8 hours of them sleeping.  So, an Ellipsis is an abbreviation. In this case, MY ellipsis is an abbreviation of an Ellipsoidal spotlight! 


Heh... I tried a lot of names for it... Mini Ellipsoidal, Micro-Ellipsoidal etc... too much of a mouthful!! But now that I've ABBREVIATED it, it works! so...


ellipsis it is!! 

Friday, August 17, 2007

Ridin' the Lightwave!!!

Photo Sharing and Video Hosting at Photobucket
Ah, my magic package arrived today.... my Solux Framing Art Light Projector kit!!! First step in assembly is to remove the front glass and retaining ring from my Lamps Plus tracklight (oddly there were no instructions with the framing light kit - but it's not hard to figure out). At this point I need to determine if the snout will fit securely on this light unit. It looks identical to the Solux unit, but you never know.

Photo Sharing and Video Hosting at Photobucket
Here's the snout and its retaining ring. I tried it, but it didn't want to fit right - it kept trying to fall out of the Lamps Plus fixture. So I decided to try it with the Lamps Plus retaining ring instead.

Photo Sharing and Video Hosting at Photobucket
They're designed very differently - the LP design actually looks a lot better to me.

Photo Sharing and Video Hosting at Photobucket
.... But it won't quite fit!!!

Photo Sharing and Video Hosting at Photobucket
So I flattened out the.... um.......... little bendy part.

Photo Sharing and Video Hosting at Photobucket
Which opened up the ring some more, causing the ends to overlap - and making it too thick there.

Photo Sharing and Video Hosting at Photobucket
So I snipped off one of the.... um..... handle pieces (???) and bent the other one a bit flatter same as I did the... um.... bendy thing at the bottom. That worked perfectly!!! Success!!! That means I'm in business. I can now create a Frankenstein Framing Art Light from my Lamps Plus (el-cheapo) track lighting unit!!!

Photo Sharing and Video Hosting at Photobucket
This is an inside view of the framing shutters inside the front assembly. Very simple economical design. You can shift them around to a wide variety of positions, creating all sorts of rectangles and parallelograms (and... um... un-parallelograms).

Photo Sharing and Video Hosting at Photobucket
Here's the screw thread that allows you to adjust the focus. It's stamped from sheet metal, so like all parts of this nifty (but somewhat flimsy) little device, it's a little wonky. But it's service-able, and so small and lightweight!!! Perfect for hanging from the lighting grid (unlike my hefty and extrmeely bulky slide projector!!!)

Photo Sharing and Video Hosting at Photobucket
And see these tiny little (slightly out-of-focus) screws? These are important. It took me a while to figure it out, but you can tighten them to snug up the tension on the framing shutters. At first it was all really loose and they would just flop around - I thought I was going to have to jam something in there to wedge them in place, till I saw the screws. Good screws!!!

Photo Sharing and Video Hosting at Photobucket
Now we start to get to the fun stuff! Just a quick example of what it can do. Or if I was to unfocus it the edges would get fuzzy. The weird part is everything is upside-down and backwards..... when you move the left framing shutter it changes the right edge. Hard to get used to.

This device is not advertised as a gobo projector - but I was hoping I might be able to use it as one anyway. It seems like since the framing shutters will focus so sweetly and give a good crisp image, I should be able to put some kind of slide or gobo in there at the same place and it should work. At first I thought it meant removing a shutter or two, or something equally ill-advised. But then it occurred to me - there's no need for anything so drastic when the whole fixture just slides apart! It's all pressure-fit together! I opened it up and started thinking about what I might be able to use as a gobo/slide.... should prefferably be round, the right size, and made of glass.

Photo Sharing and Video Hosting at Photobucket
Hey!!! How about the glass I removed from the fixture right at the beginning? And sure enough - it fits perfectly! Kind of small, but I could see making designs on it with black tape or something. Or making Photoshop images and printing them on transparencies that I could sandwich between two pieces of the glass. Or something. Anyway, this is starting to get really exciting now!!!

Photo Sharing and Video Hosting at Photobucket
One of the accessories I ordered to try out was the "Neutral Density Screen Kit". It cost $15. What they sent me were three discs cut from a screen door!!! Ripoff!!!

Photo Sharing and Video Hosting at Photobucket
But I noticed they were also the right size to fit in the gobo slot, so rather than mess with making some tape design on the tiny piece of glass, I just popped a screen in there to try it out and see if it will focus properly and give a good image.....

Photo Sharing and Video Hosting at Photobucket
Voila!!! Folks, we have an actual Gobo projector!!! But notice, when it's focused on the screen the shutters that create the outer edge are fuzzy. (not that that's a deal-breaker or anything)

Photo Sharing and Video Hosting at Photobucket
And in fact, I took this close-up detail shot to try to show the weird rainbow/prism effect you get. Can you see the reds and blues along all the edges? I assume it's because the bulb isn't glass - it's made of quartz. If I understand right it's because the halogen gas inside is under too much pressure and heat - glass would shatter. I wonder if anything can be done about that? (meaning the weird prismatic color effect, not shattering light bulbs)

Photo Sharing and Video Hosting at Photobucket
Of course there is another way to use gobos. They don't need to fit inside the projector unit itself - here's just a quick little demonstration of the more traditional way - you just cut out a shape and place it in front of the beam somewhere near the set. This way doesn't seem to cause the rainbow effect, so it might be the way to go.

Actually what I'm using here would more properly be called a flag (or a cutter - I'm not up on all the terminology). Just a straight edge to cut off light where you don't want it. It would be supported by some kind of flexible arm - something I'll be covering soon in my ever-growing Lighting Department upgrade. It's exciting times around the Darkstudio folks..... all my lighting purchases have been golden (and I don't mean color temperature-wise) - it's really a huge thrill to see everything working out better than I had planned or expected. August 2007 will be remembered for a massive heat wave - but I'll remember it for riding the light-wave!!!

Tuesday, August 14, 2007

Bodgering part troix (um... that's 3 in French)

Nick mentioned on the message board that I could doubtless rig up a snout for my bodgered track lights from a beer can or something. And I know what I said about simple (and inexpensive) solutions. But I just couldn't face the idea of putting something so ugly on my lighting grid, which is loaded with beautiful light fixtures - all black. And yeah - I could get some high-temp black paint.... but he also mentioned that the hard part is rigging up a gel holder for these that sits away from the blistering heat that fades gels fast. And suddenly I had a bizarre thought.

I recently bought a pair of these (very inexpensive) par 16 birdies from Musician's Freind and was a bit disappointed at how dim they are, But looking at one today it ocurred to me that they're very nearly (if not exactly) the same diameter as the track light units. So the rusty wheels started grinding.

Photo Sharing and Video Hosting at Photobucket
This is the snout piece from one of the birdies (and no, I had never thought of it as a snout before, but it seems fitting now). It comes off easily to facilitate changing the light bulb - all you do is loosen the silver screws.

Photo Sharing and Video Hosting at Photobucket
Hmmmm.... interesting. Looks like it would just about fit ~

Photo Sharing and Video Hosting at Photobucket
Yes! Fit it does indeed!!! I didn't have to do anything... just jam it on! It's a nice tight pressure fit. And now I have an attractive black snout with a gel-holder on it!!! I love it when a plan comes together.....

Funny - it looks like the track light/birdie hybrid unit is just as big as the par 46's behind it. Not at all!! Trust me, it's a trick of perspective. That's just one more thing to love about these little units - they're tiny, meaning they fit anywhere (a blessing in limited basement space) and I'm less likely to bang my noggin on one.

Photo Sharing and Video Hosting at Photobucket

... And voila!!! This should be the final bodge required (I hope). I've dug out all the hotglue and replaced with with steel-filled epoxy putty that can definitely take the heat, and I decided to go ahead and hang it from the yoke that came with the birdie - so now I can C-clamp it securely to my grid. The taped-up track pieces just weren't very secure, and the el cheap-o yoke that came on the track lights kept loosening. I like the fact that the (very lightweight) transformer now has some leeway to move around a bit - that further reduces strain on the cord.

I guess that about wraps it up, except for putting the Solux accessories on the third unit when they get here. I'll do a separate demo on that. Man, it's awesome having these Tricked-out Track Lights!!!

Monday, August 13, 2007

Bodgering part deux

Photo Sharing and Video Hosting at Photobucket
Here's installment #2 of my lightbashing adventure. Tonight I cut up the track into sections to attach to my lighting grid (or wherever) so I can pop these awesome little track lights in them. I used a normal sabersaw with a metal cutting blade - it took a bit of doing, but I was able to cut through the track even with all the crazy parts inside it. As you can see above, there's quite a bit of stuff crammed in there too! And one thing I learned the hard way is it's loose and wants to slide out from vibrations as you're sawing.

Photo Sharing and Video Hosting at Photobucket
So I taped it in place. Simple solutions are my favorites! Then I was able to saw away to my heart's content without worries.

Photo Sharing and Video Hosting at Photobucket
I only had two endcaps, so I used them on one piece of track. The rest had to be bodgered as shown below.

Photo Sharing and Video Hosting at Photobucket
Hotglue to the rescue! Not sure if you can see it here, but I gobbed hotglue all over each end to hold the profile pieces in place. I also filed down the sharp edges really well so I can't gash myself on them.

Photo Sharing and Video Hosting at Photobucket
And finally (another simple solution) - I just gaffer taped the pieces of track to my grid. It's a breeze to pop a light in or out in a jiffy.

Photo Sharing and Video Hosting at Photobucket
But wait!!!! A bit of a problem. Look at all that spill light!!! That could really wreak havoc in an intricately lit set.

Photo Sharing and Video Hosting at Photobucket
That must be the reason Solux makes these nifty bulb shields...

Photo Sharing and Video Hosting at Photobucket
And sells these "black-back bulbs" (for twice the price of a normal one!!!).

Photo Sharing and Video Hosting at Photobucket
But not for me - oh no! Remember what I said about simple solutions (applies to inexpensive ones too)? A cone-shaped piece of blackwrap around the bulb does just as good (and costs quite a bit less). It remains to be seen though what kind of heat buildup it might cause - I wonder about heat buildup with the bulb shields and black-back bulbs as well actually. It seems like blackwrap wouldn't be any worse than a bulb shield.

And speaking of heat buildup - I notice after one of these lights is on for a while I start smelling this sort of hot plastic odor. It took a while before I realized.... the heat is softening my hotglue fillets that hold the extension cords in place! Oh man.... I might have to do something about that. Bears thinking about anyway.

I've ordered my Solux Framing Art Light kit (just the necessary parts to convert one of my lights if possible) and can hardly wait for it to come in! It's ridiculous how exciting something like this can be! I'll post the third and (hopefully) final part of this adventure when it comes in. See ya then!

Saturday, August 11, 2007

Bodgering bodgering bodgering.....

Photo Sharing and Video Hosting at Photobucket
Hi kids! Tonight I bodgered my track light kit! (It's one of those British words - and yes, it is legal!) The plan is to liberate them from the track, so each unit has its own power and can be placed wherever I want. Above you see what they look like opened up - inside is the transformer itself plus two red wires and a green wire. I happen to know the green wire is the ground, but had to trace the path of electricity to work out which red wire goes to positive and which to negative. You can see in the picture above where I marked them - one with a black sharpie and one with white tape. Then I cut off the wires. Man, that green wire is short!!! I knew that one would give me trouble later on....

Photo Sharing and Video Hosting at Photobucket
Now I've drilled a hole through the side of the plastic casing for the cord to pass through. I picked up some 13 amp grounded utility cords with pre-stripped wires coming out the end, along with a pack of those little orange twist-connector things. It's a tight fit, but the three connectors can be jammed down into the existing space inside the casing. And yes, those little green wires gave me hell!!! But I managed.

Photo Sharing and Video Hosting at Photobucket
After getting everything connected I gobbed hotglue all around the hole I drilled - inside and out, basically to form a solid fillet around the end of the cord to keep it secured in place. If it manages to slide out I don't have any faith in those little connectors holding all the weight of the cord! Finally I replaced the lid, sealing it all together again into its attractive contemporary housing.

I did it this way because I plan to cut short sections of the track and gaffer tape them wherever I want one of the light fixtures - then I can just twist the fixture into place with a satisfying click! Not sure this is the best plan - I thought about cutting the little cord that runs between the transformer and the lighting unit itself so I could separate the fixture from the transformer housing, but if I did that the connections wouldn't be tucked away inside a nifty casing - they'd be right out in the open for all to see. Hmmm.... unless I got myself a soldering iron and tried to do it right at the connection to the printed circuit board itself.... something to consider for the future maybe.

Anyway, it worked like a charm!!! These lights are bright and white as can be! Quite satisfying after the rather dim orangey Par-16 birdies I bought from Musician's Friend recently. Oh sorry - I meant to mention those before now. The price is definitely right - $30 for a pair of these cool-looking little lights (and though the website mistakenly reports that they don't come with filter holders, I can tell you happily that they actually DO). These run on full mains power - 120 volts as opposed to the 12 volt track lights. The Par 16 birdies are a bit dim - they're 50 watt fixtures. Premiere Lighting (which I've recently added to my links on the right) carries 75 watt par 16's that I'd like to try out.

And yeah, I know I'm accumulating quite a stash of lights. That's the point - I want to have enough on hand at any time to supply whatever crazy lighting situation I dream up. I'm thinking about getting 3 more of the track light units at some point - they seem like excellent little powerhouses that can be fully tailored with the accessories found at the Solux site.


I decided to add a bit here to explain how I traced the electric lines. This little widget is the twist lock connector that pops in one end of the track and gets connected to the mains power. It fits into the track the same way the light units do - push it in....
Photo Sharing and Video Hosting at Photobucket

And twist 90 degrees.
Photo Sharing and Video Hosting at Photobucket

Here you can clearly see there are three metal tabs on top. One on the left and two on the right. These tabs make contact inside the track with copper strips that run the full length of the track. If you look closely, you can see the black wire goes to the side with only one tab, while the white wire goes to the side with two tabs.
Photo Sharing and Video Hosting at Photobucket

Here's the "lid" from one of the tracklight units. As you can see, it has the same three metal tabs to fit into the track. I wish I had gotten a pic of marking the wires before i cut them all off, but this will have to do. I'm making a black mark here on the (red) wire that goes into the side with one tab.
Photo Sharing and Video Hosting at Photobucket

See.... takes a lot of explaining, but really pretty simple. I really don't know which is positive and which is negative (not sure those terms even really apply - I've heard one is actually called the hotwire and the other is called the neutral wire). But it's not important to know that - you only need to know which wire to connect where, and now we have that vital info. Once you've marked the black wire, there's no need to mark the other one - just think of it as the *unmarked* wire, and it represents the white one. the wire you just marked with the black marker attaches to the black wire in the power cord - the unmarked one attaches to the white wire, and (simple enough) the green wire attaches to the green wire. - Am I overexplaining now?