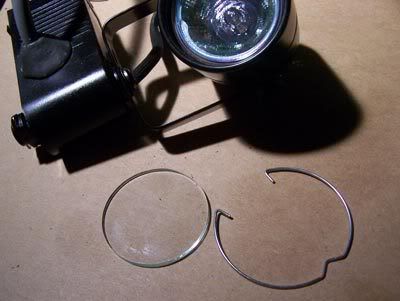
Ah, my magic package arrived today.... my Solux Framing Art Light Projector kit!!! First step in assembly is to remove the front glass and retaining ring from my Lamps Plus tracklight (oddly there were no instructions with the framing light kit - but it's not hard to figure out). At this point I need to determine if the snout will fit securely on this light unit. It looks identical to the Solux unit, but you never know.
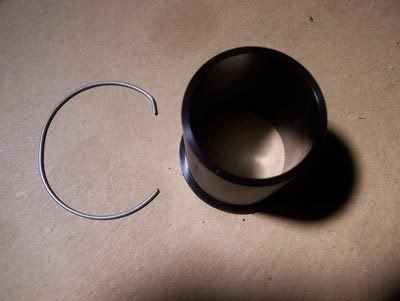
Here's the snout and its retaining ring. I tried it, but it didn't want to fit right - it kept trying to fall out of the Lamps Plus fixture. So I decided to try it with the Lamps Plus retaining ring instead.
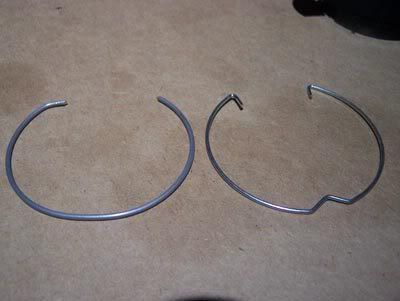
They're designed very differently - the LP design actually looks a lot better to me.
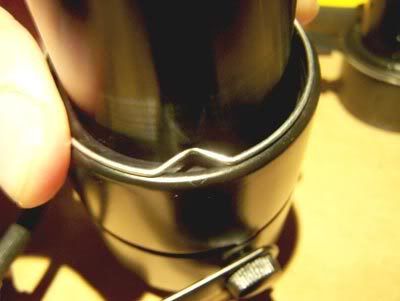
.... But it won't quite fit!!!
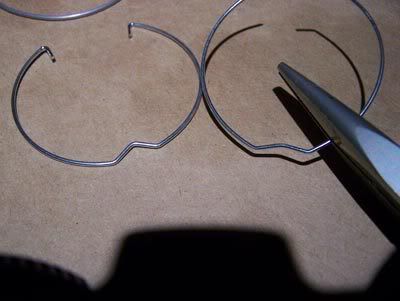
So I flattened out the.... um.......... little bendy part.
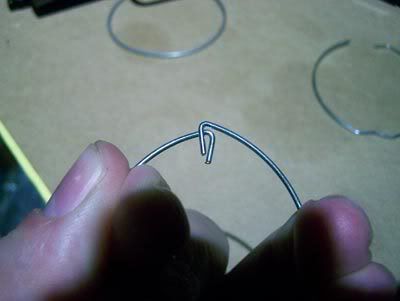
Which opened up the ring some more, causing the ends to overlap - and making it too thick there.
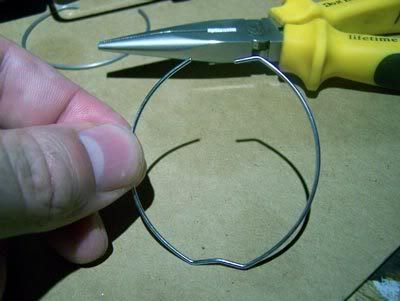
So I snipped off one of the.... um..... handle pieces (???) and bent the other one a bit flatter same as I did the... um.... bendy thing at the bottom. That worked perfectly!!! Success!!! That means I'm in business. I can now create a Frankenstein Framing Art Light from my Lamps Plus (el-cheapo) track lighting unit!!!
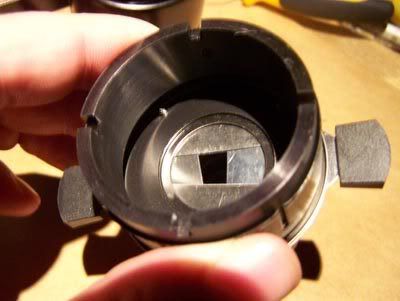
This is an inside view of the framing shutters inside the front assembly. Very simple economical design. You can shift them around to a wide variety of positions, creating all sorts of rectangles and parallelograms (and... um... un-parallelograms).
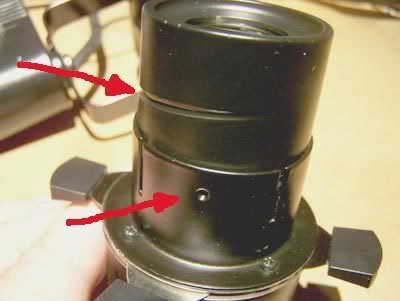
Here's the screw thread that allows you to adjust the focus. It's stamped from sheet metal, so like all parts of this nifty (but somewhat flimsy) little device, it's a little wonky. But it's service-able, and so small and lightweight!!! Perfect for hanging from the lighting grid (unlike my hefty and extrmeely bulky slide projector!!!)

And see these tiny little (slightly out-of-focus) screws? These are important. It took me a while to figure it out, but you can tighten them to snug up the tension on the framing shutters. At first it was all really loose and they would just flop around - I thought I was going to have to jam something in there to wedge them in place, till I saw the screws. Good screws!!!
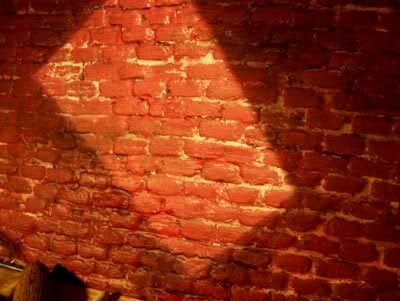
Now we start to get to the fun stuff! Just a quick example of what it can do. Or if I was to unfocus it the edges would get fuzzy. The weird part is everything is upside-down and backwards..... when you move the left framing shutter it changes the right edge. Hard to get used to.
This device is not advertised as a gobo projector - but I was hoping I might be able to use it as one anyway. It seems like since the framing shutters will focus so sweetly and give a good crisp image, I should be able to put some kind of slide or gobo in there at the same place and it should work. At first I thought it meant removing a shutter or two, or something equally ill-advised. But then it occurred to me - there's no need for anything so drastic when the whole fixture just slides apart! It's all pressure-fit together! I opened it up and started thinking about what I might be able to use as a gobo/slide.... should prefferably be round, the right size, and made of glass.
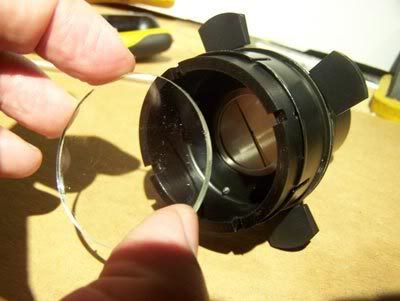
Hey!!! How about the glass I removed from the fixture right at the beginning? And sure enough - it fits perfectly! Kind of small, but I could see making designs on it with black tape or something. Or making Photoshop images and printing them on transparencies that I could sandwich between two pieces of the glass. Or something. Anyway, this is starting to get really exciting now!!!
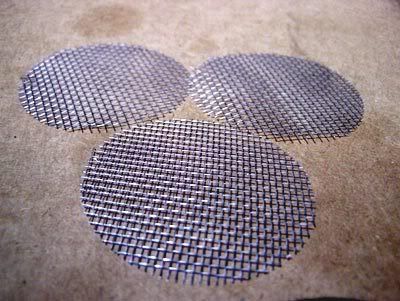
One of the accessories I ordered to try out was the "Neutral Density Screen Kit". It cost $15. What they sent me were three discs cut from a screen door!!! Ripoff!!!
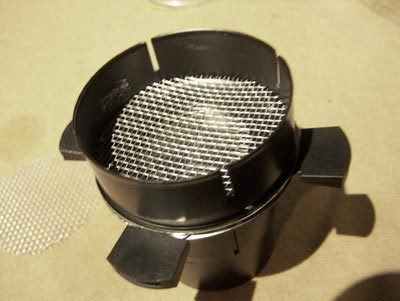
But I noticed they were also the right size to fit in the gobo slot, so rather than mess with making some tape design on the tiny piece of glass, I just popped a screen in there to try it out and see if it will focus properly and give a good image.....

Voila!!! Folks, we have an actual Gobo projector!!! But notice, when it's focused on the screen the shutters that create the outer edge are fuzzy. (not that that's a deal-breaker or anything)
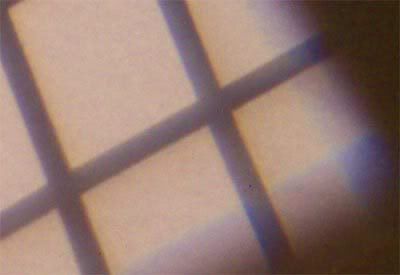
And in fact, I took this close-up detail shot to try to show the weird rainbow/prism effect you get. Can you see the reds and blues along all the edges? I assume it's because the bulb isn't glass - it's made of quartz. If I understand right it's because the halogen gas inside is under too much pressure and heat - glass would shatter. I wonder if anything can be done about that? (meaning the weird prismatic color effect, not shattering light bulbs)

Of course there is another way to use gobos. They don't need to fit inside the projector unit itself - here's just a quick little demonstration of the more traditional way - you just cut out a shape and place it in front of the beam somewhere near the set. This way doesn't seem to cause the rainbow effect, so it might be the way to go.
Actually what I'm using here would more properly be called a flag (or a cutter - I'm not up on all the terminology). Just a straight edge to cut off light where you don't want it. It would be supported by some kind of flexible arm - something I'll be covering soon in my ever-growing Lighting Department upgrade. It's exciting times around the Darkstudio folks..... all my lighting purchases have been golden (and I don't mean color temperature-wise) - it's really a huge thrill to see everything working out better than I had planned or expected. August 2007 will be remembered for a massive heat wave - but I'll remember it for riding the light-wave!!!

5 comments:
very cool light, I have never seen one with the sliding adjustmenst like that. I like the mods you did, good results all around. A little rainbow fringe won't make a difference if you are doing the buster sepia tone shots anyways!
very cool toys indeed!
jriggity
Wooo. Clever lights in Darkland!
Mark - Yeah, some of my films will be monochromatic, but I definitely want to do some in color too.
The framing shutters can be found on some of the more expenxive Ellipsoidals and Followspots, as well as with the Focal Spot attachment for the Fresnels - pretty much the ones designed to allow maximum shaping of a focused beam. It's really pretty amazing to have such tight control over this tiny little toy - almost like getting a Lekolight out of a box of crackerjack! (Except that of course all those more expensive lights are way too big and way too powerful for a small stopmo set!!!)
Hi,
I was wondering if you could tell me if you know where I/the company I work for could purchase the retaining ring and front glass found in your first picture. I have been looking on-line like crazy and cannot find anyone who carries these exact ones, besides a company in the UK who carries that retaining ring. If you could please let me know, as soon as possible, I would greatly appreciate it.
Thank you.
Post a Comment