Saturday, August 11, 2007

Bodgering bodgering bodgering.....

Photo Sharing and Video Hosting at Photobucket
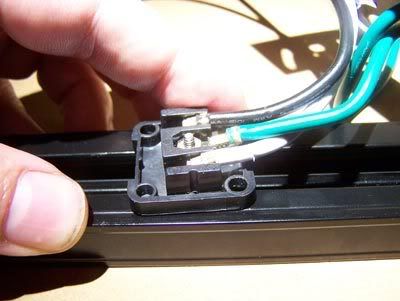
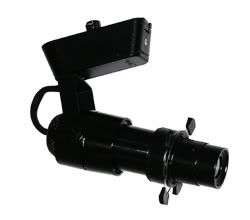
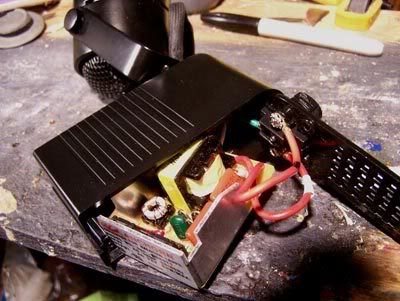
Hi kids! Tonight I bodgered my track light kit! (It's one of those British words - and yes, it is legal!) The plan is to liberate them from the track, so each unit has its own power and can be placed wherever I want. Above you see what they look like opened up - inside is the transformer itself plus two red wires and a green wire. I happen to know the green wire is the ground, but had to trace the path of electricity to work out which red wire goes to positive and which to negative. You can see in the picture above where I marked them - one with a black sharpie and one with white tape. Then I cut off the wires. Man, that green wire is short!!! I knew that one would give me trouble later on....
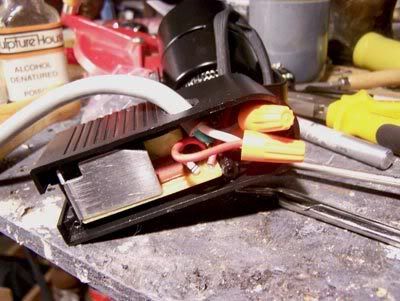
Photo Sharing and Video Hosting at Photobucket
Now I've drilled a hole through the side of the plastic casing for the cord to pass through. I picked up some 13 amp grounded utility cords with pre-stripped wires coming out the end, along with a pack of those little orange twist-connector things. It's a tight fit, but the three connectors can be jammed down into the existing space inside the casing. And yes, those little green wires gave me hell!!! But I managed.
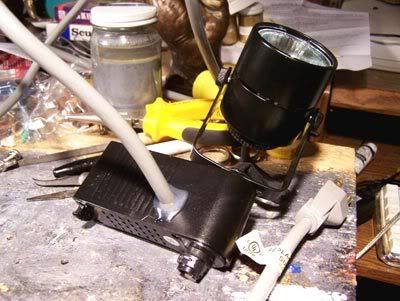
Photo Sharing and Video Hosting at Photobucket
After getting everything connected I gobbed hotglue all around the hole I drilled - inside and out, basically to form a solid fillet around the end of the cord to keep it secured in place. If it manages to slide out I don't have any faith in those little connectors holding all the weight of the cord! Finally I replaced the lid, sealing it all together again into its attractive contemporary housing.

I did it this way because I plan to cut short sections of the track and gaffer tape them wherever I want one of the light fixtures - then I can just twist the fixture into place with a satisfying click! Not sure this is the best plan - I thought about cutting the little cord that runs between the transformer and the lighting unit itself so I could separate the fixture from the transformer housing, but if I did that the connections wouldn't be tucked away inside a nifty casing - they'd be right out in the open for all to see. Hmmm.... unless I got myself a soldering iron and tried to do it right at the connection to the printed circuit board itself.... something to consider for the future maybe.

Anyway, it worked like a charm!!! These lights are bright and white as can be! Quite satisfying after the rather dim orangey Par-16 birdies I bought from Musician's Friend recently. Oh sorry - I meant to mention those before now. The price is definitely right - $30 for a pair of these cool-looking little lights (and though the website mistakenly reports that they don't come with filter holders, I can tell you happily that they actually DO). These run on full mains power - 120 volts as opposed to the 12 volt track lights. The Par 16 birdies are a bit dim - they're 50 watt fixtures. Premiere Lighting (which I've recently added to my links on the right) carries 75 watt par 16's that I'd like to try out.

And yeah, I know I'm accumulating quite a stash of lights. That's the point - I want to have enough on hand at any time to supply whatever crazy lighting situation I dream up. I'm thinking about getting 3 more of the track light units at some point - they seem like excellent little powerhouses that can be fully tailored with the accessories found at the Solux site.


I decided to add a bit here to explain how I traced the electric lines. This little widget is the twist lock connector that pops in one end of the track and gets connected to the mains power. It fits into the track the same way the light units do - push it in....
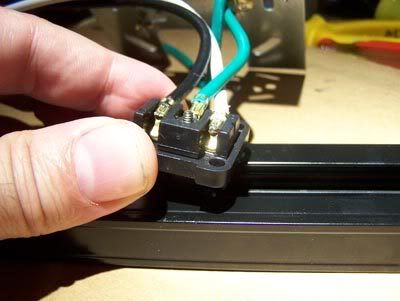
Photo Sharing and Video Hosting at Photobucket

And twist 90 degrees.
Photo Sharing and Video Hosting at Photobucket

Here you can clearly see there are three metal tabs on top. One on the left and two on the right. These tabs make contact inside the track with copper strips that run the full length of the track. If you look closely, you can see the black wire goes to the side with only one tab, while the white wire goes to the side with two tabs.
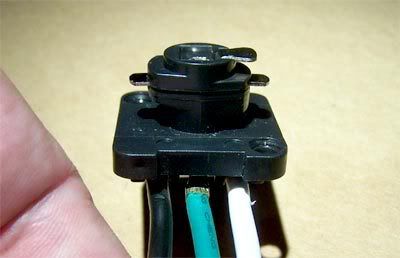
Photo Sharing and Video Hosting at Photobucket

Here's the "lid" from one of the tracklight units. As you can see, it has the same three metal tabs to fit into the track. I wish I had gotten a pic of marking the wires before i cut them all off, but this will have to do. I'm making a black mark here on the (red) wire that goes into the side with one tab.
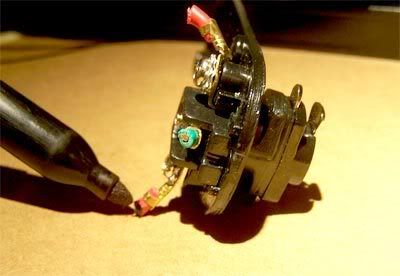
Photo Sharing and Video Hosting at Photobucket

See.... takes a lot of explaining, but really pretty simple. I really don't know which is positive and which is negative (not sure those terms even really apply - I've heard one is actually called the hotwire and the other is called the neutral wire). But it's not important to know that - you only need to know which wire to connect where, and now we have that vital info. Once you've marked the black wire, there's no need to mark the other one - just think of it as the *unmarked* wire, and it represents the white one. the wire you just marked with the black marker attaches to the black wire in the power cord - the unmarked one attaches to the white wire, and (simple enough) the green wire attaches to the green wire. - Am I overexplaining now?

Wednesday, August 08, 2007

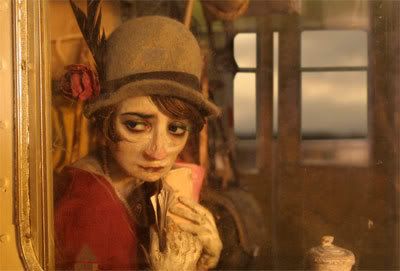
Madame Tutli-Putli - the eyes have it

Photo Sharing and Video Hosting at Photobucket
Madame Tutli-Putli @ NFB website

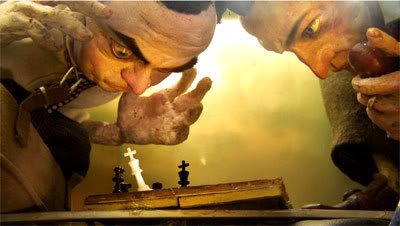
Ok folks, I don't know what's going on these days in the world of stopmotion, but a sea change is ahappenin'. Already we've had the incredible Peter and the Wolf by Suzie Templeton, and now there's the astonishing Madame Tutli-Putli by Chris Lavis and Maciek Szczerbowski of Clyde Henry Productions in Canada. These guys are basically fledgeling animators - or at least this is their first professional endeavor in the field. Previously they made posters and graphic art by taking pictures of their own bizarre collages featuring highly stylized sculptures of their own making along with found objects. In fact, very much like what Chris Sickels of Red Nose Studios does (this next picture reminds me very strongly of Chris' work, but more fully realized and detailed).

Photo Sharing and Video Hosting at Photobucket

If you're unable to watch the videos on the NFB site, the same videos are also to be found, like everything sooner or later, on YouTube. I highly recommend watching all available videos including the behind the scenes material - I love hearing these guys talk about the creative process!!!

Every aspect of this film is groundbreaking and absolutely stunning to watch, but probably the most groundbreaking effect is the eyes. They're completely alive, like no animated eyes ever have been - in fact they're real human eyes composited in through computer magic to give unprecedented life and character to these puppets.

Well, I could go on and on, but I think it's best to let the videos speak for themselves - I've probably watched each one a dozen times already, and I'm still blown away every time! I can't wait for this one to come out on DVD!!!

Monday, August 06, 2007

Transformer-thon 2007!!!!

No, it's nothing to do with the current mega-smash hit movie Transformers, though it is kind of ironic that it happens to coincide with my own delving into the mysteries and lore of the humble 12-volt transformer.

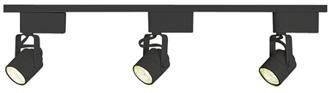
In case anyone hasn't noticed, all my posts lately have dealt with lighting - I've decided it's time to learn new tricks and to upgrade the lighting department in the Darkstudio. And most recently my questing has led me to low voltage lighting, which requires a transformer to step down household current to 12 volts. I bought this track lighting kit from Lamps Plus
Photo Sharing and Video Hosting at Photobucket

which now sits assembled (mostly) and waiting for the coup-de-grace - I intend to bodger it so I have three separate lighting units rather than all of them on one track. Here's a thread on the message board going into more detail if anyone's interested. It's Nick to the rescue once again!

But wait - It gets even better...
Photo Sharing and Video Hosting at Photobucket
This my friends is the Solux Framing Projector - a thing of great beauty and magnificence!

Photo Sharing and Video Hosting at Photobucket

See, the separate components all fit together on a quite ordinary track lighting fixture, in fact exactly like the ones I have sitting next to me right now! How awesome is that??!! Theoretically (assuming the snout piece fits correctly) I should be able to just buy the accessories and fit them onto one of my existing units and I can *transform* it into a super-sexy micro-gobo projector! A sort of poor-man's ellipsoidal spotlight in a miniaturized size (perfect for my needs!) - AND at a miniaturized price!!

Also note that Solux makes probably the finest bulbs in the world (at the same price as ordinary bulbs) - you can buy them in various color temps including fully-balanced daylight with ultra-low IR and UV emissions. What this means is, no more weird orangey or blueish light - unless that's what you want! Also note - one advantage of low-voltage lighting is that the transformer effectively stabilizes the current (I believe) - so hopefully flicker and surges are a thing of the past.

Probably the biggest difference between this device and a real projector unit is that it isn't made to accept slides or gobos of any kind - and in fact I rather doubt it can be made to project them clearly, since it uses a typical MR-16 bulb, not the single-point projector style bulb with a polished reflector behind it like you find in a slide projector. But it will definitely project a shaped beam of very coherent light, and as Tennessee Reid Norton said in a recent comment, "where you DON'T put light is just as important as where you put it" (or something to that effect - sorry if I screwed it up).

And coming soon on the Transformer-thon 2007 front, I intend to get ahold of a dollhouse style lighting kit to use as onset practicals! Fun stuff!

Tuesday, July 24, 2007

Photographing metallic or shiny objects (added new LARGER VIEW!!)

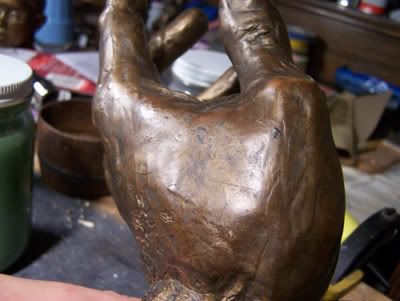
Tonight I finally figured out something that's been bugging the crap outta me for years! I used to take totally crap pics of anything shiny or metallic, like this bronze-coated sculpt I did a few years ago:

Photo Sharing and Video Hosting at Photobucket

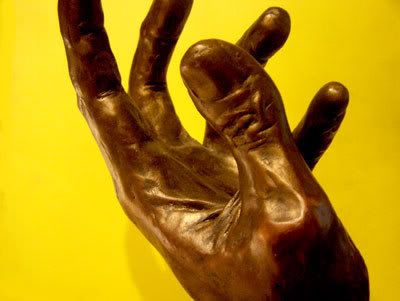
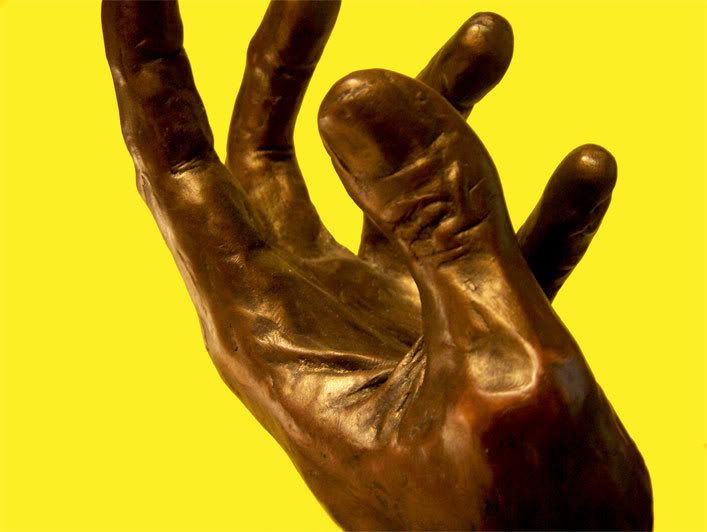
The glare is so bad it destroys the surface, which in real life looks great! As a result I was always unable to post (decent) pics of these bronzed sculpts when i wanted to show them off. Well I finally decided to try pointing the lights completely away from it, and putting a bright background behind it so the camera cuts exposure levels. Here's the result:

Photo Sharing and Video Hosting at Photobucket


(Click tiny thumbnail to see larger version)


The camera told me there wasn't enough light for a good exposure, but I taunted it and snapped away anyway. Guess I showed it who's boss, huh?

Thursday, July 19, 2007

Cheap ripoff post today

Sorry peeps, not a lot going on or anything to talk about, except a ripoff from my Blog Brother LIO's most recent post. He posted links to Corky Quackenbush's excellent Mad TV claymation Cops parodies:

Clops 1

Clops 2

Clops 3

Clops 4

Clops 5

I really dig this stuff! Kind of like the forerunner to Robot Chicken, but cruder (visually) - more handmade, and with a much stronger artistic feel to them (especially in terms of lighting and atmosphere). Also the humor is (a little) less sick and twisted, and a lot more creative. I watched these over and over, and I love the darkness and all the practical lights - windows, streetlights, flashlights, police flashers etc, as well as the constantly moving camera. There's something magical about the scene where Gumby is sliding along the street on one foot through pools of darkness, only occasionally passing through a lit area. Also, while Corky's films do have that handmade quality that gives them a certain charm, they're always very elaborately done. It's amazing if you really look at all the props and how good most of them look. I'm guessing he didn't do these completely solo? Probably had assistants to help crank out all the stuff. Anyway, just thought I'd share something so people don't think I fell off the face of the earth!

Thursday, July 05, 2007

Lightmatters - or A Hobo in the Studio

Photo Sharing and Video Hosting at Photobucket
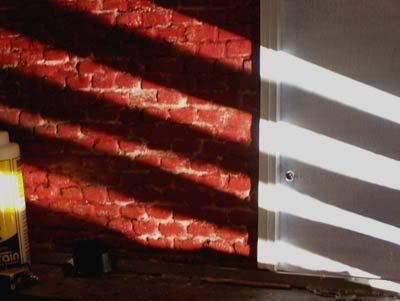
Nice Film Noir effect, huh? Accomplished with the help of my own personal HOBO (as seen below). See, Hobo is my acronym for Home-Brewed Gobo (pretty sweet, eh?). A Gobo, of course, is a focused studio light that projects an image onto the set - they're commonly used for stage shows etc, but are also very nice to have around a stopmo studio for effects like shuttered windows, branches casting shadows on the ground, etc.
Photo Sharing and Video Hosting at Photobucket
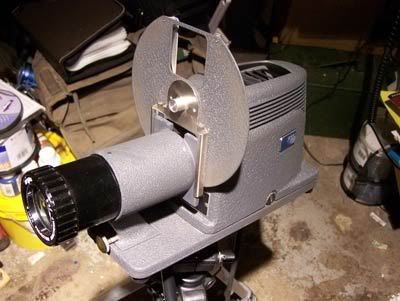
For mine I just bought an old slide projector off ebay - something small and without the bulky carousel. Analog slide projectors are relics of the past now - phased out to make way for the shiny new digital projectors. But these things are stockpiled away in closets and attics all over the place, just waiting for you to snatch them up. Mine is an Argus AP200, a thing of beauty made in a time when looks counted. It's got this great sort of Art Deco look, kind of reminds me of the front of a train. It takes a 200 watt bulb (no longer manufactured, but can be sourced online at various sites that handle these kinds of things). It's pretty small, but weighs about 10 pounds... but fortunately it has a threaded hole in the bottom to go on a tripod. To create the Gobos you just have to place something opaque on a transparent slide of some sort that fits in the slide housing. I just cut some plastic from the front of a DVD case and stuck a few strips of gaffer tape on it for my admittedly rough shutter effect. A little online research reveals that blu-tac also works.
Photo Sharing and Video Hosting at Photobucket
Another good alternative would be to get an Opaque Projector like the Artograph Tracer. There's a smaller, cheaper model called the Tracer Jr, which has a 3.5" x 3.5" platten for inserting artwork and takes a 75 watt household bulb, which might be good enough, but the regular Tracer takes a 100 watt bulb and allows artwork of 5.5" x 5.5". These would be much lighter than my heavy slide projector and allow you to draw line art using markers or something, doubtless a lot easier to create complex patterns than by cutting tiny pieces of tape to go on a slide!
I've decided to step up the lighting department in the Darkstudio - lighting is essential in creating a good visual effect. This is just one of the tools I'm creating for my arsenal - I'll be detailing more in future Lightmatters entries.

Sunday, July 01, 2007

Up to par?

Well, the awesome Pro-Light, my birthday present to myself, arrived the other day - and what a treat to assemble it and hang it on my grid! It looks perfect there, and it lends my entire "studio" a nice professional look. However, as soon as i got it all set up and switched it on, I must admit to a bit of disappointment. I mean geez - I paid quite a pretty penny for this beautiful little gadget, and it turns out all it does is cast light on my set! Hell, I've got lots of things that do that! Yes, it's got ultrasexy barndoors (well, it doesn't sound very sexy, but oh yes, it sure looks hot!) - but they do so little - seriously I could accomplish more with a little cinefoil (thick black aluminum foil used to shape light beams) or some cardboard attached to a wire in front of a light.

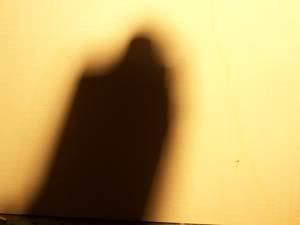
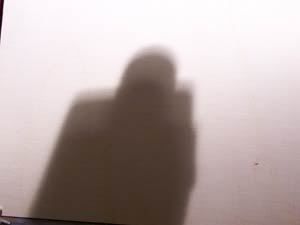
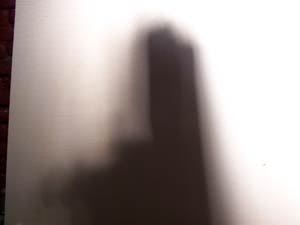
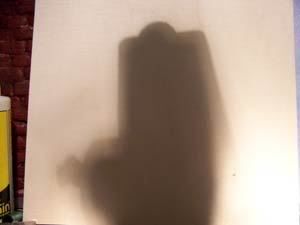
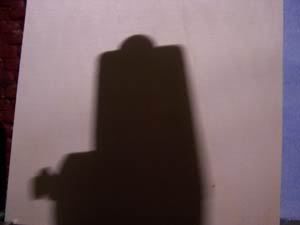
The main advantage to this particular light - really the reason I bought it - is it has an "adjustable, focused beam" that they say is "fresnel-like". Well yes, there is a switch on the side that changes the quality of the beam. It's supposed to change it from spot to flood, but mostly it just seems to function as a sort of crappy dimmer. I suppose the width of the beam does change a little, but it's hard to tell - maybe if I had more room, but I'm using it about 6 feet from my set. Well, I began to wonder it this (rather expensive) light is really all that much better in any way than my good old par cans. So I put them to the test. Below are a series of pictures demonstrating the shadow clarity of each light under various conditions. See, that's the beauty of a focused light like a fresnel (or the Pro-Light, at least supposedly) - it's able to cast a good crisp shadow. I can think of certain situations where I'd want to use this feature.... for instance in a shot where all you see is a puppet's shadow on the wall. Here's how the lights stacked up, with a surprise contender at the end ( the object casting its shadow is my animation camera).....

Lowel Pro-Light, beam centered:
Photo Sharing and Video Hosting at Photobucket

Lowel Pro-Light, edge of beam:
Photo Sharing and Video Hosting at Photobucket
(Yes, I discovered a strange thing quite by accident - shadows are a good deal clearer at the edge of a disc of light than at the center!)


Par 46, beam centered:
Photo Sharing and Video Hosting at Photobucket

Par 46, edge of beam: (not too shabby really!)
Photo Sharing and Video Hosting at Photobucket

But here's our surprise contender folks.... by far the best and crispiest shadow yet....

Photo Sharing and Video Hosting at Photobucket
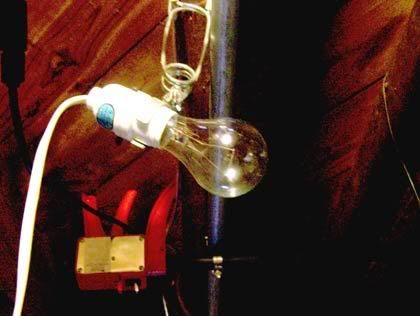
What is it, you say? Why, but of course - it's nothing more than a simple hardware-store clamp light housing an unfrosted 75 watt bulb from the corner convenient store - total cost about $3.00! Not as bright as either of the centered images above of course - those lights are 200 or so watts each, but it's about as bright as the non-centered images. Here's a nifty shot of our little hero:

Photo Sharing and Video Hosting at Photobucket

Normal household bulbs are frosted, giving them that familiar whitish appearance. This scatters the light beams, diffusing them for a more pleasing appearance - it softens shadows, see? But it also fuzzies them up quite a bit. The unfrosted bulbs are less common, but can still be found at most stores that sell bulbs, and give a nice clear shadow quality. I wonder if they can be bought at higher wattages?

Anywhoo, I'm now convinced that the single greatest feature any light can have is some form of gel frame or filter holder, so you can insert colored filters or diffusion or scrims to tailor the light. The par cans have them, and I could buy ten of them for the price of one of the Pro-Lights! In fact, I even have a swingarm desk lamp with a piece of diffusion taped over it! See, what I'm finding is that the pro quality stuff is maybe slightly better than ordinary household lights, but not at all worth the enormous price difference! (And in some cases, for certain specific applications, the household stuff is actually better.)