Sunday, June 15, 2008

2nd barstool... NOW we're talkin'!!!!

Tomstoolery
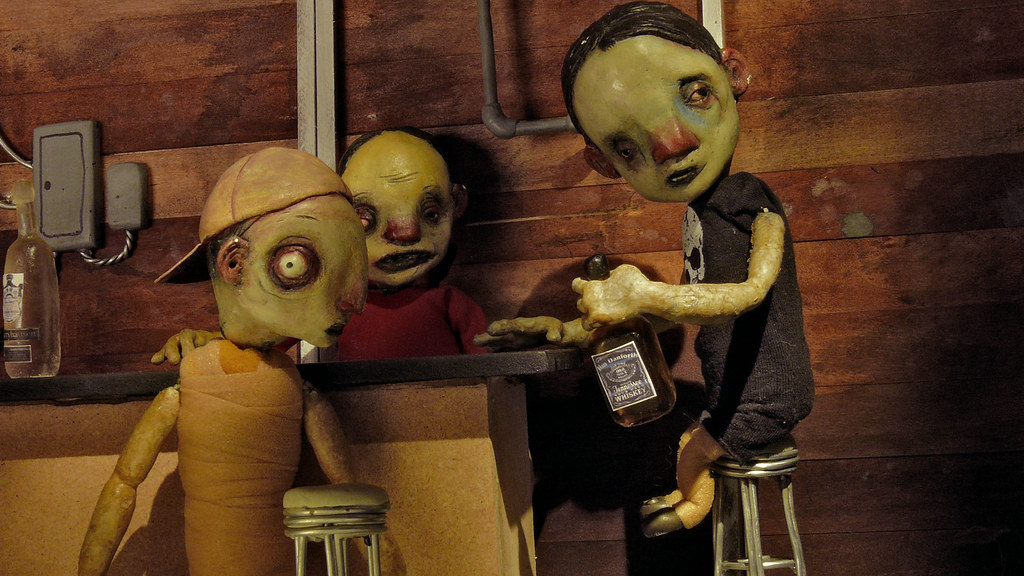
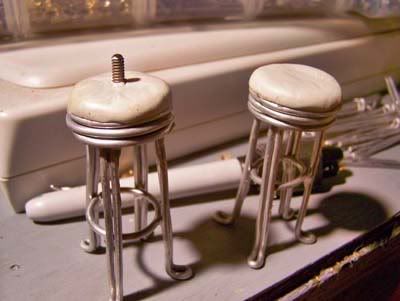
Getting a feel for how the stools will fit into the decor. A little tall --- standers-by need to look up to talk to the seated, but I do like the way their tiny little legs dangle so comically. Imagine the difficulty for them, climbing onto one of these! Oh, and click the above pic to see it in megagigantic size at Flickr. I don't know, I MIGHT have to make shorter stools....

Photobucket
Ok, tonight things went a lot better than the prototype stool last night. I've worked out a methodology that turns it into a pretty simple production line, and gives me much better control over the finished product. Look how much taller and prouder the new stool is in the above pic than its predecessor, all sort of slumped and bedraggled looking. Plus of course it has a nice rectal tiedown on top! 
Photobucket
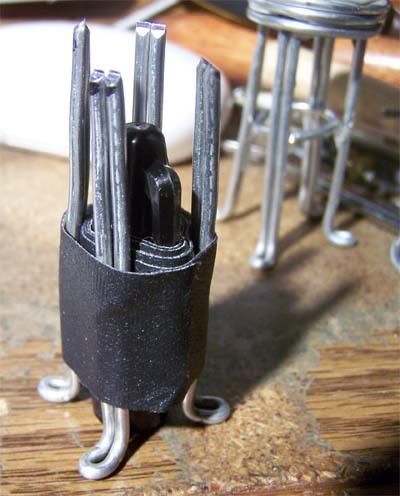
The heart and soul of my assembly line.... the leg jig. No no... it's NOT a sharpie cap with gaffer tape wrapped around it... it's actually intricate state-of-the-art equipment, made of beryllium. Ber ILL eeee yum. yeah. 
Photobucket
Round-thing-on-top wrapping jig. Ahem. No, it's NOT the end of my coping saw handle! It's made of carborundum. say it. Emphasis on third syllable - carboRUNdum. 
Photobucket
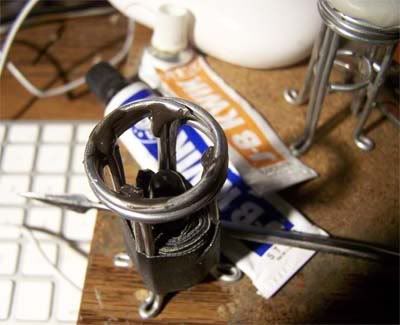
The Kwikweld station. A nice little tack-weld to hold everything together and reduce fidgetty, flippy floppy action as I work. This step might not even be necessary really. Think I'll eliminate it from the workflow. Kind of hard to clean up sticky nasty Kwikweld that likes to run down the legs.
Photobucket
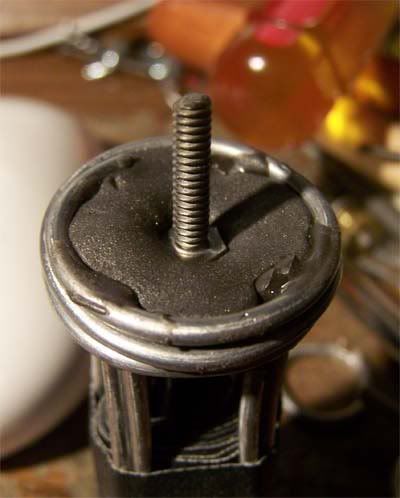
Then a little blob of 5 minute Fasteel epoxy putty with a cut-off 6-32 screw stuck in. This is a purely structural layer, to be covered by the cushion when we arrive at the upholstery station. 
Photobucket
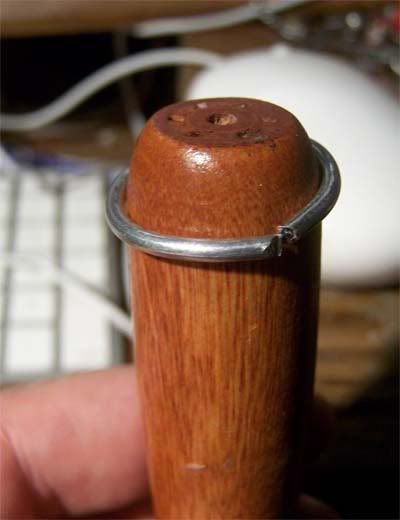
Ring-thing bending station. NOT a chisel handle. MAAANG-a-neez, ok?
Photobucket
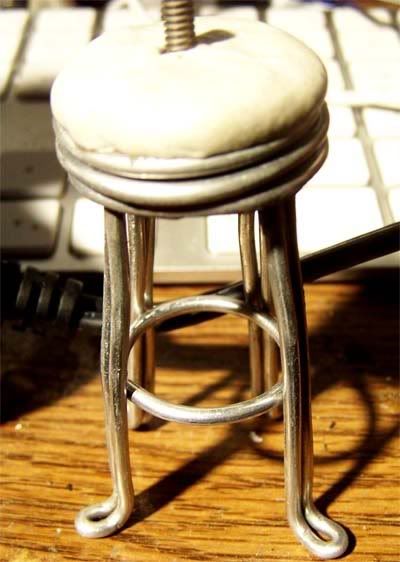
Final assembly and cleanup. Seat cushion made from 20 minute Kneadatite A+B epoxy putty (gives me more time to sculpt it, plus a better color to paint later). The ring is hotglued to the legs on the underside, where it hopefully won't show, and the gap is hidden behind one of the legs that will be in the front. And we're done. Total time, about 1/2 an hour. Schaaaa-weeeet! 

Friday, June 13, 2008

Stool sample

Photobucket
I've just made my first prototype barstool. WOW, what a hassle!!!! Never in my life have I struggled and wrestled and fumbled with so many flipping, flopping fidgety little pieces of wire as they refused to do my bidding. It was like holding down an overturned cockroach while trying to glue something onto all its legs at once.... (sorry!) It's been about 24 hours since I first started this little job, and it's required an immense amount of problem-solving skills --- approximately equal to that required for the REST OF THE FREAKIN' FILM SO FAR!!! Looks pretty wonky, doesn't it? Heh... wait till you see the flipside:
Photobucket
Sorry, seeing this is bringing back the pain and suffering it took to make this crazy thing... I need a minute.

Photobucket
Ok... I'm better. Here's a little pile of legses I bent up last night.... enough for 5 more such monstrosities. I can only hope it gets easier after the first one...

It should actually, because I've now devised a nice little jig that I can assemble the parts on. Still need to come up with one for gluing on the little ring underneath though... extremely FIDGETY.....

(Oh, and don't miss the other new post directly under this one... I kind of buried it right after making it)

Building a better foot....

Photobucket
Yes friends, it's time once again to geek out over minute details that most people would never even notice, but that mean all the difference in the world to a stopmofo! Here you see my latest - and most successful - attempt to grind down a 4-40 thumb nut into the smallest, most essential piece it can possibly be to function as a foot in a puppet. Comparison with an unground nut above. It's necessary to widen the channel this much so I can fit two strands of 16 guage wire in there, and to me that's the minimum for good solid attachment. I've heard of people drilling into small blocks of aluminum or brass and threading a tie-down hole, then drilling another hole to epoxy the leg wires into, but I just don't like to rely on nothing but an adhesive --- especially for such a critical joint. The ankle has to bear all the weight of the puppet and at some extreme angles to boot! 
Photobucket
Another size comparison, this time including Tom's foot (made from an unmodified 6-32 thumb nut). This design is much more compact.... and I think I can just put a little bead of JB Kwickweld into the channel before wrapping the wire in place.... doing away with all that excess grey matter that bulges out on the sides and makes the foot so much bulkier. Here you can see that two wires fit nicely after grinding. That means I can use 3 or 4 leg wires and they'll all be firmly attached. In fact, the only reason I'll really need any kind of adhesive is to keep the nut from being able to spin. 
 Photobucket
Photobucket
A shot from underneath... dig the nifty funnel shape that helps you get the end of the tie-down screw in place as you fumble around there under the table.
Photobucket
Looking at this shot, I see I could remove a good deal more brass before having to worry about hitting the threading - but that would be a lot more work for little added benefit. I now feel like this piece of brass is as small as it can be.... the perfect functional foot piece. All there is now is a sleeve of brass that's threaded inside with a slight flange at top and bottom to help hold the wires in place. It's hard to imagine a different design that would be as effective (at least to me, with my fetish for always making a good solid physical connection that's then just aided and abetted by some adhesive). It takes a surprisingly short amount of time to do this really... I was expecting a lot more effort and time spent, but when I did a few and got my techniques figured out, it only takes about 10 minutes (part of it is hand filing with a round file to make room for the Dremel grinding stone, which won't fit otherwise). 

Tuesday, June 10, 2008

Made a new banner, and Ordered some stuff from McMaster-Carr....

Photobucket
Recently Marc Spess emailed me about making a banner for my blog to post on his new Stopmotion Magic site. I don't really consider myself much when it comes to graphics, but I have learned a few things in Photoshop over the years, and I happened to find a couple of great images that really work well together. I'm pretty proud of this one. Be sure to check out the site, it looks like a great start! He's basically creating a vast stopmotion empire all on one host server, and members can create their own blogs and sites. Pretty cool.
Photobucket
My tie-down supplies were getting pretty depleted, plus I wanted to see about using some smaller thumb nuts for feet, so I placed an order from McMaster-Carr - a veritable Mecca of seemingly unlimited supplies for us stopmoes! Unfortunately, most of my discoveries were rather disappointing this time around. The picture above is a size comparison between a 6-32 thumb nut (on the right) from Smallparts.com and one of a 4-40 nut from McMaster. I was hoping it would actually be a little smaller, making for smaller feet, but it looks like they use the same size blanks as the 6-32 nuts, just drill a smaller hole in it. *Sigh* - oh well, at least it still makes for smaller holes I need to drill in the set!
Photobucket
Here you see my attempt to grind them down a bit smaller. I also picked up some 4-40  threaded rod , because I have yet to find 4-40 screws that are long enough to use for tie-downs. It might be a bit hard to make out, but I threaded a bunch of thumb nuts onto one of the rods, tightened them against each other so they don't move, and went to work with the Dremel to flatten two opposing sides. I also widened the channel a bit, because it's a little too small to fit two wires into, as I posted recently. 
Photobucket
This is the result.  Frustratingly, the wires end up larger in diameter than the nut itself, meaning all the grinding I did was essentially useless! I suppose I can grind down the inside part of the channel though, THAT should actually make a difference. Plus I found I could remove a bunch of excess brass at the top of the foot, which does streamline the profile a bit. At least THAT'S something! 
Photobucket
And here's another disappointment - I was excited about McMaster-Carr's selection of annealed aluminum wire (all their aluminum wire is annealed, making it good armature wire, though it seems to be a bit stiffer than armature wire sold in art shops for sculpture). Even in this small pic, you can clearly see the endless stream of nicks all along the entire length of the wire! I had received a roll like this from them before, but was hoping it was just a fluke - some kind of factory reject that somehow made it through quality control... but both rolls I ordered this time are nicked like this! So no more ordering wire from them for me! Dammit, I have no other supplier for the sizes smaller than 1/16"... and I like to use something around 1/32" for hands/fingers. I suppose I just need to keep using the nicked wire until I can find another source. 

Very disappointing in some respects, but I still consider McMaster-Carr a great source for lots of other supplies.... I also picked up some epoxy putty and a tube of Pliobond 20 flexible contact cement that I think will be a good substitute for Barge.... though it's made from a similarly toxic solvent. Oh well, at least I got this one in a tube rather than the giant can with brush-in-lid like I have of Barge (well past its shelf life -  it's getting really stiff and rubbery.... very hard to use these days!)