
Showing posts with label bar set. Show all posts
Showing posts with label bar set. Show all posts
Wednesday, July 01, 2009
Push comes to Shove - my entry for StopMotionMagic's June contest
Unfinished, but the deadline crept up on me so I posted what I have. This is actually just the live feed from the Lumix, complete with Antishake icon up in the left corner and low res artifacts galore. After I get the scene finished I'll post the high res version, now locked firmly in the innards of the camera until I can wrestle it out. This is my first time animating 2 puppets interacting, and it's a lot of fun. Oh and on deadline night after hours of animating and encoding and uploading, I forgot to edit out my false starts on the beginning, so just ignore the first 2 blips. Heh.. yeah, I was gonna have bartender Ahab in there, but took him out when the deadline loomed too close and I decided to go with 2 characters rather than 3.
Marc and John provided the prompt "Puppet Needs a Drink" - and I wanted to also get in some more Physical Theatre exercises along the way, so I came up with a scenario to explore the idea that physical interaction between 2 characters can be broken down into variations of pushing and pulling.
There was quite a flurry of activity on the contest this month, including an incredible entry by Nick Hilligoss. Check the thread if you're interested. The link goes right to the top of page 11, where John compiled all the links... that's the place to check unless you want to read a long and rambling thread with clips interspersed randomly throughout.


Monday, May 04, 2009
Skulkin take 2
I'm getting some practice in... learning to get my animation more under control, so a puppet's movements start to look coordinated and graceful, rather than disjointed and spasmodic. As I begin to get this kind of control I can start to make the movements become dramatic - the next step.
I had a good long conversation with Jay Wojnarowski - AKA 1BigLebowski on YouTube, who is a theatrical actor / director and has received training at Dell' Arte International School of Physical Theatre in Blue Lake California. Maybe you wouldn't know it from seeing what he's posted on YouTube so far, but this guy really knows his stuff!! And, if you've looked at any of his behind-the scenes videos, you know he likes to talk, so I got a good detailed overview from him about physical theatre and commedia dell'arte, which is very closely related to stopmotion - at least the kind of stopmotion I'm interested in. It's the type of training clowns get, and mimes, and silent film comedians.
So I ordered a few books and I'm studying the physical training techniques developed by Jaques Lecoq, who pretty much single-handedly developed these methods (according to his book anyway) - or I should say re-discovered the techniques used in ancient Commedia and Greek Tragic theatre and further developed them.
Jay stresses the importance of the actor in the process.... having been thoroughly trained in physical theater an actor knows how to bring his character to life, and doesn't need permission from a director or writer... he's the main driving force behind the creation of the character and of the drama onstage.
So I'm now changing my focus from researching drama and story to actual performance. Don't misunderstand.... of course it's important to study drama and story, but unless you can express something through actual performance, it's a moot point. Until you're capable as an actor/animator of creating dramatic moments through your puppets, you can't really tell a story with them. So I'm beginning there.
Lecoq puts a lot of emphasis on mask work... training actors by putting masks on them. It frees an actor up... strips away the face and the social persona and puts emphasis on motions of the entire body. I think this is very similar to animating a puppet in a silent performance. So I plan to try some of the exercises he discusses. More to come...
Tuesday, July 22, 2008
Settin and proppin
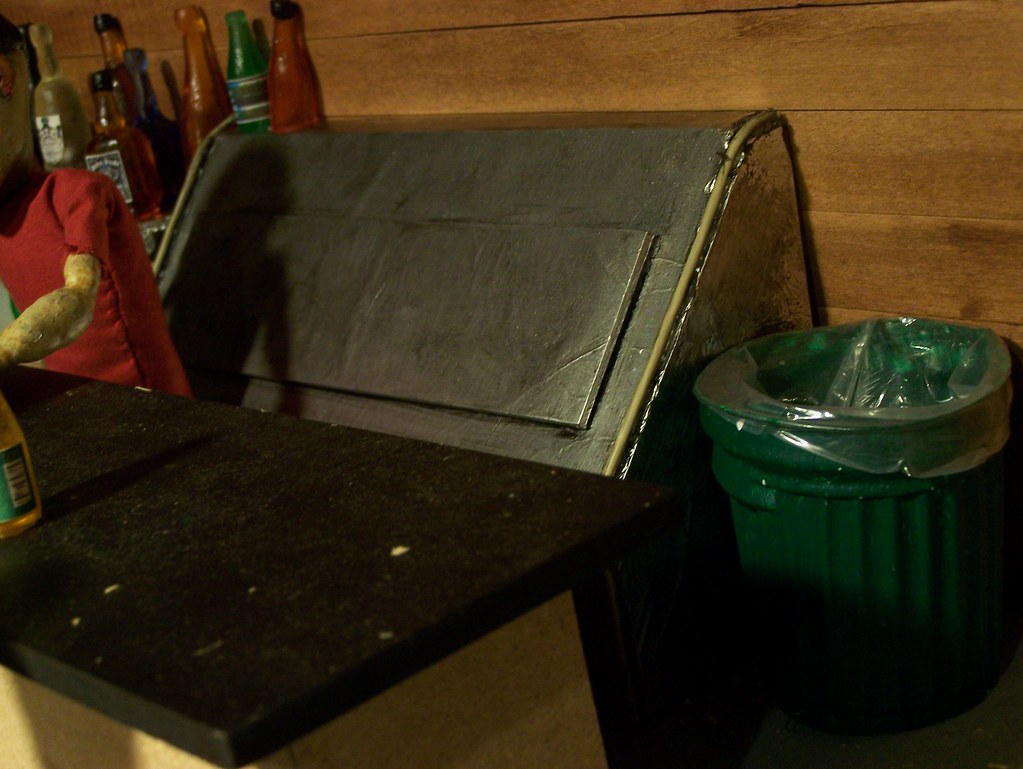
Just to prove I've been doing actual physical work, on top of delving into the absurd... Cosmo got a new (make that heavily used) cooler, and a trash can that began life as a plastic chicken tub.
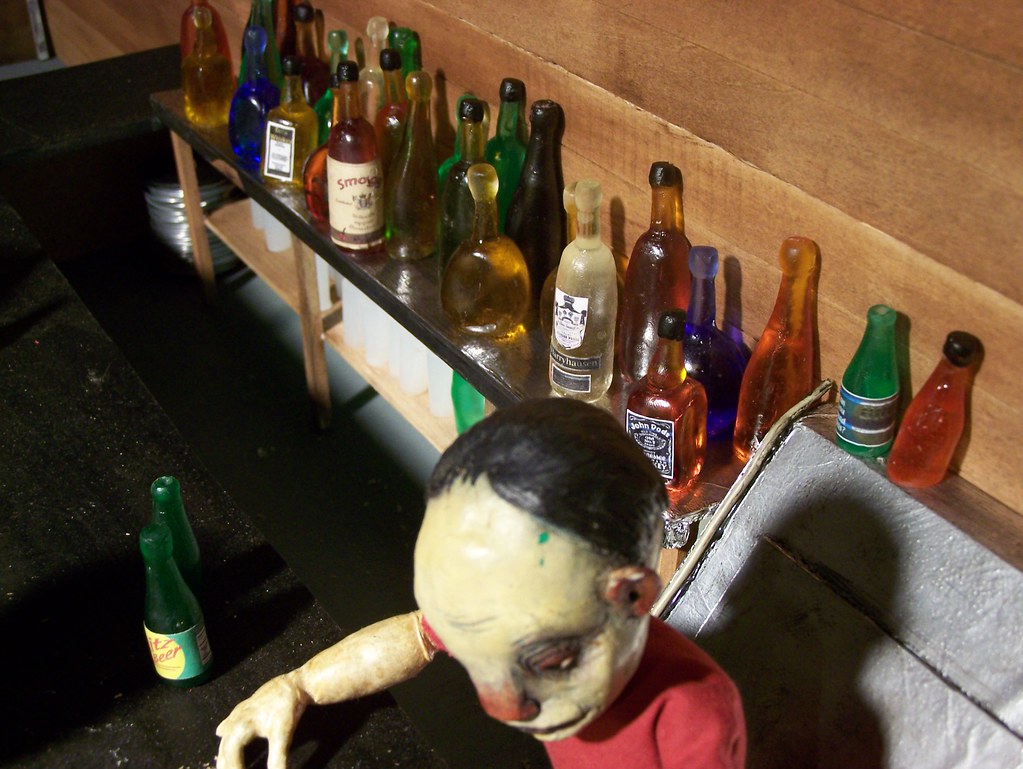
He also ordered (from his 'heavily used bar equipment' catalog) one shelving unit with stainless steel top.

Here's a quick setup just to give the overall feel so far. It all needs detailing of course. Everything will start to come together a lot better when I get a printer and can put labels on some more bottles. Click any pic to see it larger at Flickr (once there click on "all sizes" above the pic). It was easier to shoot these with my crappy auto-everything camera than to set up the Lumix for these shots, and the lighting is awful. Hey, I don't want to spoil you!
Sunday, June 15, 2008
2nd barstool... NOW we're talkin'!!!!
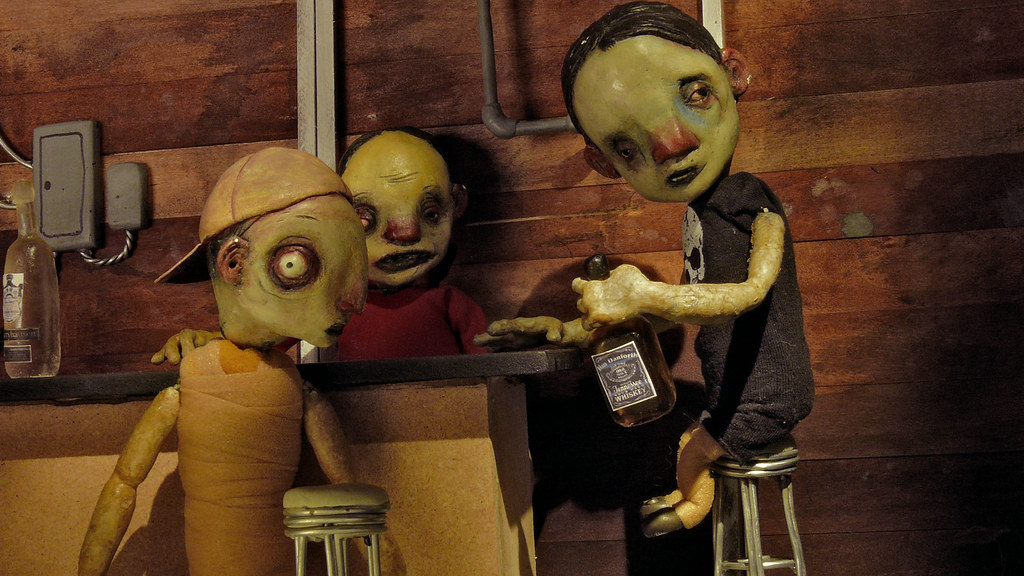
Getting a feel for how the stools will fit into the decor. A little tall --- standers-by need to look up to talk to the seated, but I do like the way their tiny little legs dangle so comically. Imagine the difficulty for them, climbing onto one of these! Oh, and click the above pic to see it in megagigantic size at Flickr. I don't know, I MIGHT have to make shorter stools....
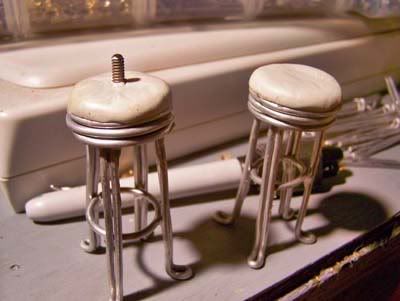
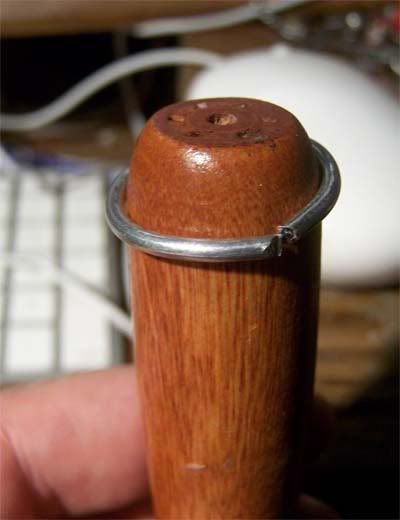

Ok, tonight things went a lot better than the prototype stool last night. I've worked out a methodology that turns it into a pretty simple production line, and gives me much better control over the finished product. Look how much taller and prouder the new stool is in the above pic than its predecessor, all sort of slumped and bedraggled looking. Plus of course it has a nice rectal tiedown on top!
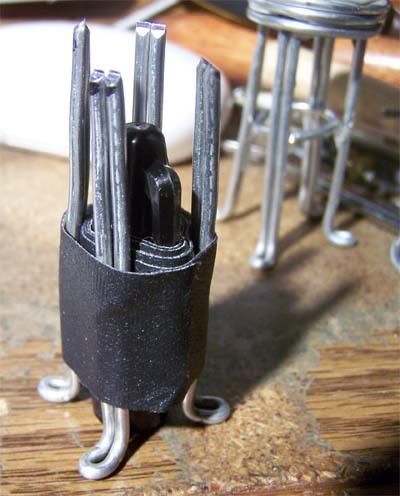

The heart and soul of my assembly line.... the leg jig. No no... it's NOT a sharpie cap with gaffer tape wrapped around it... it's actually intricate state-of-the-art equipment, made of beryllium. Ber ILL eeee yum. yeah.
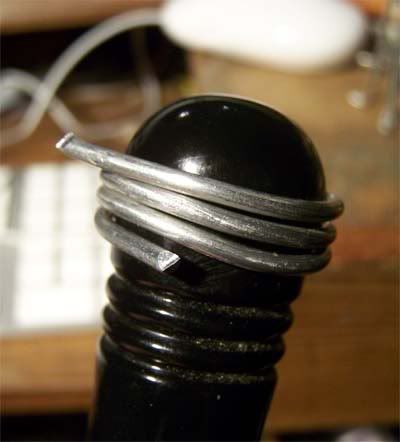

Round-thing-on-top wrapping jig. Ahem. No, it's NOT the end of my coping saw handle! It's made of carborundum. say it. Emphasis on third syllable - carboRUNdum.
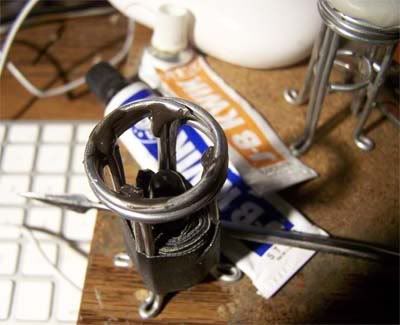

The Kwikweld station. A nice little tack-weld to hold everything together and reduce fidgetty, flippy floppy action as I work. This step might not even be necessary really. Think I'll eliminate it from the workflow. Kind of hard to clean up sticky nasty Kwikweld that likes to run down the legs.
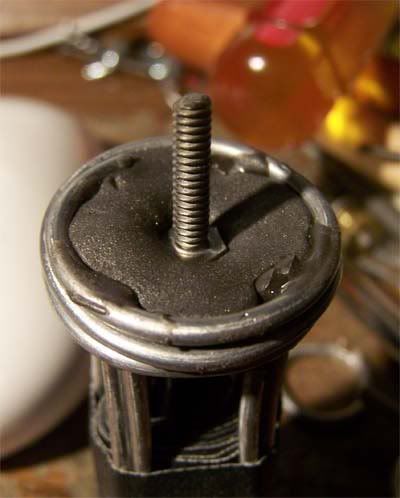

Then a little blob of 5 minute Fasteel epoxy putty with a cut-off 6-32 screw stuck in. This is a purely structural layer, to be covered by the cushion when we arrive at the upholstery station.

Ring-thing bending station. NOT a chisel handle. MAAANG-a-neez, ok?
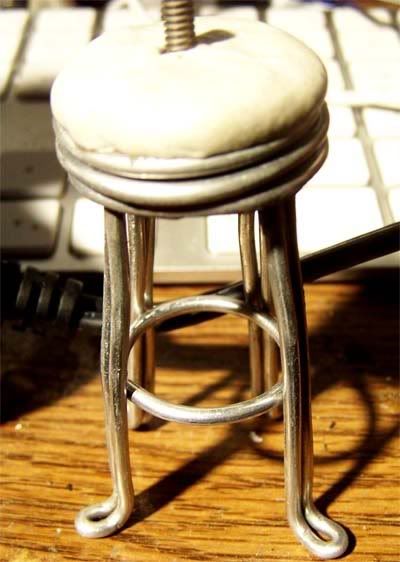

Final assembly and cleanup. Seat cushion made from 20 minute Kneadatite A+B epoxy putty (gives me more time to sculpt it, plus a better color to paint later). The ring is hotglued to the legs on the underside, where it hopefully won't show, and the gap is hidden behind one of the legs that will be in the front. And we're done. Total time, about 1/2 an hour. Schaaaa-weeeet!
Friday, June 13, 2008
Stool sample

I've just made my first prototype barstool. WOW, what a hassle!!!! Never in my life have I struggled and wrestled and fumbled with so many flipping, flopping fidgety little pieces of wire as they refused to do my bidding. It was like holding down an overturned cockroach while trying to glue something onto all its legs at once.... (sorry!) It's been about 24 hours since I first started this little job, and it's required an immense amount of problem-solving skills --- approximately equal to that required for the REST OF THE FREAKIN' FILM SO FAR!!! Looks pretty wonky, doesn't it? Heh... wait till you see the flipside:

Sorry, seeing this is bringing back the pain and suffering it took to make this crazy thing... I need a minute.

Ok... I'm better. Here's a little pile of legses I bent up last night.... enough for 5 more such monstrosities. I can only hope it gets easier after the first one...
It should actually, because I've now devised a nice little jig that I can assemble the parts on. Still need to come up with one for gluing on the little ring underneath though... extremely FIDGETY.....
(Oh, and don't miss the other new post directly under this one... I kind of buried it right after making it)
Thursday, February 14, 2008
Short wall

Welcome to the short wall of my set. Ever been in a bar that looks like this? This is a space that has a lot of history.... it's been used for other things in the past and still bears the markings from those earlier incarnations. The lighting here is horrible... it looks a lot better than these pics show.

I have ideas for cheating the size of my set. For instance, this wall is 3 feet long, while the short end of my set table is only 2 feet. More on that in future installments. I'm having massive computer issues... it's literally crashed 6 or 7 times while I was trying to put this post together! So I'm signing off now... wish I could post more, but it's starting to flicker again....
Tuesday, November 20, 2007
Vintage Veronica
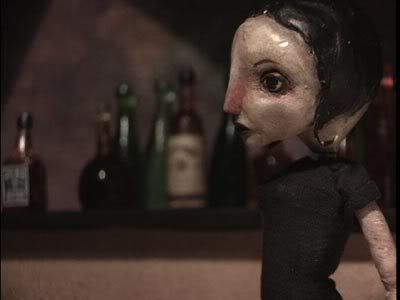
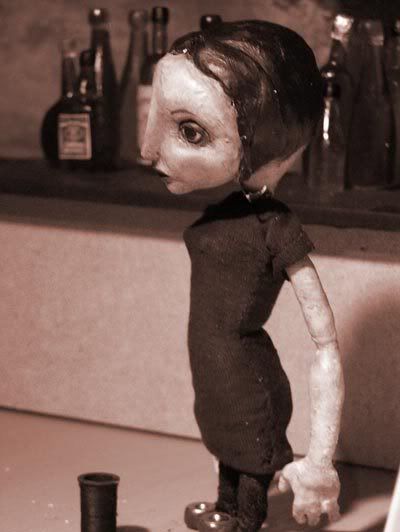
The puppets are all finished now and being dressed. Here's Veronica, desaturated nicely above and sporting lovely vintage Sepia tones below....
Monday, November 05, 2007
Bottlefactory
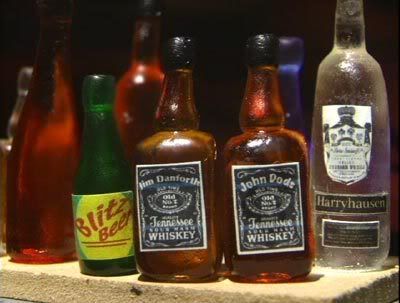
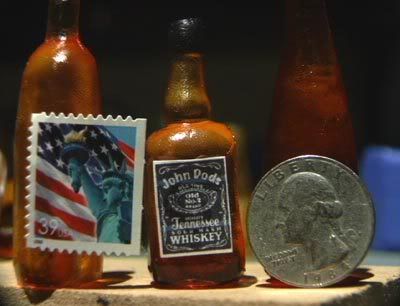
Man, that's tiny!!
I've never really done this kind of work before, especially at this tiny scale!!! But as I go I learn, and 2nd or 3rd generation comes out looking pretty good. That applies to the bottles and to the labels (the vodka label is obviously still under development).
I did discover how to get bubble-free castings without needing a vacuum chamber.... all it takes is stirring very slowly. I also learned to spray the bottles with clear coat before pouring up the silicone molds, and also to spray the castings the same way.... makes them come to life! I only wish I had smoothed down the sculpts with solvent before baking them... I had no clue there were fingerprints all over everything!!
Now I'm learning to steal - um, borrow - elements I find online to make the labels look official and snazzy - a coat of arms here, a graphic element there (in some cases a complete label, with only minor adjustments). The earlier labels are looking downright crap in comparison to the newer ones. Guess it's time to redesign them now! But it's all worthwhile - I'm learning valuable skillz.
Tuesday, October 16, 2007
FLATIRON
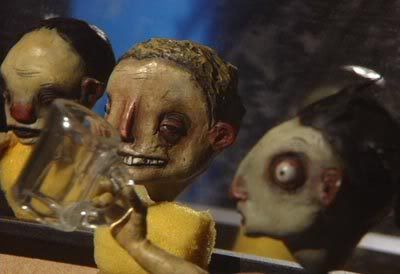
I thought I'd test the ideas of shallow and deep filmic space, which I'm only theoretically familiar with so far. Shallow space is a favorite of Von Sternberg {maybe I've written about him before? Can't recall.... ;) } and I know it can be achieved with a telephoto zoom lens with the camera set pretty far back from the action and zoomed way in. That's how I got the above pic. Notice the way all the puppets look the same size, with no foreshortening of perspective. If they weren't overlapped, it would look like they're all standing side by side for a police lineup. In fact there were about 16 inches between the frontmost and rearmost puppet! I couldn't quite get focus on all of them at once. This technique is used to create a sense that the image is flat like a painting.... it emphasizes the flatness of the screen and doesn't let the viewer feel they could walk into this space.... it distances them from the characters and creates a sense of disconnect between image and viewer.... a favorite among the avant gard because it makes viewers think about the nature of art. The back wall of the set seems to be squeezed right up behind them, and the entire space is squashed flat, with no room to breathe.
Heh... I also played around with some different settings in Framethief, and tried widescreen. But as you can see, all it did was stretch the image out sideways. Also, I apologise for the puppets always being in the same poses.... I don't want to bend them around too much before I pick up my megaphone and shout action.
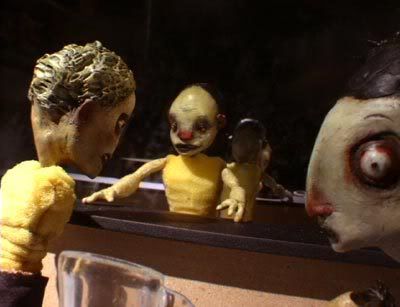
Here's the deep space we're all more familiar (and comfortable) with. I definitely prefer this look. It complements the stopmo aesthetic nicely..... what's the point of building 3 dimensional puppets/sets and then flattening them out photographically? Some people could make good use of shallow filmic space I'm sure, but for now I'm sticking with good old depth! Look how much smaller Cosmo (the bartender) is here than Hoppy (pop-eyed guy up front). His entire head is about as big as Hoppy's eye... now THAT'S some foreshortened perspective! It's funny, I actually moved Hoppy back about 5 inches because it was even harder to get good depth of field (focal depth) this way. This one was shot with a 6mm lens and the camera right up in Hoppy's face.
Setting up for these shots is really showing me the problems I'm gonna have with that mirror. It's hard to find an angle where the camera doesn't show and the light doesn't reflect directly into it and make sunspots. A flag cut from a piece of MDF helps a lot with that, but I can see it's gonna really drive me nuts. If you're gonna have a big mirror in your set, it becomes the most important factor and affects all your other choices. Plus the matte spray I misted it with to make it look dirty can really flare up bright when the light hits it a certain way. Ugly! But I should be able to minimize these problems when I've made some shelves and loaded them with bottles. Then the mirror will only show through here and there. And if it still gives me headaches... out it goes!
One thing I dislike about it is this.... good lighting is more than just how you aim your lights and shape the beams etc.... about half of it consists of what the light falls on.... form, texture, color etc. A flat mirror doesn't give it much to work with!
Sunday, October 14, 2007
Pre-production still
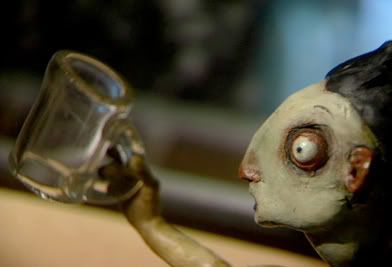
This is one of many such shots I've taken so far, using the camera I'll be animating with and Framethief, to get as close as possible to actual filming conditions. The purpose is to fine-tune the visual elements as I go, making decisions about lighting, exposure, filmic space (deep space versus flat space etc). I'm also thinking about colors, since I have yet to paint much of the set and make clothes for the puppets. Things begin to suggest themselves as you look at the pics. Example; I'm rethinking my plan to make a front wall for the set, and the reflected TV is giving me ideas....
I find this a good way to go into pre-production... often you see things in pictures that you just don't notice otherwise. I find myself taking more and more stills as I go, until it's time to start animation, and then it's not a sudden transition, more of an easing-in... less surprises that way.
Thursday, October 11, 2007
The bar will be opening soon....
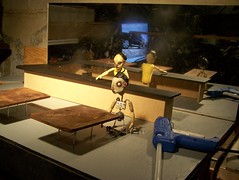
Sneak peek. Sorry for the small pic, Photoshop no longer seems to work for me. But I posted it to Flickr, so click on it to see the full-size version (once there, click on 'All Sizes').
The mirror is a double-edged sword. It doubles the (very limited) size of the set and the number of puppets, but it also makes it hard to place the camera where it won't show up. That puts a bit of a crimp in my montage ideas - I'm extremely limited in terms of shooting angles. I'll try a few experiments.... but the mirror might need to go.
Subscribe to:
Posts (Atom)