
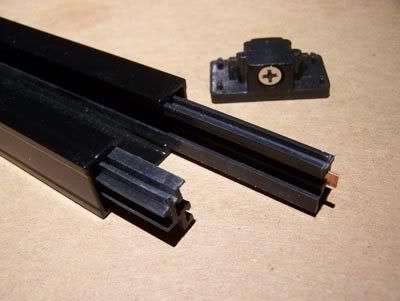
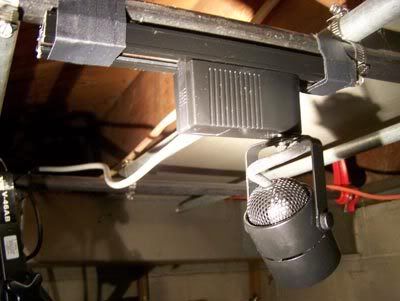
Here's installment #2 of my lightbashing adventure. Tonight I cut up the track into sections to attach to my lighting grid (or wherever) so I can pop these awesome little track lights in them. I used a normal sabersaw with a metal cutting blade - it took a bit of doing, but I was able to cut through the track even with all the crazy parts inside it. As you can see above, there's quite a bit of stuff crammed in there too! And one thing I learned the hard way is it's loose and wants to slide out from vibrations as you're sawing.
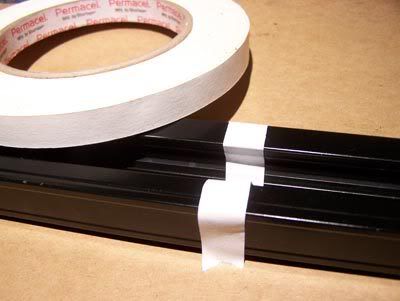
So I taped it in place. Simple solutions are my favorites! Then I was able to saw away to my heart's content without worries.
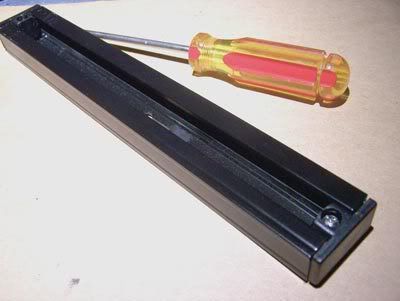
I only had two endcaps, so I used them on one piece of track. The rest had to be bodgered as shown below.
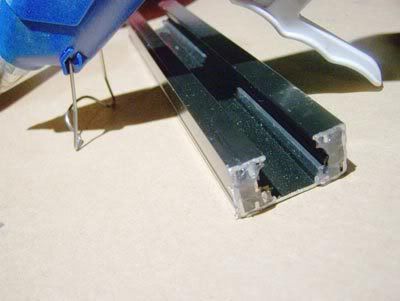
Hotglue to the rescue! Not sure if you can see it here, but I gobbed hotglue all over each end to hold the profile pieces in place. I also filed down the sharp edges really well so I can't gash myself on them.
And finally (another simple solution) - I just gaffer taped the pieces of track to my grid. It's a breeze to pop a light in or out in a jiffy.
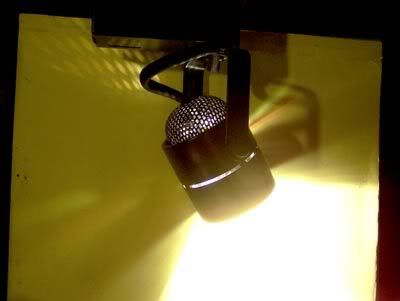
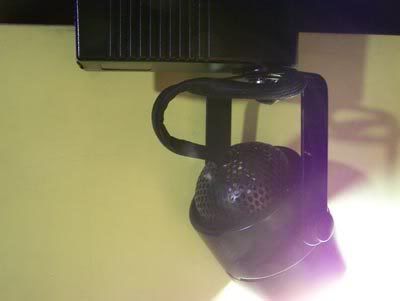
But wait!!!! A bit of a problem. Look at all that spill light!!! That could really wreak havoc in an intricately lit set.
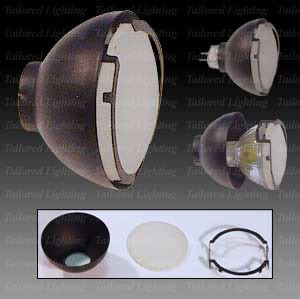
That must be the reason Solux makes these nifty bulb shields...
And sells these "black-back bulbs" (for twice the price of a normal one!!!).
But not for me - oh no! Remember what I said about simple solutions (applies to inexpensive ones too)? A cone-shaped piece of blackwrap around the bulb does just as good (and costs quite a bit less). It remains to be seen though what kind of heat buildup it might cause - I wonder about heat buildup with the bulb shields and black-back bulbs as well actually. It seems like blackwrap wouldn't be any worse than a bulb shield.
And speaking of heat buildup - I notice after one of these lights is on for a while I start smelling this sort of hot plastic odor. It took a while before I realized.... the heat is softening my hotglue fillets that hold the extension cords in place! Oh man.... I might have to do something about that. Bears thinking about anyway.
I've ordered my Solux Framing Art Light kit (just the necessary parts to convert one of my lights if possible) and can hardly wait for it to come in! It's ridiculous how exciting something like this can be! I'll post the third and (hopefully) final part of this adventure when it comes in. See ya then!
3 comments:
Watching with rapt attention!
Love the new profile... "Rules were made not to be broken, but to be outgrown"
Hi Shelly - I'd highly recommend anybody looking for great lights on a budget try this! Following my little demo just about anybody should be able to do this, assuming they have the bodgering skills and are careful with electricity etc.
These are far and away the brightest, whitest (and smallest) lights I've got, and at a fantastic price!!! And so versatile too, with the range of beam spreads available just by swapping bulbs, and the accessories available through Solux. For the price of one really good professional studio light you can have half a dozen of these puppies! And you probably couldn't tell the difference quality-wise!
An upcoming final part? Just go with the flow. Whatever it takes to tell your adventures into studio light 'bodgering' or any other kinds of future bodging.
Seems like, one can home brew some of those sensual Solux accessories. Maybe not as purty looking. Perhaps some analyzing & pondering after if you get any of them.
I know UK words too: GRUB Screw = Set Screw (USA)
-LIO
Post a Comment