Monday, September 21, 2009

5 of 8

5 of 8

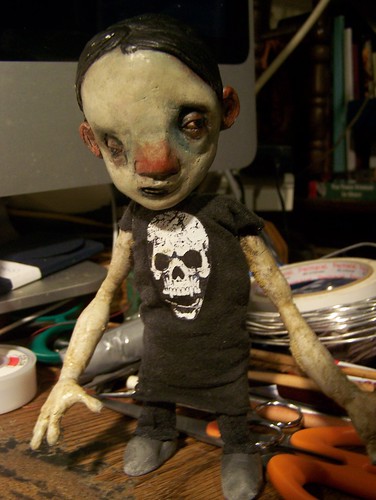
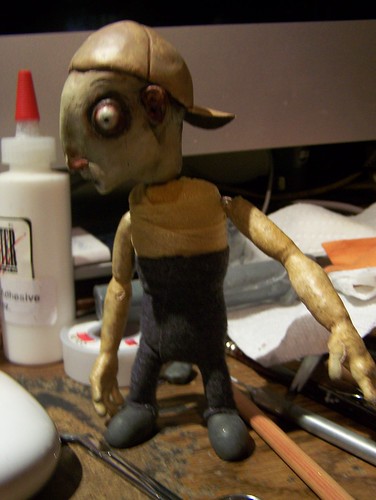
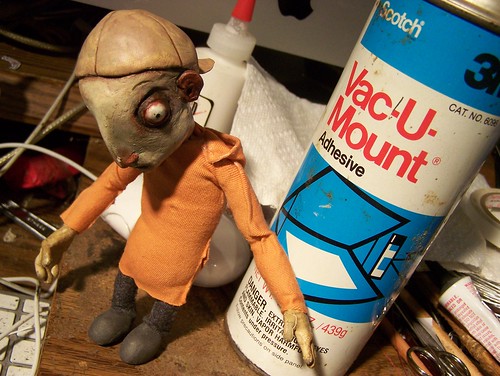
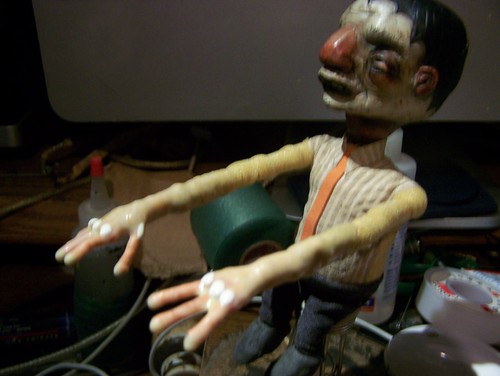
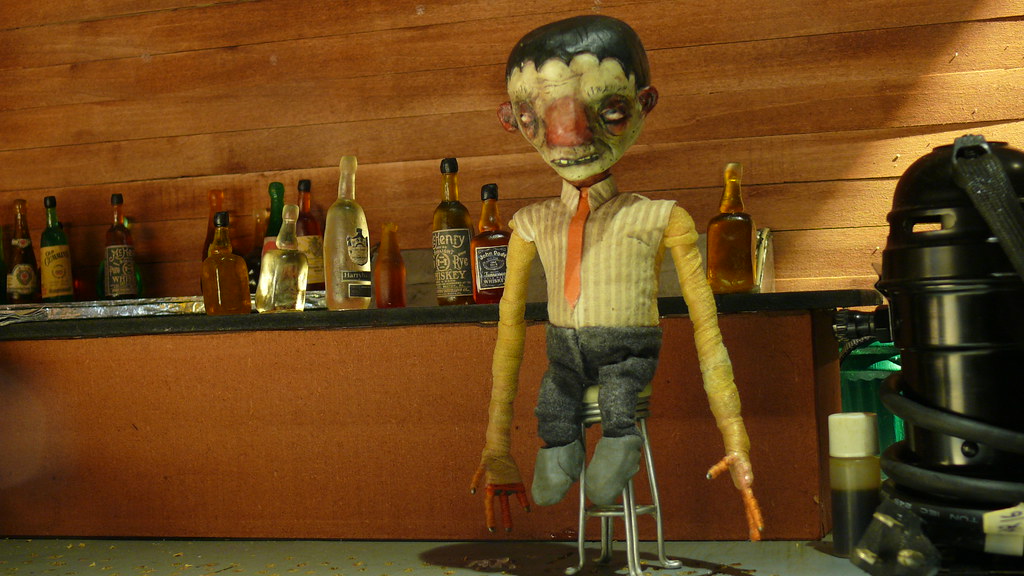
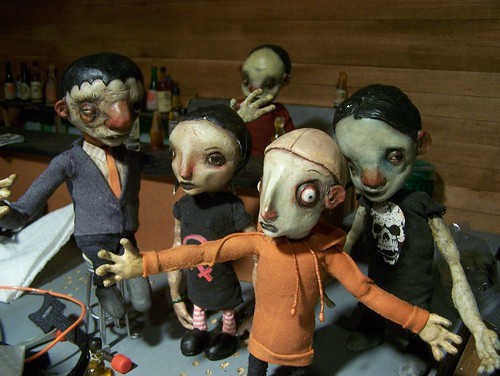
5 of my 8 actors now dressed to kill.
Duckbutt

Getting ready for his pants.

Tom is a Rocker

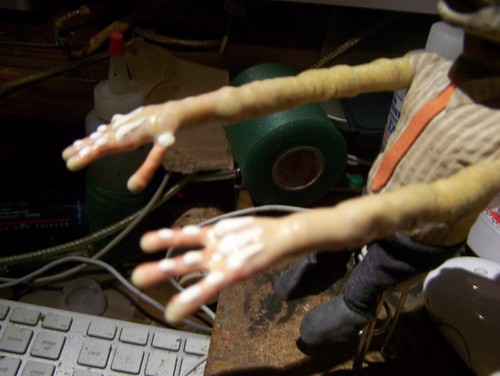
Tom is a rocker. He still just needs his wristbands. I've coated all the formerly sticky rubber arms with a clear coat of the new No-Tac Acrylic Adhesive from Monstermakers (well... new to me, not new to Monstermakers). It'll be nice when they no longer stick to each other and pull chunks of paint off when I pry them apart.

Oh, I should mention... one little trick I figured out... when you get gobs of glue spreading out all over a jacket or something you can scrape it off after it's dried with an X-Acto knife. If you kind of try scraping in different directions you'll suddenly find the right one and it will almost magically lift off. The scraping can also put some nice wear on the cloth... I don't like that bright, too-clean kind of thing - I want some clothes that look like old favorites.

Sunday, September 20, 2009

Hemmed, Cuffed and Drawstrung

Hemmed, Cuffed and Drawstrung

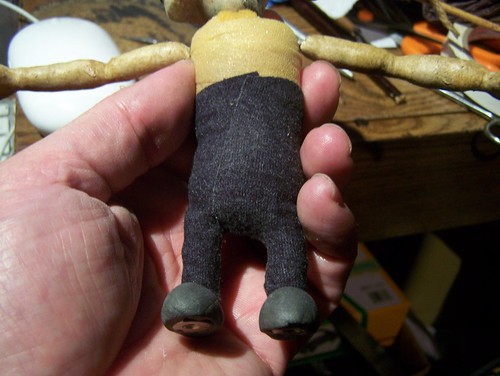
It's kind of weird how this is working out... I now have a buildup puppet with visible seams down the sides like a foam latex puppet!

Friday, September 18, 2009

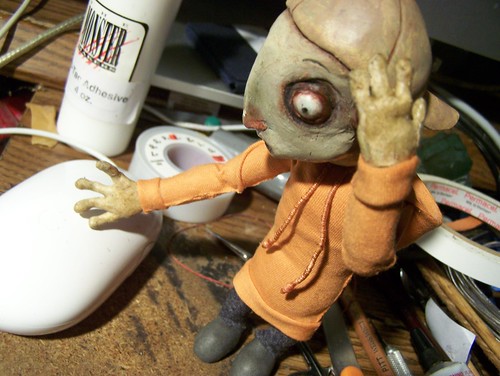
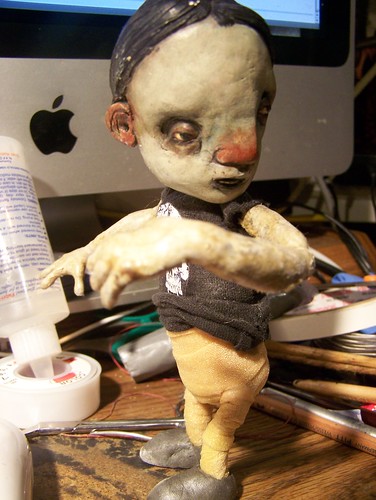
Happily, Hoppy Has His Hoodie

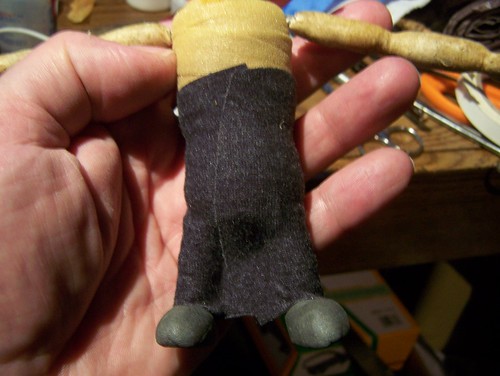
pants are a breeze...
Trying something new. I just hit one side of the fabric sheet with some spray adhesive and let it tack up for a while, then wrapped it around Hoppy all nice and snug. Made sure to pinch it tight in the space between his legs so it gets good adhesion along the seam lines.
Excess cloth trimmed off
Trimmed away the excess fabric.
Hoppy has pants
This worked extremely well!! It's great for cartoonish puppets. Just make sure to use STREEEEETCH fabric!
Hoodie
Made his hoodie the same way as the pants. I screwed up and got weird wrinkles in the sleeves, but then decided it looks good. Too bad I didn't think to do it on purpose... next time I'll allow for it from the get-go.

Puppet clothes were never simpler to make!

Monday, September 14, 2009

Tonic finished!!!

Tonic finished

Another puppet dressed and DONE!!!!


Don't dip it, drip it!

I've found there's no need to fill a tall jar with latex and dip hands/arms or whatever.... I bought this Latex Paint Base from www.MonsterMakers.com with handy dandy applicator tip... turns out Latex Paint Base is actually just very thin liquid latex with no added filler... same as Balloon Rubber. Just the stuff for putting 6 or 7 coats on for puppetskin. Also, doing it this way you don't get as much of the webbing between the fingers that needs to be constantly poked away. Just gotta watch those fingertip drips and shake them off or touch them with something to make the drips fall away before they dry.

Knucklehead

Sorry this is a bit out of focus. But you can see I've added drops of latex for knuckles. I only have very thin runny latex (Latex Paint Base from Monstermakers) and really thick latex (Foam Latex base), and neither was suitable for this - so I mixed them together. The mellow blend worked beautifully!!

More knuckles

I've added more detailing.... tiny knuckles on the fingers, plus tendons drawn over the backs of the handses.

Tonic Hands Painted

PAX painted using Monstermaker's No-Tac acrylic adhesive (hey Monstermakers, when does my check get here?) mixed with acrylic paint. An undercoat of raw umber followed by a mix of raw umber and white stippled on with a bit of paper towel, finally followed by a thin glaze of more raw umber. Then powdered with some corn starch to kill the (supposedly non-existant) tack and shine. It comes pretty close to matching the paint job on the head I think.

Looking at it now, most of the knuckles are too subtle... only the pinky knuckle on his right hand is big enough (and I thought that one was too big!). Those nasty gnarly arms will luckily be hidden under the sleeves.

*****EDIT*****

Just wanted to add a note here for future reference.... after a day or so the No-Tac adhesive dried with NO TAC!!! My other puppets' arms have a tendency to stick to anything they touch... ESPECIALLY each other!!! With the result that, when I detach them, sometimes big chunks of painted skin come off... not good!!! Plus dirt likes to stick to them. But the hands I made for Tonic (first time I've used the no-tac adhesive) don't feel AT ALL sticky! I wonder if that means I don't even need to powder the anymore? Need to do a test....


Monday, September 07, 2009

Getting dressed for the show

Tonic half dressed
Click the pic to get to Flickr, then click on All Sizes above it to see it bigger

Finally Tonic has some clothes!!! I know it's been a long time... you might have forgotten who Tonic is... or my newer readers probably have never even seen him naked! To refresh the memory, the name is short for his full name Catatonic Drunk (working name only... not the character's actual name in the film). This is one of the heads Scott Radke sculpted for me long ago, that I promised to grow little homunculus bodies under and bring to life... the stuff we animators do, right? I made the bodes some time ago but hadn't made clothes for most of them yet. Now it's time.

So far everything is just cut and wrapped around Tonic and held in place using Fabri-Tac glue. It's working quite nicely I must say. I always try to use stretch fabric for puppet clothes when I can... it can help them stretch into those awkward poses they otherwise couldn't reach. Where edges of cut fabric will show, like the tie, I strengthened it first with some Elmer's glue so it wouldn't fray. Also, having recently learned on the message board that it's common practice to never use white I washed over anything white or close to it with a brown acrylic wash - same thing I did for the bottle labels and the posters recently. I think I need to find some kind of dye for fabric though, or something that doesn't stiffen it as much as acrylic paint does. There are times when you want to stiffen the cloth, but for a shirt or something you want it flexible. And stretchy.

TonichandDon't make me repeat what I wrote under the other pic!

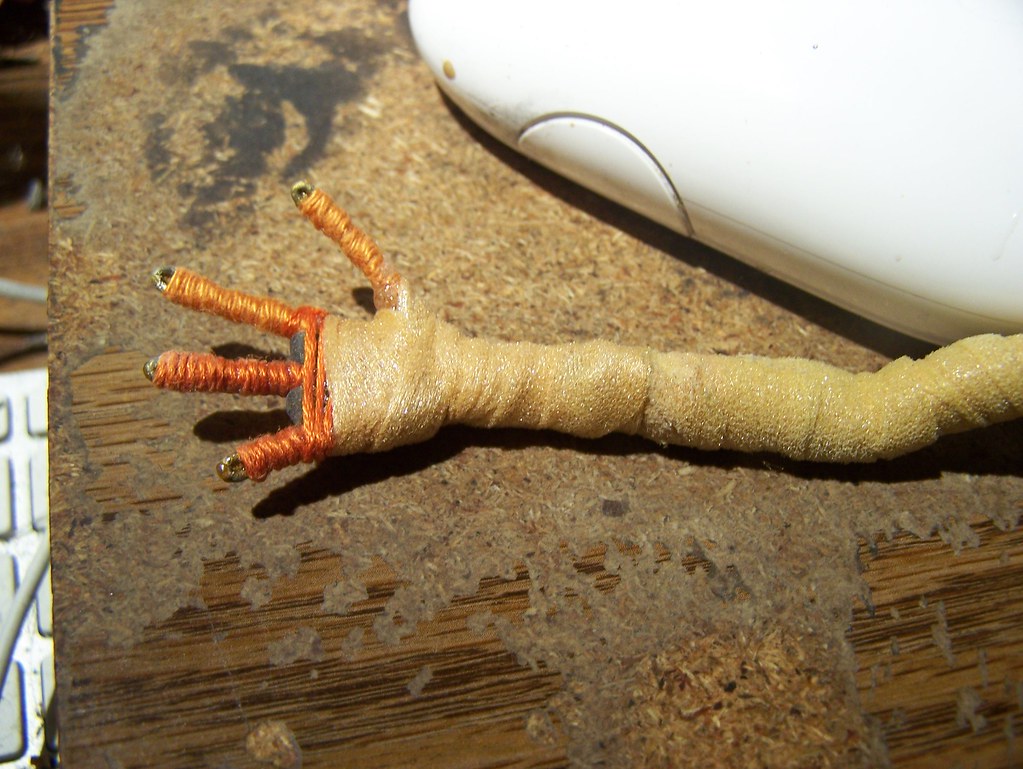
Here's a closeup of one of his hands. This time I decided to wrap the fingers all the way to the wrist before creating the palm part. I used Fabri-Tac again, wrapped two layers of cotton string on each finger, and then made little tiny epoxy putty wedges for in between the fingers... then I covered the palm section with fabri-tac and wrapped more string around it all to hold everything together. Over it all I wrapped a little of the infamous athletic underwrap. After dipping several times in latex and painting the hands up I'll just have to make him a jacket and he'll be done. But geeze Louise!!! This is taking so freaking LOOOONG!!!! Mostly waiting for things to dry. I think for the rest of the puppets I need to get an assembly line method going.

More to come.

Thursday, August 27, 2009

Working on the wrong movie - and drawing random caves

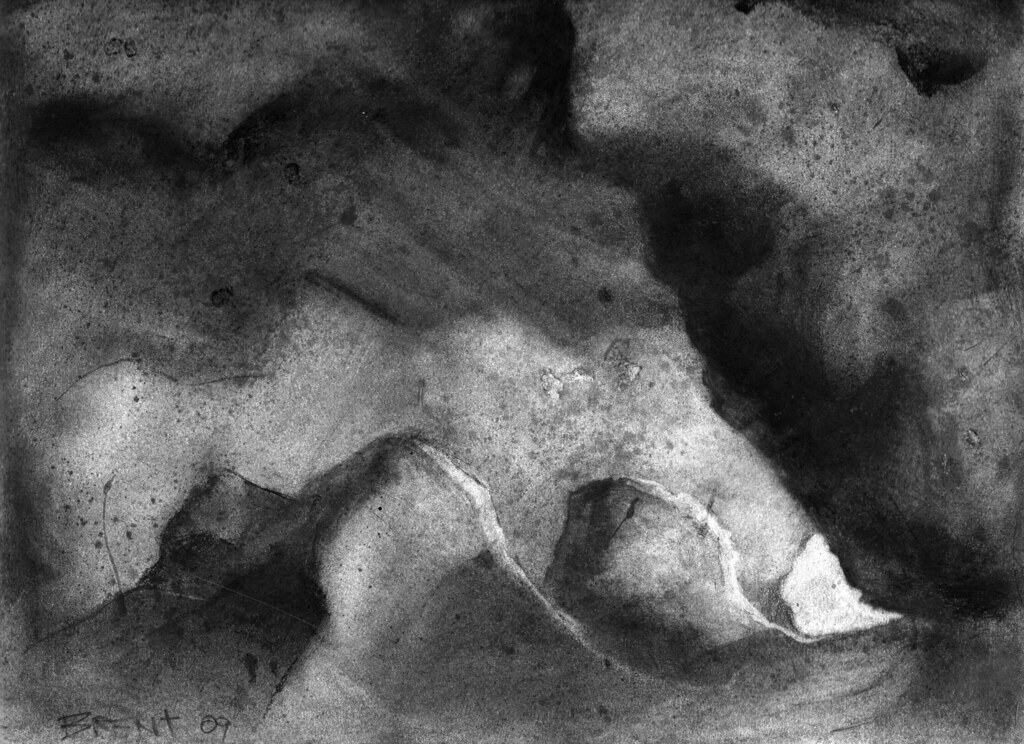
Cave001
Click the image to see it bigger on Flickr, then click on "All Sizes" above it

I am getting some work done on my film, but I've actually been spending a lot more time working up the scenario for my next one. I'll have some images to post soon for the bar flick though, promise! (And no, the image above is NOT from that other film, it's just a random drawing I did to play round with my new charcoal and carbon drawing kit!)

Meanwhile, I've also been drawing! I recently read The Art of Ray Harryhausen and discovered he did his key drawings using charcoal powder, compressed charcoal and carbon pencils with highlights pulled with various types of erasers, and decided I had to try it. Hard to believe, but this is actually the first time I've rendered a complete environment with full-on lighting/shading effects. Feels like the beginning of a new era.

This began as just random marks on paper... when my new materials came in as usual I was too excited to actually plan out a drawing, I just started smearing things around on a piece of paper... but what I've discovered (as I had hoped) was that this method allows almost unlimited redos... if you don't like something just erase it and rework. It doesn't feel quite finished yet, but I decided it was time to scan it in case I completely screw it up after this.

Here are a few fun links to tutorials on drawing with charcoal and carbon pencils... this is some awesome stuff:


Thursday, August 06, 2009

Quakehold! Museum Gel for animating water, and a fix for the Solux Framing Art Light

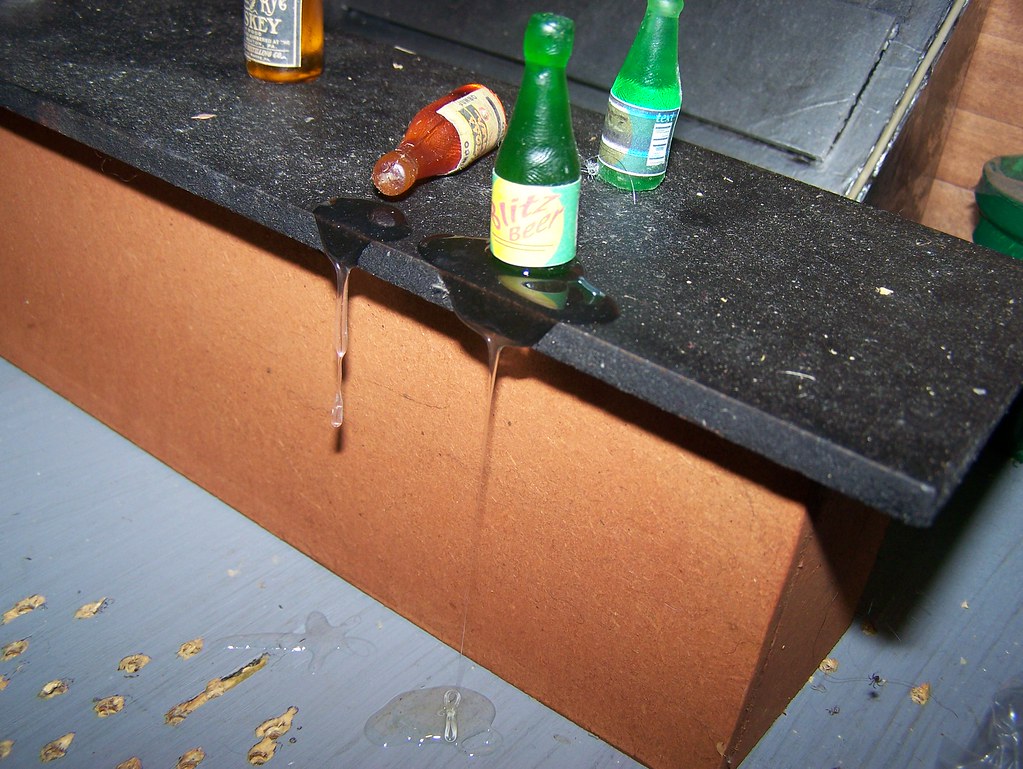
Gel spill
(Click image to see it at Flickr, then click on All Sizes above the pic to see a bigger version)

Hmm... wow that pic is UGLY!!! Amazing how using the flash makes every speck of dust glare impossibly bright! And I didn't even know I had a little arachnid friend living on the set till I saw him larger than life in closeup. Egad!! Try to ignore the nastiness and concentrate instead on the beerspill effect (even though it's clear rather than beer colored). Hey, this whole shot would look a lot better through beer goggles!!

Anyway, the (1st) point of this post is to tout my discovery for water (or any liquid) animation... Quakehold! Museum Gel. Crystal clear, non-toxic, and easy to form into spills or drips that hold their shape for a long time. It will sag over time, but it takes a few hours for a ball to revert to a puddle. Easily enough time for animation. It can also be tinted by adding probably any kind of transparent tint. I tried it with some of the resin tints I used for the bottles and it works great.

Quakehold! also makes a Museum Wax that's just microcrystalline wax... a very sticky yellowish translucent wax that's perfect for sticking props to sets or even to puppets hands. It's a good deal stickier than the so-called Stikky-Wax I bought some time ago. I consider it an essential for any stopmoe to have on hand.

One thing I discovered quite by accident that needs further testing.... I had a blob of the gel sitting on a paper envelope for a long time.... probably a week and a half or so, and noticed a big clear stain spreading around it... like an oil stain. I peeled the gel off the paper and it seemed like it was a good deal stiffer than it normally is... to the point that you could maybe sculpt forms from it and they'd hold their shape long enough for animation. Not sure on that one... I decided to put it to the test and placed a larger glob on a piece of paper last night, but so far it hasn't leached very much, just the beginning of a spreading stain. It must take longer than overnight. But Im not sure if it was really much stiffer than the regular stuff.... more experimentation is needed. I'm also not sure why you'd need it any stiffer.... this stuff is perfect for animating spills or drips or pours just as it is. Seemed kinda neat is all.

Also, at just about the same time as I made that accidental discovery last night, I made another one.


This is my Solux Framing Art Light, a great little device that casts a very controllable spotlight effect. The only problem I had with it is that it was rather... well - droopy. In fact I used to say it was built like a Dr Seuss telescope. Kind of tricky to get it aimed exactly where you want. I was looking at it last night thinking I ought to find some way to secure it better, and I had an idea about bending a couple of strips of metal to use as clips. I started looking around the basement to find some suitable metal, when I ran across the rotisserie attachment from my convection oven... basically a useless chunk of metal that I had kept around in case I ever found a use for it! Hah! In a few minutes I had bent the pointy tines (prongs... whatever they are) into suitable positions and found that it's just what the doctor ordered!!! The steel has just the right amount of spring to it too... by tightening it a little too much I get some good tension on it. Now the Dr Seuss telescope is more like an arrow-straight ramrod!! And just incidentally, I found the steel rod is also a great handle for adjusting the light... I used to burn my hands on it all the time!!