Friday, September 25, 2009

Costume dept. has been working overtime

Fully Dressed Cast

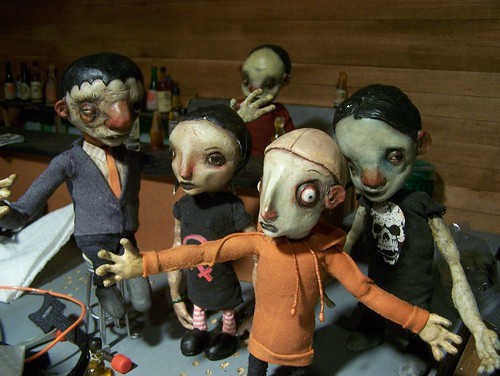
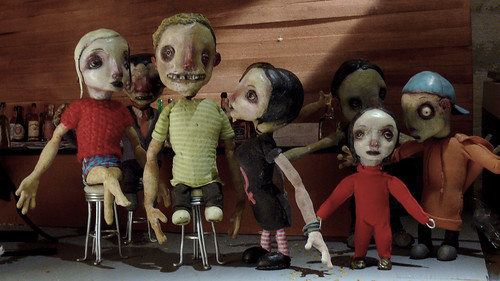
They're all dressed now, aside from a few accessories here and there (plus hands and feet for the littlest one Cindy Lou). As I went they just kept getting brighter and more colorful. Shelley, you might recognize some of the fabric I used on the last 2 puppets... you sent it to me.

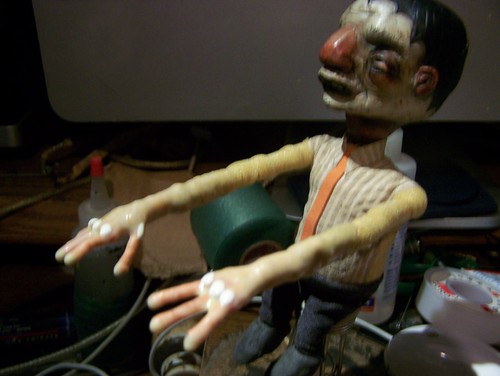
I'm developing puppet personalities for them, and complex relationships/dysfunctions, as well as working on a lighting technique that minimizes the slight shininess of the heads and makes the faces fully visible in spite of the extremes of light and dark on them all. Looks like my best bet will be a pretty diffused "cartoon" lighting setup, mostly reflected light.


... Here's a pictorial tutorial on how I've been making the clothes lately....
Photobucket
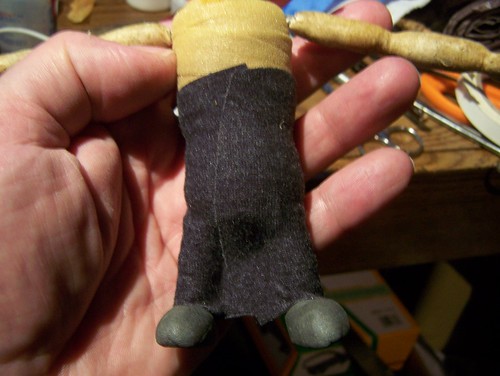
First I cut the cloth to size and tape it to something for spray adhesive treatment. Note the blue Nitrile glove. Give it a pretty heavy coat of spray adhesive. I do this part outside.


Photobucket
Here I'm pressing Cindy Lou against the back part of her costume.


Photobucket
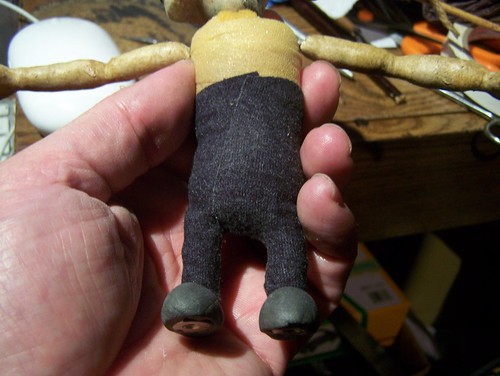
And pressing the front part into place. Care is essential. I press tightly all around the puppet, trying to get the seam line as tight as possible. I do this for a while, hoping the adhesive will do its work well. If anything comes apart later I can always fix it up with some Fabri-Tac though.


Photobucket
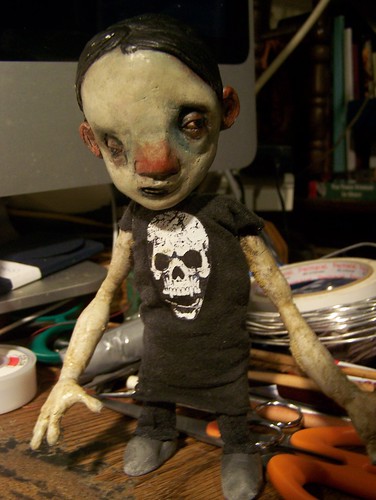
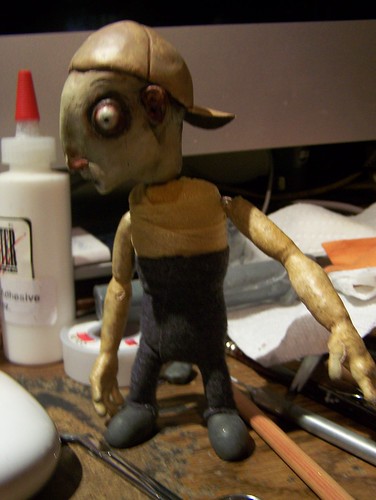
Here she is well into the trimming process. I found this velvet stuff very hard to cut. It also doesn't stretch, so it's pretty unforgiving stuff to work with. Note how I handled the collar... I made sure to put a wrinkle in the right place so it ended up looking like a mock turtleneck. It still needs more trimming though, and I'm not sure I can get as close as I want to. Maybe the dremel with a sanding drum.... ?

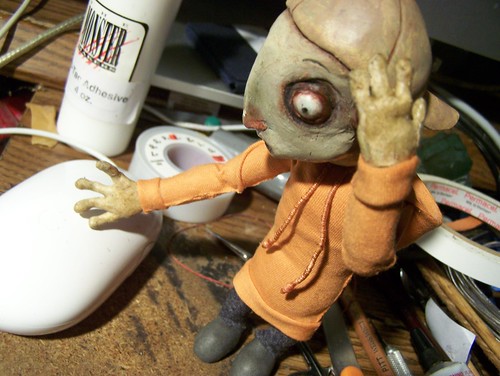
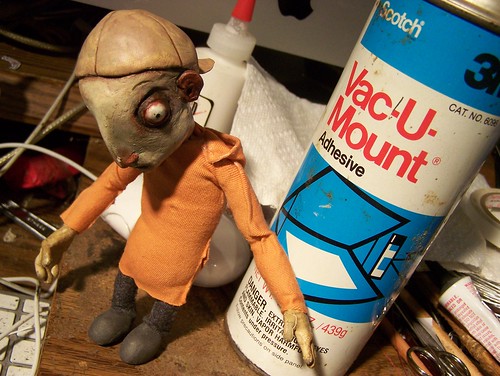
Cindy Lou is a little older than in her former star turn (in How the Grinch Stole Christmas)... she's turned in her pink sleeper for a red jumper and gone Goth.

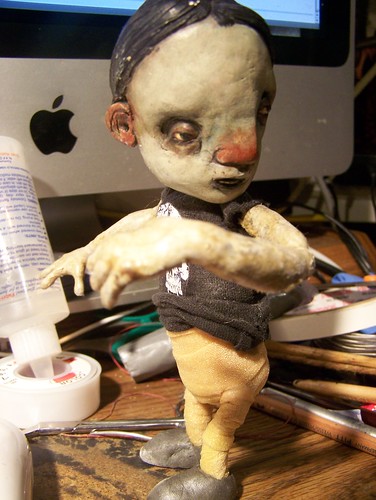
What I'm learning is that puppet clothes don't need to look realistic... in fact it's best if they're not. Stylization suits them well.

Monday, September 21, 2009

5 of 8

5 of 8

5 of my 8 actors now dressed to kill.

Duckbutt

Getting ready for his pants.

Tom is a Rocker

Tom is a rocker. He still just needs his wristbands. I've coated all the formerly sticky rubber arms with a clear coat of the new No-Tac Acrylic Adhesive from Monstermakers (well... new to me, not new to Monstermakers). It'll be nice when they no longer stick to each other and pull chunks of paint off when I pry them apart.

Oh, I should mention... one little trick I figured out... when you get gobs of glue spreading out all over a jacket or something you can scrape it off after it's dried with an X-Acto knife. If you kind of try scraping in different directions you'll suddenly find the right one and it will almost magically lift off. The scraping can also put some nice wear on the cloth... I don't like that bright, too-clean kind of thing - I want some clothes that look like old favorites.

Sunday, September 20, 2009

Hemmed, Cuffed and Drawstrung

Hemmed, Cuffed and Drawstrung

It's kind of weird how this is working out... I now have a buildup puppet with visible seams down the sides like a foam latex puppet!

Friday, September 18, 2009

Happily, Hoppy Has His Hoodie

pants are a breeze...
Trying something new. I just hit one side of the fabric sheet with some spray adhesive and let it tack up for a while, then wrapped it around Hoppy all nice and snug. Made sure to pinch it tight in the space between his legs so it gets good adhesion along the seam lines.
Excess cloth trimmed off
Trimmed away the excess fabric.
Hoppy has pants
This worked extremely well!! It's great for cartoonish puppets. Just make sure to use STREEEEETCH fabric!
Hoodie
Made his hoodie the same way as the pants. I screwed up and got weird wrinkles in the sleeves, but then decided it looks good. Too bad I didn't think to do it on purpose... next time I'll allow for it from the get-go.

Puppet clothes were never simpler to make!

Monday, September 14, 2009

Tonic finished!!!

Tonic finished

Another puppet dressed and DONE!!!!


Don't dip it, drip it!

I've found there's no need to fill a tall jar with latex and dip hands/arms or whatever.... I bought this Latex Paint Base from www.MonsterMakers.com with handy dandy applicator tip... turns out Latex Paint Base is actually just very thin liquid latex with no added filler... same as Balloon Rubber. Just the stuff for putting 6 or 7 coats on for puppetskin. Also, doing it this way you don't get as much of the webbing between the fingers that needs to be constantly poked away. Just gotta watch those fingertip drips and shake them off or touch them with something to make the drips fall away before they dry.

Knucklehead

Sorry this is a bit out of focus. But you can see I've added drops of latex for knuckles. I only have very thin runny latex (Latex Paint Base from Monstermakers) and really thick latex (Foam Latex base), and neither was suitable for this - so I mixed them together. The mellow blend worked beautifully!!

More knuckles

I've added more detailing.... tiny knuckles on the fingers, plus tendons drawn over the backs of the handses.

Tonic Hands Painted

PAX painted using Monstermaker's No-Tac acrylic adhesive (hey Monstermakers, when does my check get here?) mixed with acrylic paint. An undercoat of raw umber followed by a mix of raw umber and white stippled on with a bit of paper towel, finally followed by a thin glaze of more raw umber. Then powdered with some corn starch to kill the (supposedly non-existant) tack and shine. It comes pretty close to matching the paint job on the head I think.

Looking at it now, most of the knuckles are too subtle... only the pinky knuckle on his right hand is big enough (and I thought that one was too big!). Those nasty gnarly arms will luckily be hidden under the sleeves.

*****EDIT*****

Just wanted to add a note here for future reference.... after a day or so the No-Tac adhesive dried with NO TAC!!! My other puppets' arms have a tendency to stick to anything they touch... ESPECIALLY each other!!! With the result that, when I detach them, sometimes big chunks of painted skin come off... not good!!! Plus dirt likes to stick to them. But the hands I made for Tonic (first time I've used the no-tac adhesive) don't feel AT ALL sticky! I wonder if that means I don't even need to powder the anymore? Need to do a test....


Monday, September 07, 2009

Getting dressed for the show

Tonic half dressed
Click the pic to get to Flickr, then click on All Sizes above it to see it bigger

Finally Tonic has some clothes!!! I know it's been a long time... you might have forgotten who Tonic is... or my newer readers probably have never even seen him naked! To refresh the memory, the name is short for his full name Catatonic Drunk (working name only... not the character's actual name in the film). This is one of the heads Scott Radke sculpted for me long ago, that I promised to grow little homunculus bodies under and bring to life... the stuff we animators do, right? I made the bodes some time ago but hadn't made clothes for most of them yet. Now it's time.

So far everything is just cut and wrapped around Tonic and held in place using Fabri-Tac glue. It's working quite nicely I must say. I always try to use stretch fabric for puppet clothes when I can... it can help them stretch into those awkward poses they otherwise couldn't reach. Where edges of cut fabric will show, like the tie, I strengthened it first with some Elmer's glue so it wouldn't fray. Also, having recently learned on the message board that it's common practice to never use white I washed over anything white or close to it with a brown acrylic wash - same thing I did for the bottle labels and the posters recently. I think I need to find some kind of dye for fabric though, or something that doesn't stiffen it as much as acrylic paint does. There are times when you want to stiffen the cloth, but for a shirt or something you want it flexible. And stretchy.

TonichandDon't make me repeat what I wrote under the other pic!

Here's a closeup of one of his hands. This time I decided to wrap the fingers all the way to the wrist before creating the palm part. I used Fabri-Tac again, wrapped two layers of cotton string on each finger, and then made little tiny epoxy putty wedges for in between the fingers... then I covered the palm section with fabri-tac and wrapped more string around it all to hold everything together. Over it all I wrapped a little of the infamous athletic underwrap. After dipping several times in latex and painting the hands up I'll just have to make him a jacket and he'll be done. But geeze Louise!!! This is taking so freaking LOOOONG!!!! Mostly waiting for things to dry. I think for the rest of the puppets I need to get an assembly line method going.

More to come.