Showing posts with label MFT. Show all posts

Sunday, September 16, 2012

Lens wrap-up - why modify when you can cropify?

Clear plastic tub-o-lenses

Lens Rankings:

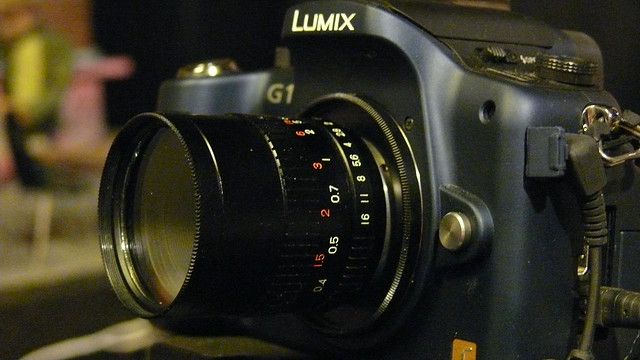
  1. I love my CCTV lenses - the little black plastic ones you see grouped together in the pic at the top. They always have TV in the name. Made by companies like Fujinon, Elbex, Pentax, Cosmicar and many more in the 90's on up. I consider these probably the best kind of lens to use for what I'm doing - at least of the lenses I've tried. These lenses have given me no trouble at all (aside from the fact that the really wide ones require cropping in post).
  2. Next comes my Nikon SLR lens. I like that one just as much I think.  Beyond that my lenses begin to become a bit problematic.
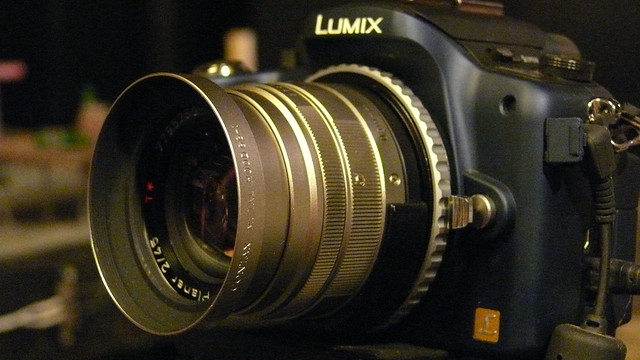
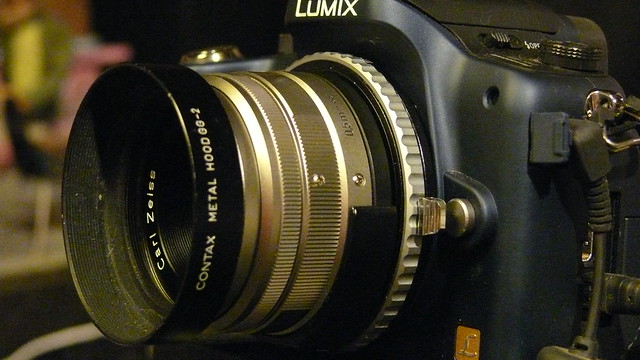
  3. The 2 (silver plastic on the far right) Carl Zeiss Contax G lenses are nearly as trouble-free as the black ones - and they're excellent quality glass - but focusing is a bit difficult (the only problem with them, and only a small one if you have the good adapters - more info below). 
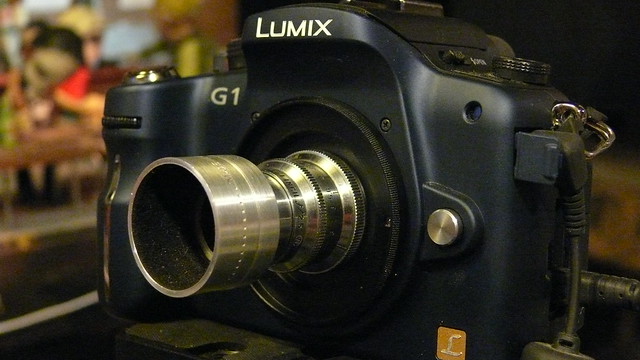
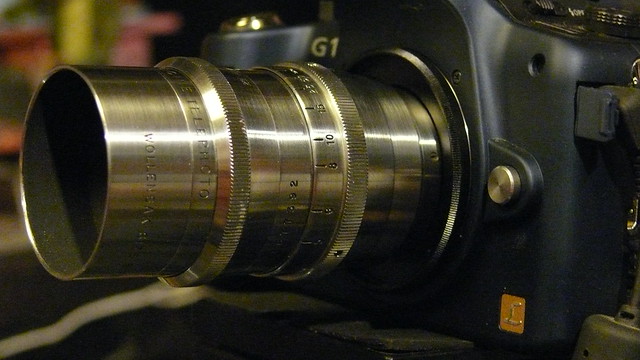
  4. Then the old hefty machined metal lenses (on the far left) made for 16mm movie cameras are too heavy and have poor optical coatings - causing lens flare and color fringing problems, and since they're old many of them can have problems like tight focusing or oil on the iris blades etc. 

Looking back I can't believe how much time and effort (and money) I've put into acquiring lenses for my G1. Several long posts dedicated to nothing else - lots of money spent on modifications (that really were unnecessary - keep reading). In the beginning I knew basically nothing - every step of the way was a learning experience, and now I've got a good deal of knowledge racked up and it seems like a great time to stop and get down my thoughts and findings before my sieve-like memory betrays me. It might be helpful to someone else wanting to use a Micro Four Thirds camera for stopmotion. So without further ado, my thoughts and findings:

I find I'm not using the metal-barrelled cine camera lenses - the ones made for 16mm movie cameras. I love the look of them - the solid heft of machined and polished steel - the engraved markings. Exotic and beautiful - relics from a time when things were made differently. But they're heavy on the camera, making it more difficult to hang it under the Manfrotto arm and swing it around over the set, plus they don't have the more advanced optical coatings that later lenses do, which reduce or eliminate lens flare and chromatic aberration. They do give a more 70's type look (well, 70's and all decades previous) that I thought I would like, since I love 70's movies with all their flaws. But I find I'm using mostly the TV lenses (which are made for closed-circuit TV and security camera use) like the Fujinon-TV 12.5mm and 25mm and the Elbex-TV 8mm. Another lens I use is the Micro-Nikkor-P 55mm. Followed by the Carl Zeiss Contax G series lenses - 35mm and 45mm - which are excellent, but a bit difficult to focus, even though I now have better adapters that make it much easier and more precise than the older adapters. The adapters I bought originally* (see note below in green) used a tiny knurled thumbwheel for focus. It's location - jammed right up against the body of the camera and too close to the base - meant that I had to try to wedge my thumb in between the bottom of the lens and the tripod platform, or else try to use my thumbnail to turn the wheel, and when I did get the wheel to turn it didn't always engage with the lens' focusing mechanism - a very hit and miss procedure and extremely frustrating (I definitely wouldn't use these adapters for focus pulls).

But the ones I bought from Hong Kong on eBay have a large focus ring all the way around the circumference of the lens base - no slippage and no frustration. Well, slightly frustrating at times just because it's a thin ring and it's still jammed up right against the body of the camera, but that's much better than the older adapters - trust me! Though to be honest if I was going to pull focus on a shot I'd lean toward one of my other lenses that have a focus ring right on the lens barrel itself rather than on the adapter.


* Important note - the Amazon page actually shows the picture of the newer and better adapter and the price is ridiculous at $60.00 - but when you order, what you actually receive is the older adapter with the little frustrating knurled thumbwheel for focus. DO NOT order this item from Amazon - instead order from Holga Camera - it's much less expensive and you'll get the newer/better adapter that uses a full focusing ring. 

Contax G lens to Micro Four Thirds adapters - the good and the bad


Here are 2 YouTube videos I hunted up just to demonstrate how both the older style adapters with the thumbwheels and the newer ones with full focusing rings work. First up - old thumbwheel style (BAAAD Adapter!):


And the newer style (Gooood Adapter!):


Crop Circles

I mentioned above that the modifications I got (to the Fujinon-TV 12.5mm f 1.4) were unnecessary - let me explain why. It's simple - because vignetting and soft focus - the problems the modifications are designed to solve - only affect the outermost edges of the image and can easily just be cropped out, as I demonstrated in the Lightroom demo. If I can crop this drastically:

what you get directly from the camera

.. and after cropping and a little color adjustment - it's still slightly larger than HD! 


.. And still get HD sized images, then there's no need for full lens coverage. I mean it is a nice thing to have - it makes framing your shots simple - what you see is exactly what you get. But cropping isn't difficult at all. This is an issue that only affects the wide lenses - the wider you go the less coverage you get on the m43 sensor. So for those wide lenses, feel free to buy an unmodified Fujinon-TV 12.5mm and 25mm - and just crop away the edges. Same for the Elbex-TV 8.5mm or similar ultrawide lenses, even if they're made for a 1/2" format camera (as opposed to the 1" format, which is approximately the same size as the m43 sensor).

There's also no need to get a zoom lens, as I briefly mentioned in my last lens post. Just as cropping makes expensive lens modifications unnecessary, digital zooming makes a zoom lens unnecessary. It looks exactly the same whether it's done by twisting the barrel of a zoom lens or in software during post processing.

Keep in mind, I'm using my camera strictly for stopmotion animation, so I have certain advantages over anyone using theirs to capture live action video. Namely, I shoot still pictures that are much larger than any video image (they're more than twice the size of 1080p) so I can crop pretty far and still pull HD images with absolutely no loss of quality. I imagine for zooming in live action video you'd want to use an actual zoom lens that gives full coverage because you wouldn't be able to crop much in post without degrading image quality, since you're starting with images only captured at HD resolution. In fact if you're shooting live video you'd also want your wide angle lenses to have full coverage for the same reason - you won't be able to crop without losing resolution. So forgive me for saying it but - nanny nanny boo boo!! This is one area where stop motion animators have a distinct advantage over live action videographers. Hah! Take that!!

In an upcoming post I'll do for my micro 4/3s camera what I did in this one for lenses - I'll look back and sum up the key points - the strengths and weaknesses in using them for stopmotion.


Last minute Addendum:

Oops! 2 more freebies!! - and a little more home-studio lens surgery (total success this time)
2 old Pentax-TV lenses I've had sitting around for years - now back in service again! 


Here are 2 more freebie lenses - these are also ones I was using with my Hitachi analog broadcast camera about 8 years ago (like the Rainbow zoom lens I mentioned a couple of posts back). Had to search a lot harder for these, but they finally turned up, in absolutely new condition because I kept them wrapped in bubble wrap and packed in their boxes. One is a 12mm f1.2, the other a 6mm f1.2. The 6mm - the larger of the two above, required a little surgery before it would fit snugly into a c-mount adapter and focus properly - the base of it was a little too big around to fit into the socket in the adapter. This is often true for the really wide lenses - in fact my Elbex 8mm lens had been machined a bit in order to fit better. I googled for machining c-mount lens and quickly found this article where somebody shows exactly how he did it with a lens that looks very similar to mine. As soon as I saw exactly what he had done - namely just cut a 45º bevel into the outer edge of the lens base and a matching bevel into the inner edge of the adapter - I was able to do the same. Of course, he used a machining lathe, and I used a belt sander and a dremel, but the results are the same - after a good deal of grinding and checking it suddenly fit right into place and focused perfectly! It does give a smallish image circle in a black rectangle, but it's big enough that I can pull an HD image from it.

A couple of pics demonstrating how I did it:
Dremeling a bevel into the adapter

Beveling the edge of the lens base using a belt sander


This is not the actual lens or adapter I used - there's no way I'm taking them apart for pictures because they fit very snugly now (means there won't be any slop - so yay!) and I'm not gonna keep messing with it. I just wanted to show what dremel tip I used and how I held it. When I really did the deed I held the dremel in my right hand and held the adapter down tightly with my left and slowly rotated the ring itself, holding the dremel as still as I could - trying to be a machine. I also held the lens in both hands (note safety gloves from the hardware store - as you can see they've saved me from a few cuts and scrapes). I held the lens in both hands, again holding my hands as immobile as possible, like a machine, and slowly rotated the lens against the sandpaper belt.

The lens you see above is actually the Elbex 8mm, which had been modified like this by someone else, and as you can see they rounded off the base. I went for more of a straight 45º bevel, and the same on the inner edge of the adapter. Oh, and I also had front and rear lens caps on the lens the entire time of course!

Note - just discovered you can make the image circle for a given lens slightly larger by opening up your iris. Apparently the more light  you let in the bigger it gets. Need to be careful though - most lenses don't do well wide open and you need to keep an eye on depth of field - though with the really wide lenses (the ones that do the image circle thing) you naturally have great depth of field to begin with, so it should be manageable.


Monday, September 10, 2012

Latest Lens Lore


My posting has been very sporadic lately - it's because I'm in production now on Cosmo's and I don't want to give too much away. I feel like if I show pictures of what the film is going to look like then there won't be any surprises when I finally unveil this bad boy - and we all like surprises, don't we? Well, good ones anyway, and I assure you you're all in for some good surprises when I release this thing. 

So I've been posting about other stuff.

Sporadically.

But it's time to bring the bloggosphere up to date on what's been going on in the Darkstudio behind the scenes, the stuff that's shaping the look and feel of this film.

Above is a pic of the Fujinon-TV 12.5mm f1.4 lens 

 Not mine, I grabbed it off the web, but that's exactly what mine looked like before I packed it up and shipped it off to England for modifications. It's hard to find wide angle lenses that give full coverage on the Micro Four Thirds sensor - but as I mentioned a couple of posts ago I found Edward Koehler, who does these mods brilliantly - through his site at ekoe Camera

Looking back, I went about this the wrong way - rather than buying a lens and having to ship it across the atlantic for mods, then back across the pond to me, I should have bought one from his stock and it only would have had to pond-jump once (it cost me $100 just to ship it to him!!). But he was exceedingly cool about it all - even though the lens had been partially modified by someone else (they didn't quite get full coverage out of it) and they had superglued the  lens to the mount - a very dangerous gambit that can easily result in the lens suddenly just falling off and destroying itsef at your feet - he machined a retaining ring from aluminum to restore it to full working strength and eliminate that danger - plus he added a huge 72mm filter ring because he knew I like to keep clear UV filters on my lenses to keep my greasy fingerprints off of them, which gives it a totally different look (see it in the pic below):


Not only does it resemble a Pirate Blunderbuss now with that massive flared snout, but it gets complete coverage - no darkening at the corners, no softness of focus near the edges (as long as I'm not shooting wide open with it). 


Ok, next up is my cool little ultrawide lens - the Elbex-TV 8mm f1.3. Just like the (pre-modified) Fujinon-TV 12.5 I posted above, this lens doesn't give full coverage on a Micro 4/3s sensor (it's even worse):


All you get is a black rectangle with an image circle in the middle. But believe it or not - this isn't really a problem (well, it can make it difficult to frame your shots precisely - but that can be fixed as I'll explain in a moment).

Here's the exact same shot after a minute or two messing with it in Lightroom:


.. And wouldja believe - from that little image circle in the Elbex-TV 8mm I can still pull HD sized images after cropping!! Amazing!! Not only that, but working with the camera's RAW image files, Lightroom is able to do unbelievable things - you can do incredibly subtle adjustments to white balance, highlights, whites, shadows, darks, color saturation and vibrancy etc... essentially you can make em look real good. You can even distort or un-distort to whatever degree you want - shoot with a normal or long lens and make it look like a wide angle or even extreme wide angle with barrel distortion, or shoot with a fisheye and de-fish. I'll be doing a post soon about Lightroom - and let me tell you, now that I have it, I can't understand how I ever got along without it - my shots that I thought looked pretty good before now look like crap compared to what I'm capable of.


I've also been thinking about a zoom lens, for those nifty 70's shots:


In fact with the assortment of lenses I currently have, it's the only thing left that I want (used-to want - read on dear readers.. ). I did a little web research and the options for a decent zoom lens that works on m4/3 are pretty limited - the one that kept coming up is the Rainbow H6x8-II 8-48mm Zoom Lens. I was preparing to try to find one on fleabay and then send it somewhere for the necessary mods, when it suddenly struck me - I HAVE one of these!!! I got it back when I was using my Hitachi analog broadcast camera. In fact after I first got my Lumix G1 I remember trying it with a c-mount adapter and being disappointed because it does the image cirlce in a black rectangle thing (I wasn't aware of just how much you could crop out in those days). 

I found this little video showing how some guy modified his to work: Rainbow H6x8-II Lens Modification for GH2 / Micro Four Thirds Cameras on Vimeo.

Well, I also happen to have the exact same kind of c-mount adapter laying around that he used (oh yeah,  this mod was a total freebie!), so I did a little drilling and dremeling this morning and it worked like a charm: 
At least the physical modification did. I don't understand how to adjust the back focus in order to make it what's called parfocal - so as you zoom you don't lose focus. That has to be precisely adjusted for the exact lens and camera, and apparently it's best done in a camera shop by trained professionals. I was beginning to consider finding a shop to get this done but I went ahead and did a few animated zoom tests (even though it has a very short range where it stays in focus) and realized there's no need to actually have a zoom lens - since there's no perspective shift during a zoom, it looks exactly like a digital zoom that can be done in software. Or I could just move the camera itself toward or away from something, adjusting focus frame by frame as I go, and get a tracking shot that could resemble a 70's style zoom (but look even cooler thanks to the perspective shift). 

Okey dokey then - that brings us up to date on the lens front. Soon I'll do a Lightroom demo, but up next - more news on that European Puppetry documentary.

** Edit **

I just discovered Byrne Power has already created his Gravity From Above blog, where he'll be sharing his progress in making the European Puppetry documentary I blogged about last time. I've added it to my blogroll for easy updates. I want to do a followup on Byrne himself and his other site The Anadromous Life - next time I promise!

Friday, March 30, 2012

Legacy lenses


I took a break from animating to put together this little video showing my legacy lenses - well, the ones that are currently in my possession anyway. Sorry if I got a little carried away with putting on and taking off every accessory on every lens, including the lens caps! The video slideshow is the fun way to look at my collection, but YouTube has seriously blurred things to the point where you can't make out details at all (unless you click through and switch to 1080p resolution on YouTube) - so I've also uploaded a few pics to Flickr where you can see each lens in far more detail than you'd probably ever care to:

Wollensak Cine Raptar 1" (25 mm) f2.5Wollensak Cine Raptar 1" f2.5Click the images to see them on Flickr

Above and below are my 2 C-mount Cine lenses, made for 16 mm movie cameras. These could date as far back as somewhere in the 30's, and I suspect the little one above just might. I got it from eBay for a song, with an old Revere movie camera attached! The camera doesn't work, I'm using it strictly as a rear lens cap. In the video above you can see, this little sucker breaks down ridiculously far - there's a lens hood that comes off and then there's another piece that also comes off - not sure what that piece would be called. This one looks really crazy on my camera. Unfortunately it also vignettes pretty badly - so bad the photos are inside of black circles. It also doesn't have a focus ring. Not sure this one is worth using - glad I got it for $25! 


Wollensak Cine Raptar 2" (50 mm) f2.5Wollensak Cine Raptar 2" f2.5

This one is much more like it! Another C-mount lens made for 16 mm movie camera use, but this one doesn't vignette at all (a lot of the 25 mm and under ones do on m43 cameras). This is a hefty and beautifully worked hunk of steel. Has a very cinematic look because of the way it renders highlights in out-of-focus areas. In fact all the legacy lenses I've got ahold of are extremely cinematic. The front section is a hood that comes off. 


Fujinon-TV 25 mm f1.4Fujinon-TV 25mm f1.4

This one is a CC TV lens, built for security camera, machine vision or closed-circuit TV use. Vignettes just ever-so-slightly right in the very corners in 16:9 mode, but when I crop to widescreen format that should disappear entirely. It actually looks rather pleasant, and generally can't be seen at all in dark shots (which I've been known to use now and then.. ), but if necessary I can crop it further and still end up with greater than HD resolution. This is the companion lens to my even wider 12.5 mm f1.4, which is currently in England being modified to eliminate the vignetting entirely (as detailed in my last post). These two have the lowest f-stop number at 1.4, meaning the aperture (iris) opens up nice and wide to let in lots of light - what's known as a fast lens. The faster a lens is, the shallower depth of field you can capture with it.


Carl Zeiss Contax-G 45 mm f2CarlZeiss Contax G 45 mm f2 with hood


And finally my two Contax-G lenses above and below. I described them well enough in the last post I don't feel the need to do it again. But I did feel bad for posting a web pic of somebody else's lens in that post, so thought I'd like to post pics of my own.


Carl Zeiss Contax-G 35 mm f2CarlZeiss Contax G 35 mm f2 with hood

Ok, enough.. time to get back to the actual animatin'!! 

Saturday, February 26, 2011

Enabling live view out on the G1!!


Well well.... Lookie what I got here!! It LOOKS like a honest-to-goodness Live Video Feed from my G1. But -- it can't be. No such thing is possible, right?

Wrong!!

There's a little trick - a hack of sorts, in Panasonic cameras (some anyway - I'm assuming the ones with an LCD viewscreen attached)). All you have to do is hold down the trashcan button for about 30 seconds in record mode (regular picture-taking mode, not review mode). Suddenly the image on the viewscreen of the camera will go dark for just an instant. Was there a tiny click or sound of some sort from the camera? I thought so, but it might have just been something in my head busting wide open from the sudden release of tension, and the inrushing of excitement to replace it.

I can't even tell you what a rollercoaster these last few days have been for me... deciding to buy the G1, discovering the live feed doesn't work, the anger and frustration and the decision to sell it and start researching for a micro four thirds camera that would work... then the sudden green light when I remembered reading that this trick works with some cameras.

I was sitting down at the time eating some stir fry chicken and watching the trailer for the upcoming Harryhausen Tribute when it happened. I leaped from my seat in a rush of excitement to try it, but decided to wait till I was done eating so my rather excellent dinner wouldn't go cold. I could hardly contain myself... and ate way too fast. With a bit of a tummyache, I then levered myself up and began to set things up for the test. Imagine my consternation and frustration when before I could even finish opening Framethief the camera shut itself down with an audible electronic groan due to expended battery life!!

I put it on the charger and chewed my nails for 2 and a half agonizing hours waiting as electricity slowly trickled into that faceless, mocking little cube of plastic. But at last it was full as I was, and the test commenced. Now I'm full and satisfied. What a day!!


Oh, and yes, I can easily make all the screen icons go away with the click of a button.


Oh oh!! And I almost forgot to add.... you have to reset the Resolution settings in Framethief to 3:2, which is the native resolution of the Micro Four Thirds camera system (strange as that may sound... part of the reason for the very name is because the default resolution they provide is 4:3). Another discovery made in my exhaustive research recently to save the day. I kept trying various resolution presets provided in Framethief to no avail, Buster always looked either too Laurel or too Hardy, if you get my drift. But of course, the presets were configured for VIDEO cameras, not still cameras! So recalling a strange bit of trivia I dug up the other day (which incidentally explains why the MFT cameras truly use full resolution in all aspect ratios, 16:9 as well as 4:3 etc) I manually punched in 3:2 and it worked!

Heh... actually this explains the weird setup with Skulkin leaning on Buster above.... I was beginning to doubt my eyes and think that maybe Buster was really either thicker or thinner than I believed. I propped Skulkin up against him so I could see another face... Buster's is rather strangely proportioned.

It didn't help... Skulkin is rather weirdly put together too...

Friday, February 25, 2011

The Lumix Smackdown Challenge - putting the G1 and the FZ50 through their paces

XtremeCloseupG1full
XtremeCloseupG1full

I won't write a lot about this here... just click the image above and view the group of pictures uploaded to my Lumix Smackdown Challenge set. Yes, I finally decided it was time to buy the much-lauded G1 and give it a whirl. 

A warning right up front though - DO NOT BUY THE G1 FOR STOPMO!!! It does NOT have a true full-time live feed that works with a framegrabber!!! (Actually it DOES have live view out - see next post for details on how to enable it) In many other respects it remains similar to it's larger but less refined cousin the FZ50, but for some reason Panny decided to disable the full-time live view out. 
In fact my research revealed that NO Micro Four Thirds camera yet made has live view out that actually functions in another device (like a framegrabber for instance)... until the newly-released GH2. I might be selling my shiny sexy new G1 to get one and test it out. Keep watching this space. 

Ok, for more info check THIS THREAD at the stopmotion message board. 

Enough typing for tonight... Im wiped out from massive research and camera testing.