Sunday, January 30, 2011

Decorating the Darkstudio

Front wall
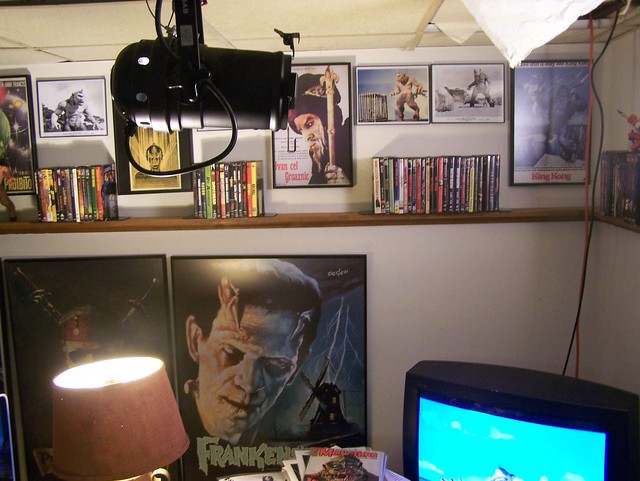
Here's what one wall of my new studio looks like now. Got room for a few more 8 x 10s behind the TV.

I HAD to do something... this is a great big space, but it was essentially a big empty white box... felt like a sterile environment. My choices were to paint it or wallpaper it... so I chose to paper it, though not in the conventional way. Instead I'm filling all that blank white space with inspiring images.

left corner high angle
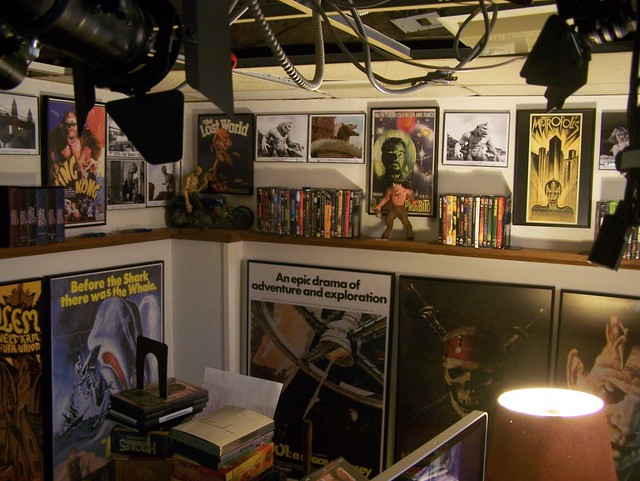
Pan left a bit and here's what you'll see.

Left corner low angle
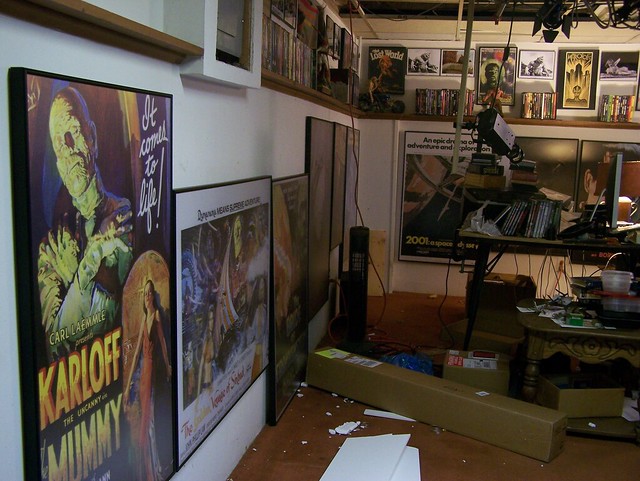
Same corner, from a low angle, and including the left wall. And the mess on the floor.

Left wall
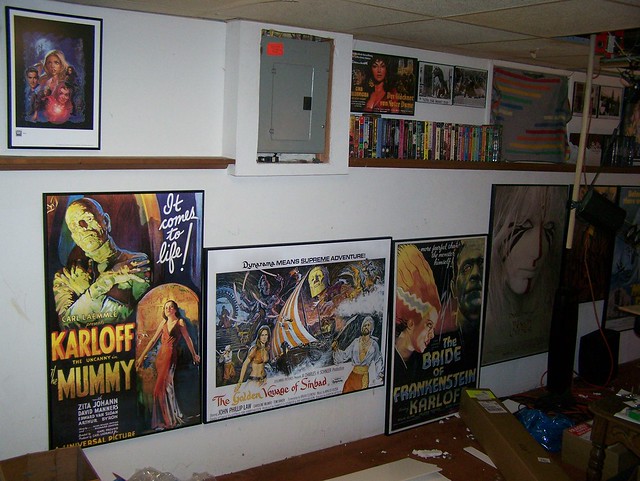
And a better angle on the left wall itself. There will be a HUGE King Kong poster in the space where the Bride is now, and all the white spaces will be filled in. I also have a door to cover the circuit breaker box, which will soon be decorated as well.

And now spotlight on my little friend from last post - he's essentially finished now though I'll probably finesse the paintjob a bit more. Here are a few in=progress painting pics...
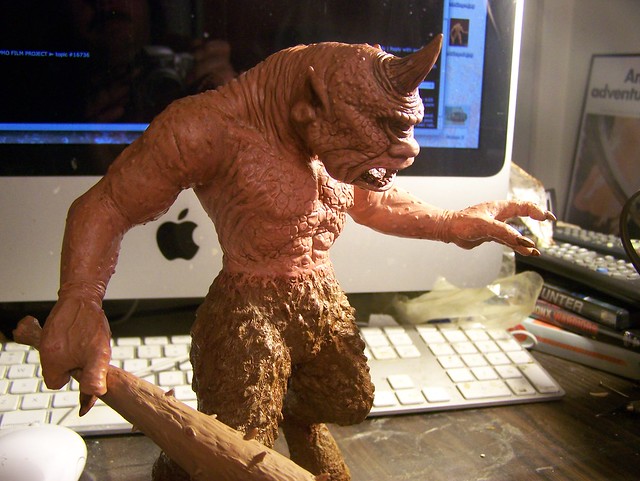
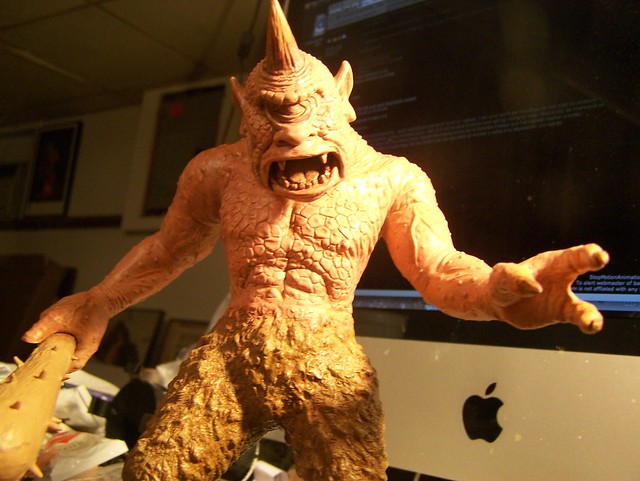
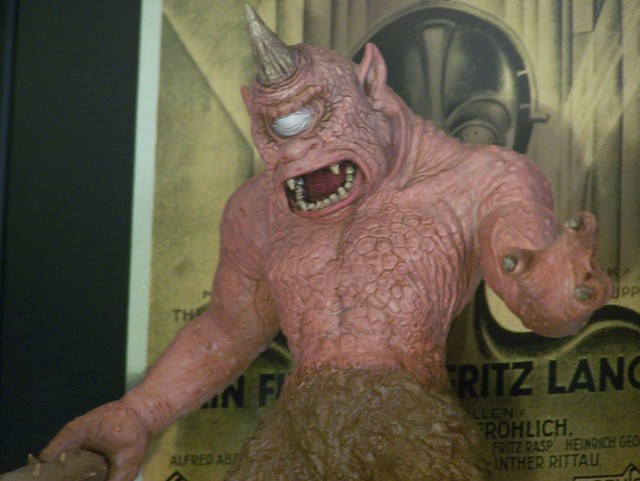
Cyclops in progress 02

Cyclops in progress 01

Cyclops in progress 03

... And finished:

Finished Cyclops model

finished Cyclops in place
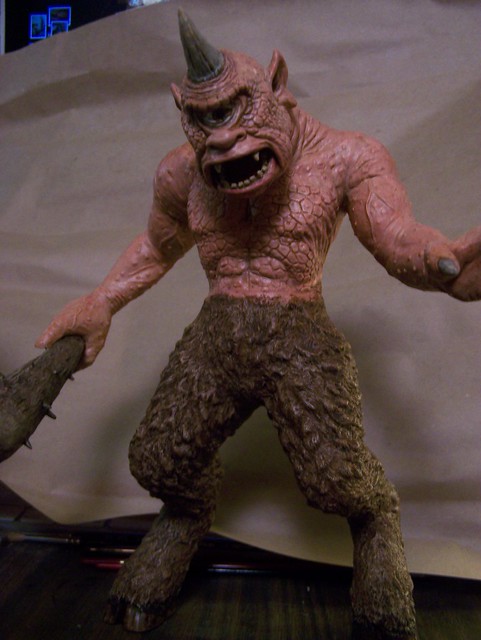
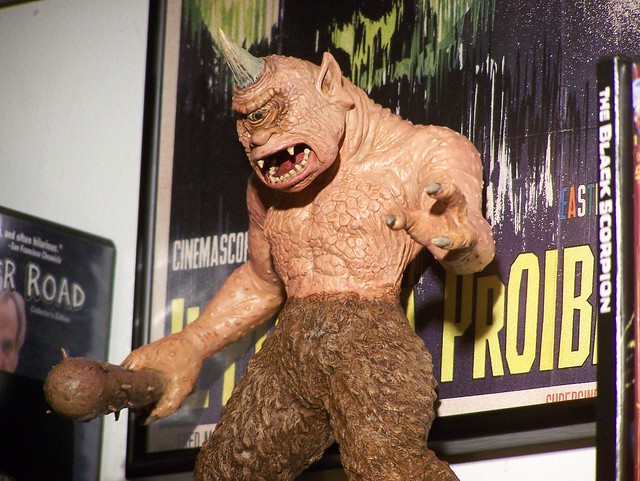
Here you see him in his little niche nestled between the Harryhausen/ O'Brien section and the General Stopmotion section of my DVD shelf.

Wednesday, January 19, 2011

Say Hello to my Little Friend!

Photobucket

Photobucket

This is the GEOmetric Cyclops vinyl model kit, produced some time in the 90's I believe and long unavailable. Man I love eBay!! A vinyl kit is hollow and kind of squishy/ flexible, and the way the parts pop together it can be re-posed like an action figure. Some people keep that articulation, but I'm going to pose it the way I want and putty the seams and paint it up, after filling with resin to make it heavy and solid like a sculpture rather than a toy.

There have been several Cyclops kits made, both resin and vinyl, but most of them didn't really look much like the real deal. This one is spot on! It comes with two right hands... one for holding the club and one for... um... NOT holding the club, and there are two heads. The other head is the two-horned Cyclops. Pretty cool, but that one was just a bit player in 7th Voyage... I wanted to build the REAL Cyclops!

After moving into my new house, one of the first things I got was the amazing book Ray Harryhausen: Master of the Majicks vol 3, which has been incredibly inspiring. That chance purchase has seriously influenced my decorating choices! I'm setting my animation studio up in the basement in this cool big room that has a narrow shelf running all the way around it.

Aw geeze... now I guess I need to get some pictures... much easier than trying to explain it. I'll post those soon, but let me finish my story...

Anywho, I have groupings of DVDs and VHS tapes displayed on the shelf in places, and I've bought a lot of posters to hang beneath the shelf. I decided since this is my animation studio I wanted the entire room to be a shrine to movie images from the films I love, so the posters are all from classic monster movies and stopmotion flicks, plus I've been going crazy buying up 8 x 10 photos and lobby cards from King Kong and several Harryhausen films.

And I decided the spaces in between groupings of DVDs/ tapes needed statues and models.

I also have an Ymir and Gwangi on the way. More pics when they arrive!

Tuesday, January 18, 2011

Let there be (more) Light!!!

Photobucket
This, my friends, is what I call the Lightcannon.


It's a further refinement/ modification to the Solux Framing Art Light. I detailed my first round of mods to it in these posts. It worked, but with some issues - namely, due to its rather rickety construction and pressure-fit components, it had a tendency to sag and droop like a Dr. Seuss Spyglass, making it very hard to get precise accuracy, plus once you did get it aimed where you wanted, it could slowly droop... impercieptibe except when played back in your animation, when it becomes VERY noticeable. In fact, I have an example posted. Check out the background lighting in One Good Yank. This is unacceptable... in stopmotion everything must stay exactly where you put it until you move it yourself. 


I partially solved the problems with this makeshift brace made from a turkey skewer:


It did snug up the assembly nicely, countering all that cartoonish sagging, but it's bulky and dangerous -- those chromed points sticking out right at eye level. Also, the yoke attaching it to my lighting grid was weak and couldn't be secured very well. I tried using a piece of folded-up paper jammed behind it, which helped somewhat but not enough. 

So today I set about to improve it. 

I started with one of my tinkered-together Blackbirds:


Photobucket

... based on the discovery that the snout/ yoke assembly from a cheap PAR16 (known as a Birdie) pressure-fits perfectly onto an ordinary track lighting unit. As so:

Photobucket


Here's one of my Blackbirds, with the Framing Optic Assembly of a Solux Framing Art Light laying next to it: 

Photobucket

I tried fitting the Adapter Ring into the snout:

Photobucket

Success!! It fits, nice and tight!! 

Photobucket

So I fitted the rest of the Solux assembly in place...

Photobucket

So far, so good... but when I plugged it in to test it, a problem:

Photobucket

A LOT of light leaks out as you can see. All this spill light sprays out onto the set where you don't want it. Wish I would have got a picture of that. But then, this tut is already ridiculously long and filled with too many pictures. Anyway, my first attempted solution was to jam some Blackwrap in there:

Photobucket

It's designed for use with lights to block out unwanted spill. But it was impossible to arrange it right in there, too many compound curves to deal with. I could have just wrapped it around the outside of the fixure, but I wanted a clean permanent solution, not an ugly blob of black foil hanging from my grid! 

It didn't get rid of all the spill:

Photobucket

So I decided to try some Epoxy Putty:

Photobucket

Photobucket


Photobucket

... And Voila!! No more spill!! And not only is it fully functional now, but it looks a heck of a lot like a high-tech Ellipsoidal fixture...


... Which is exactly what it is really. 

I've also ordered another 3-unit Tracklight kit from Lamps Plus, a couple pairs of the cheap PAR 16's from Musician's Friend,  and another Solux Framing Optic Assembly. I'm glad I detailed out exactly how I did all that modding, because I'll need to go back and check my notes for specifics. But when I'm done, I'll have two more Blackbirdies (for a total of 4) and another Lightcannon (to make a pair) to add to my lighting grid... that should be enough for just about any lighting situation. 


*** EDIT***


I came up with a better name than Lightcannon. I'm calling it the Ellipsis. An ellipsis is those three little dots that represent missing text... 


Yeah. THOSE three little dots. Essentially it's an edit used to shorten something. It's also used in filmmaking, with the same meaning. It's an edit used to cut out unnecessary action or time... example you see someone go to bed, then cut to them waking up in the morning. It edits out the 8 hours of them sleeping.  So, an Ellipsis is an abbreviation. In this case, MY ellipsis is an abbreviation of an Ellipsoidal spotlight! 


Heh... I tried a lot of names for it... Mini Ellipsoidal, Micro-Ellipsoidal etc... too much of a mouthful!! But now that I've ABBREVIATED it, it works! so...


ellipsis it is!! 

Sunday, January 16, 2011

t(h)INKeRING....

Well, as you probably already guessed, I'm in the process of tinkering around with my blog... thinking out loud as it were. Changes will be coming fast and furious for a while as I zone it in (yes, I finally broke down and decided to switch over to the new blogger templates... which aren't all that new anymore!) The reason I waited so long to do this... it means adding back in all the links in my sidebar one by one. A massive chore, that I was dreading. But I'll do it little by little, mercilessly pruning out old ones that don't belong anymore, until it's back up to snuff.